Happy New Year!
Well well well — 2019 proved to be an especially interesting and productive year, both professionally and personally. I had the opportunity to attend and give a presentation at the International Anaplastology Association Conference, where I met a ton of my colleagues in person for the first time, I had my first anaplastology-related paper published… and I got married!! All things considered, the bar has been set VERY high for 2020, and I’m excited to see what the next year has in store!
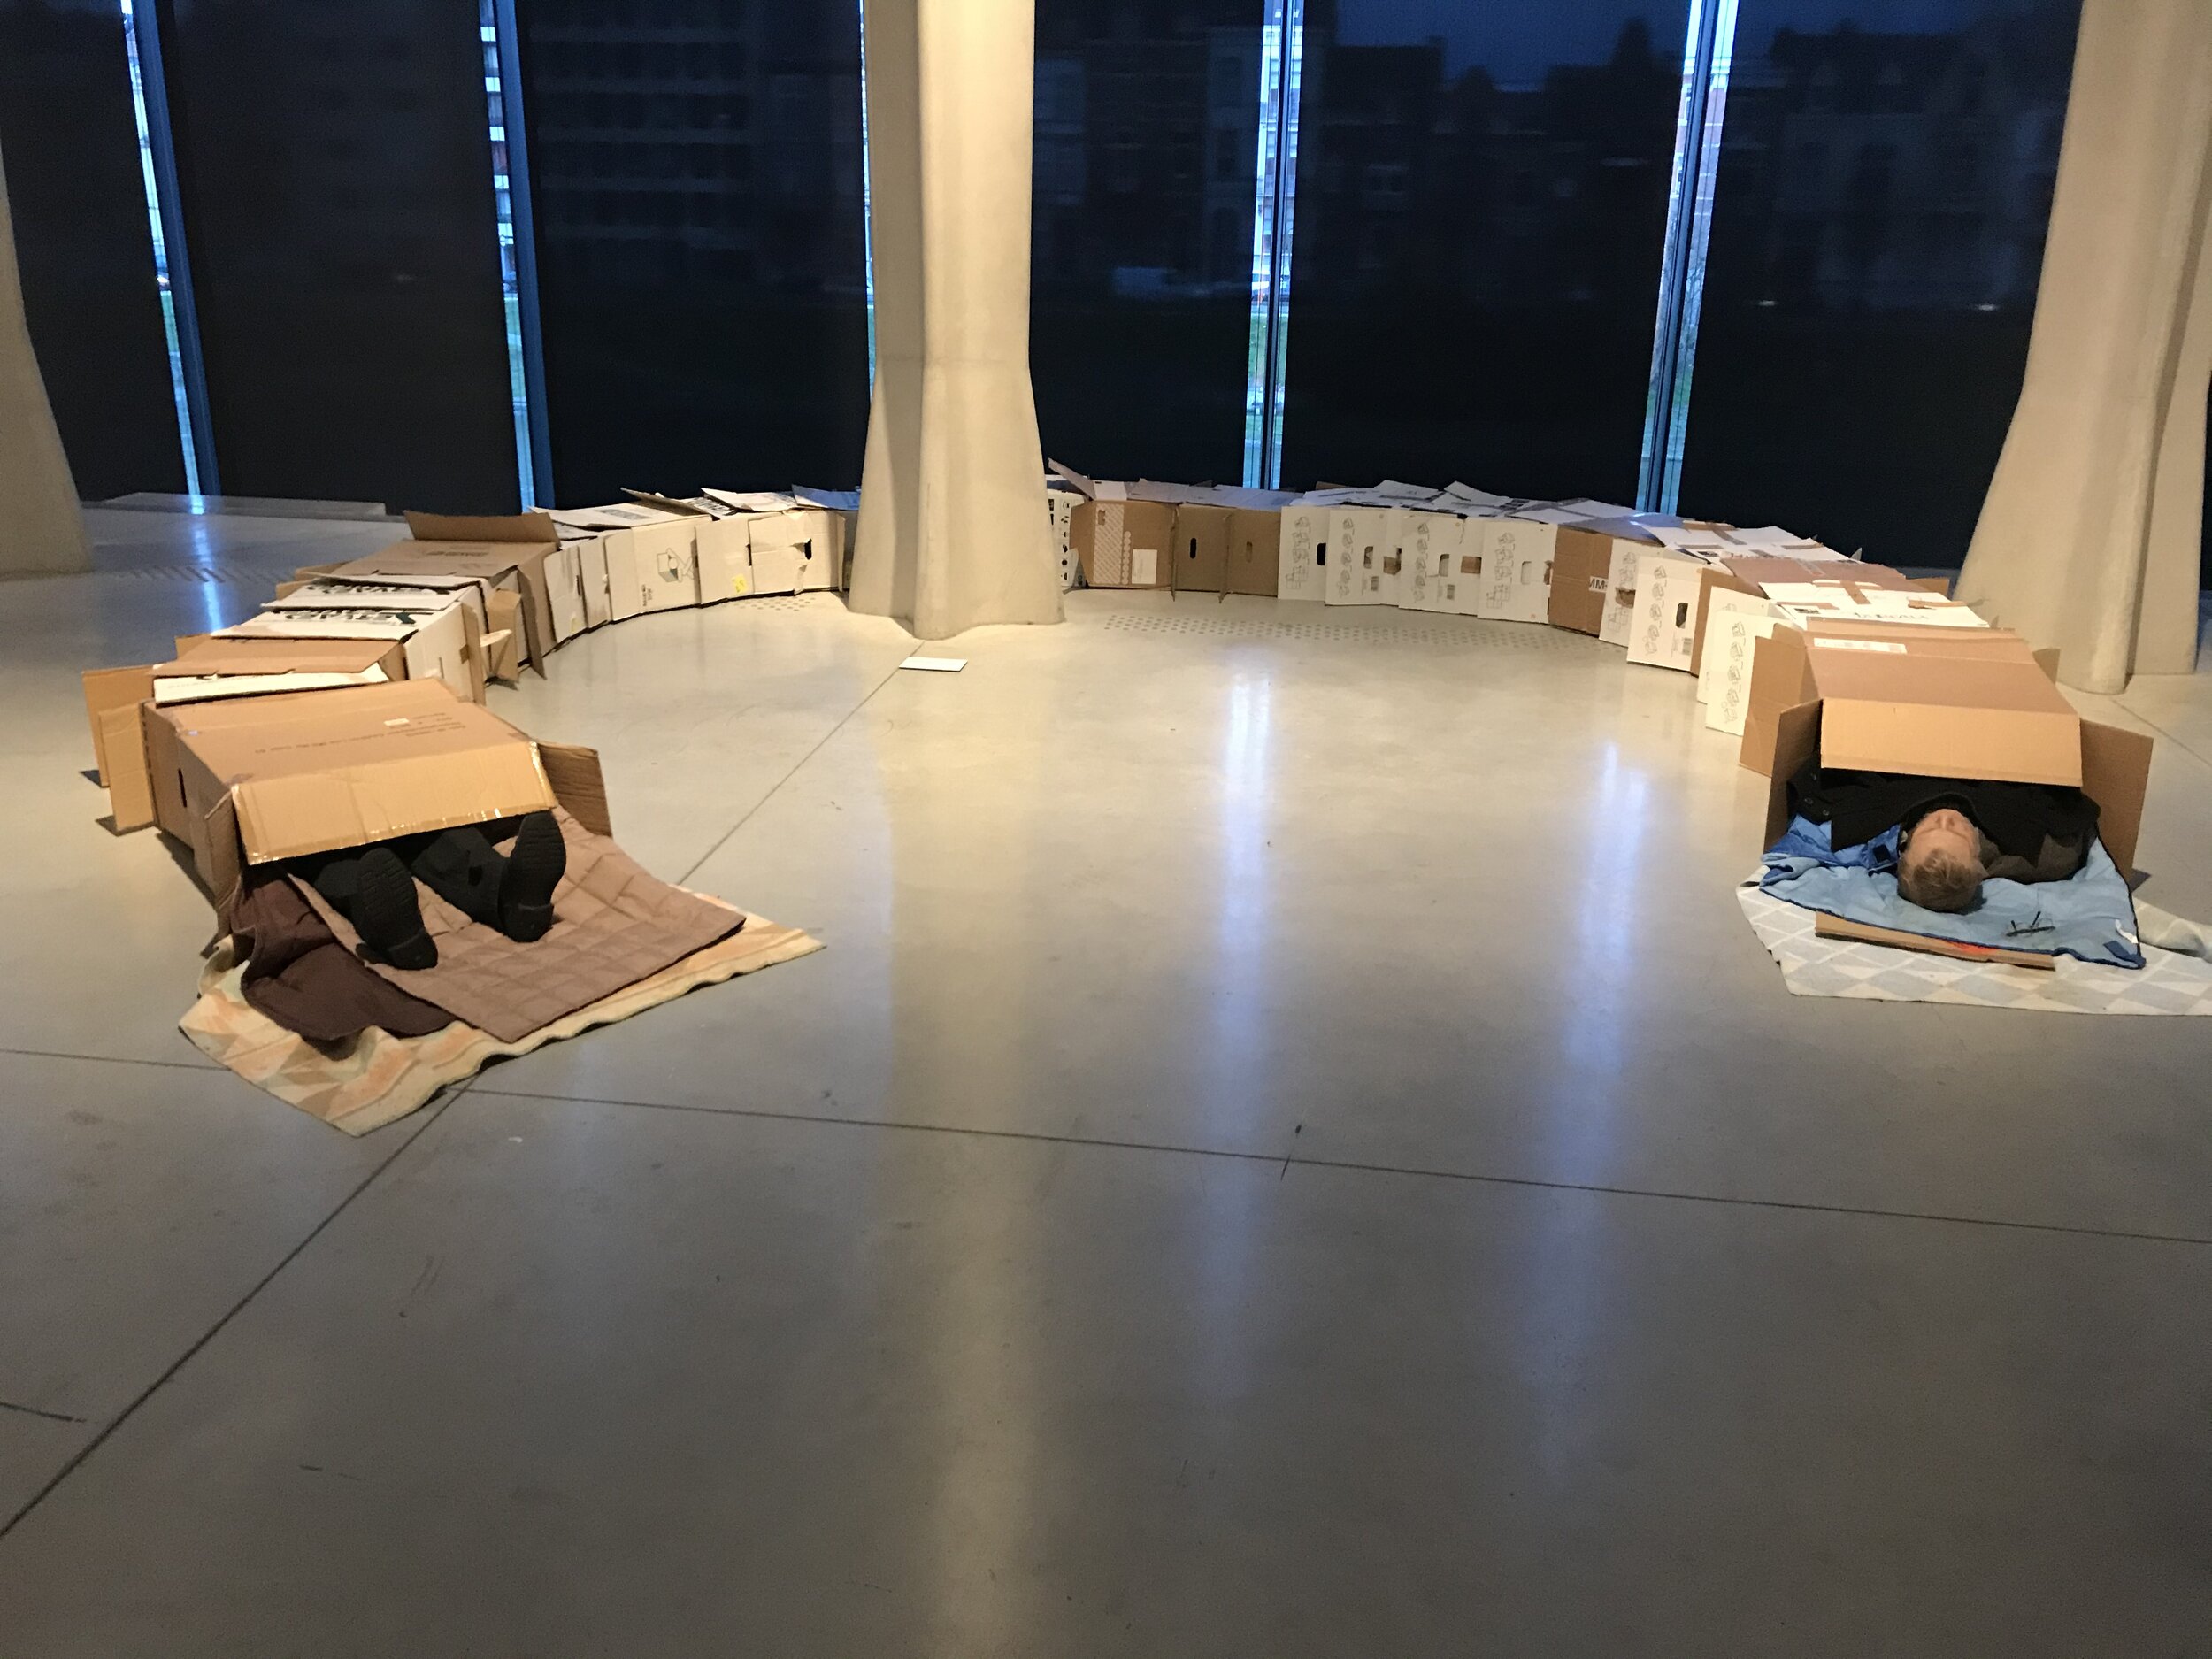
To top it all off, the year ended with a serendipitous museum exhibition popping up in my backyard: “Ceci n'est pas un corps” - a collection of hyperrealistic sculptures on display at La Boverie Museum in Liege, Belgium. I came across an Instagram post by the very talented Kazu Hiro who had one of his awesome Andy Warhol busts on display at the exhibition, alongside the work of some of the the most talented hyperrealistic sculptors from the past several decades. And many of the pieces on display were made in silicone, which really couldn’t get much more relevant to my work as an anaplastologist. So just before the holiday break, feeling like a kid in the proverbial candy store, I took a trip over to Liege to see these amazing works of art first hand.

Anything I could say about how impressive these sculptures were would be an understatement. Some of the best examples of hyperrealistic sculpture were all in one place, with work by Sam Jinks, Peter Land, Jamie Salmon, Marc Sijan, Ron Mueck, Patricia Piccinini, Evan Penny, Kazu Hiro, and many more. I’ve been following the work of many of these artists for years, and to have the opportunity to see some of their most famous pieces up close was truly phenomenal. As someone who spends the majority of their day making detailed anatomical sculptures in silicone, an exhibition like this is literally akin to, like, I dunno… a pretty decent cook eating something prepared by Gordon Ramsey. Or… an architect touring the Roman Colosseum, maybe? Definitely a “Next Level” experience in my wheelhouse, to say the least.
Silicone sculpture being the relatively niche topic that it is, I wanted to take this opportunity to share some of my personal observations and opinions on the materials and techniques used on some of the extraordinary works on display, from the perspective of an anaplastologist. The work was so incredibly detailed and lifelike that I couldn’t help but analyze each and every piece along the way, trying to figure out how they were made and which techniques were used. That being said, I hope that I can offer some interesting and unique insights on the subject that you might not be able to get elsewhere!
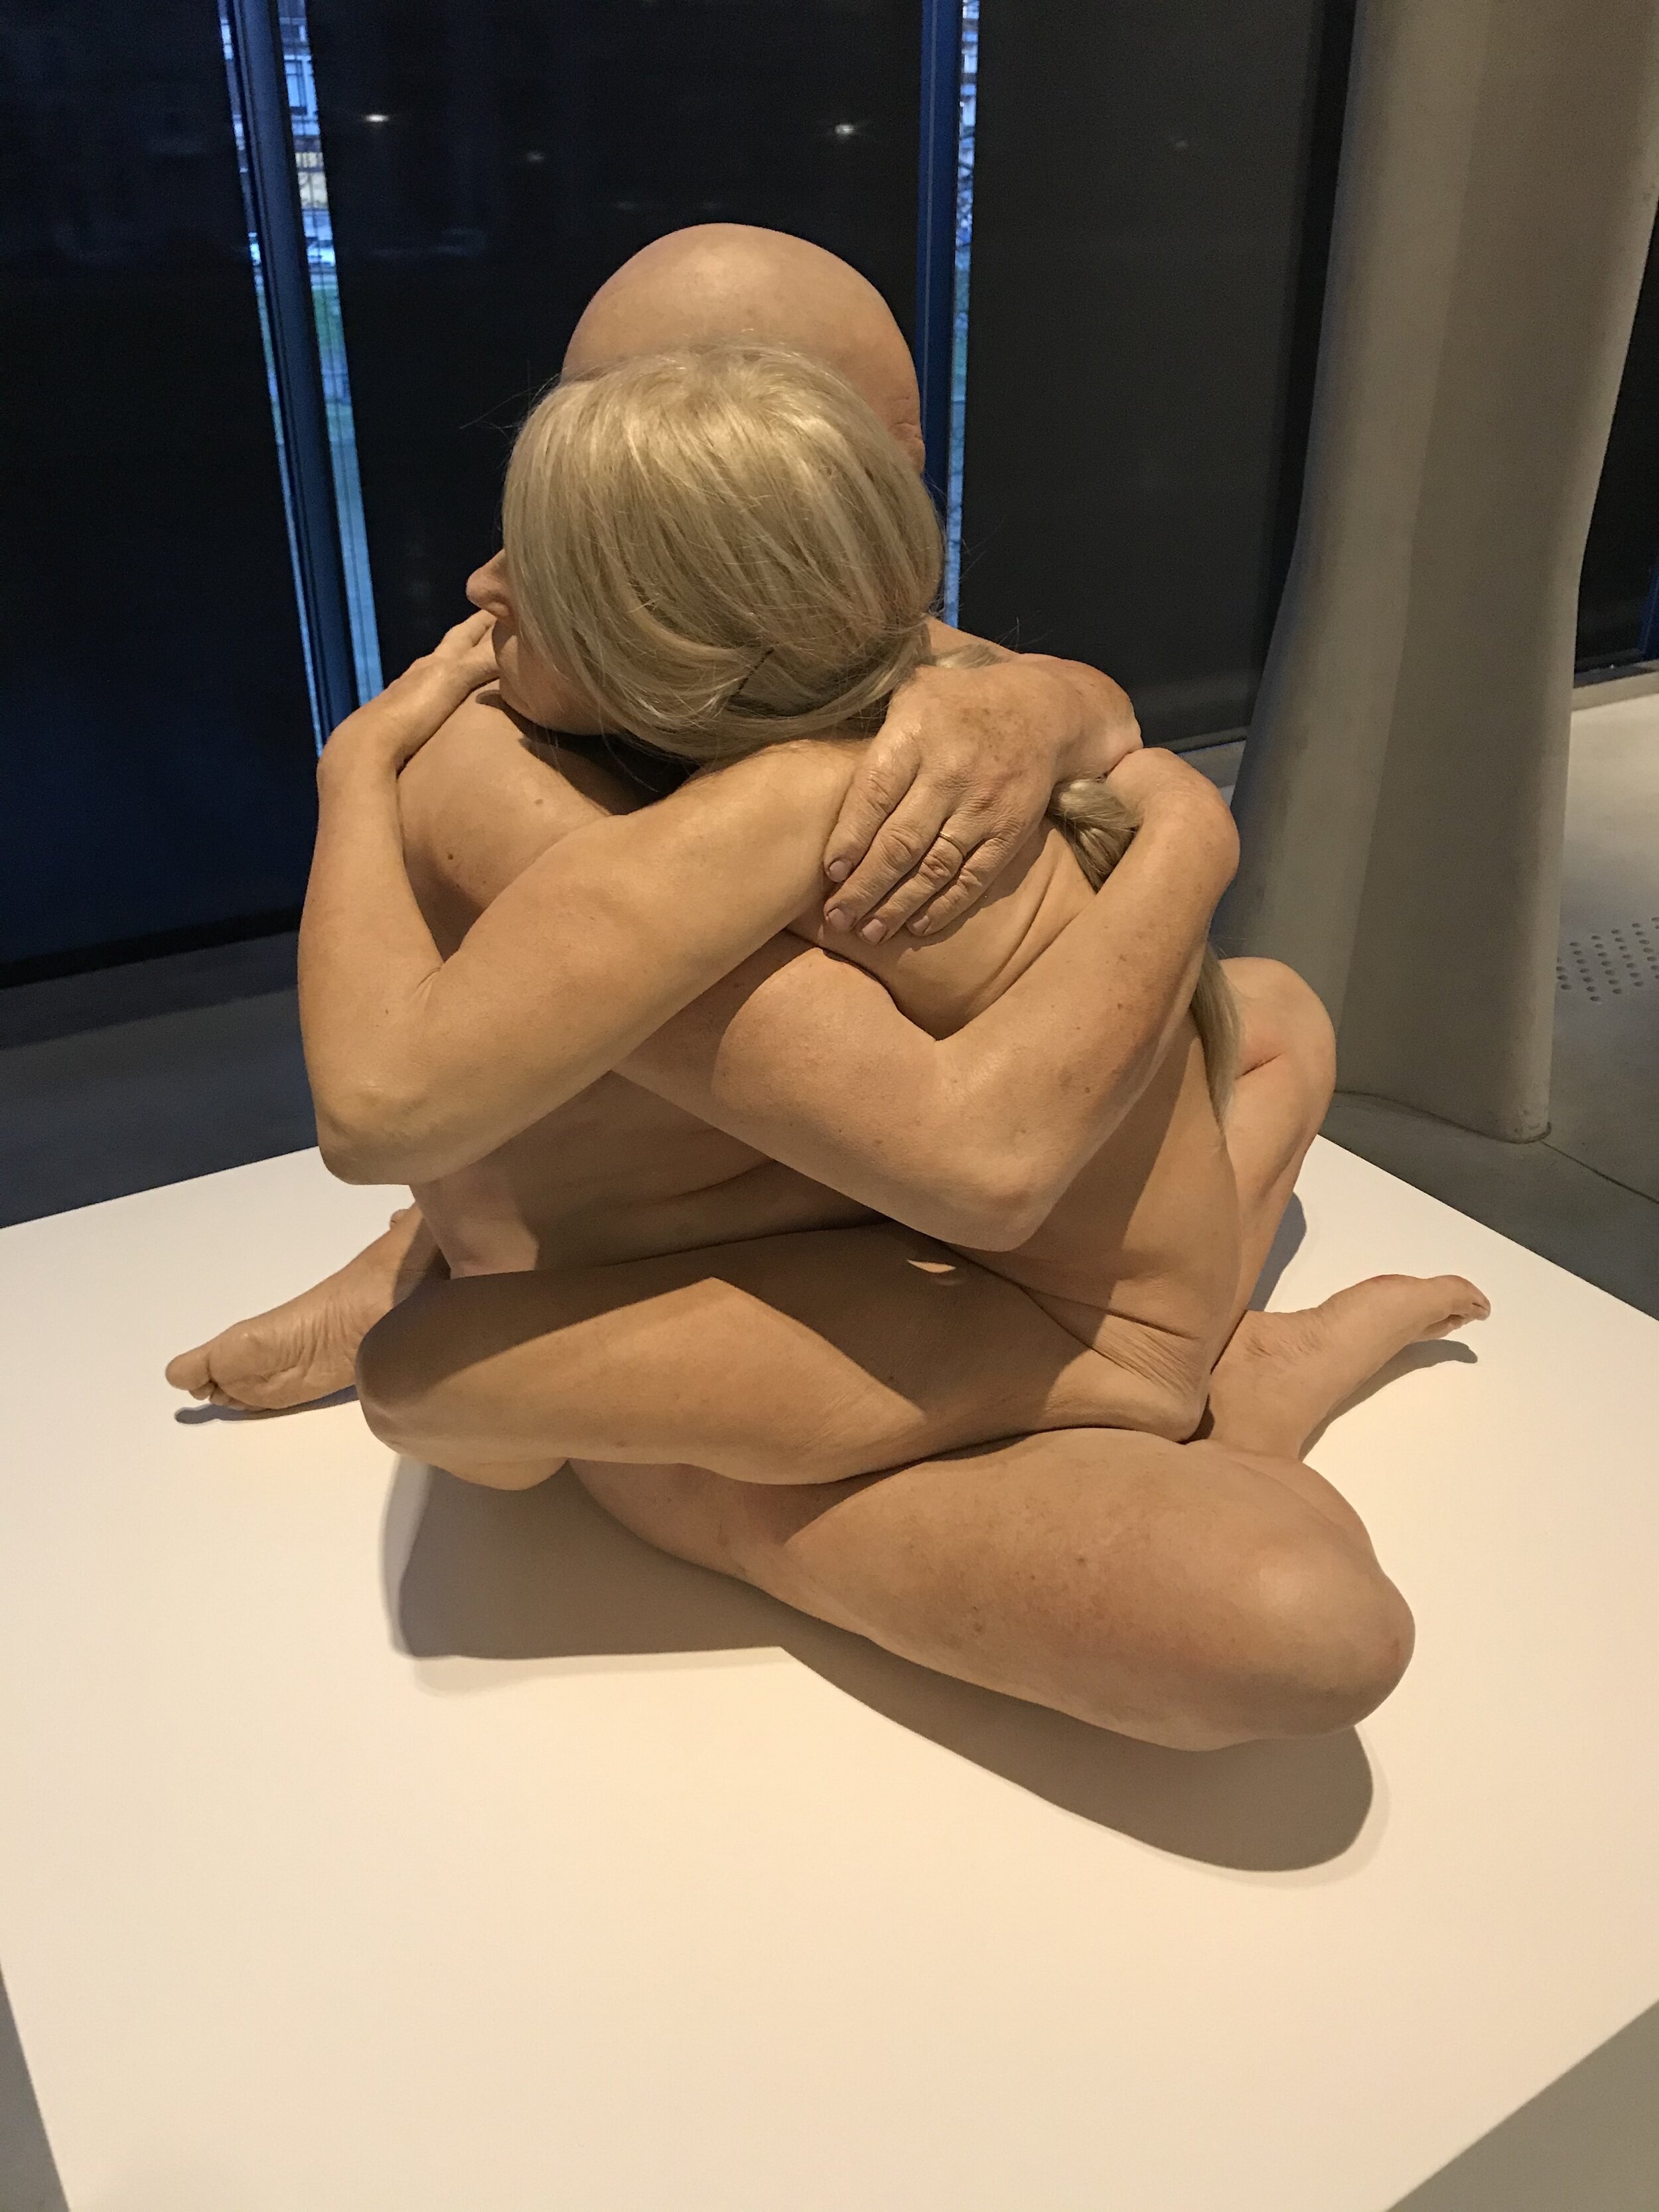
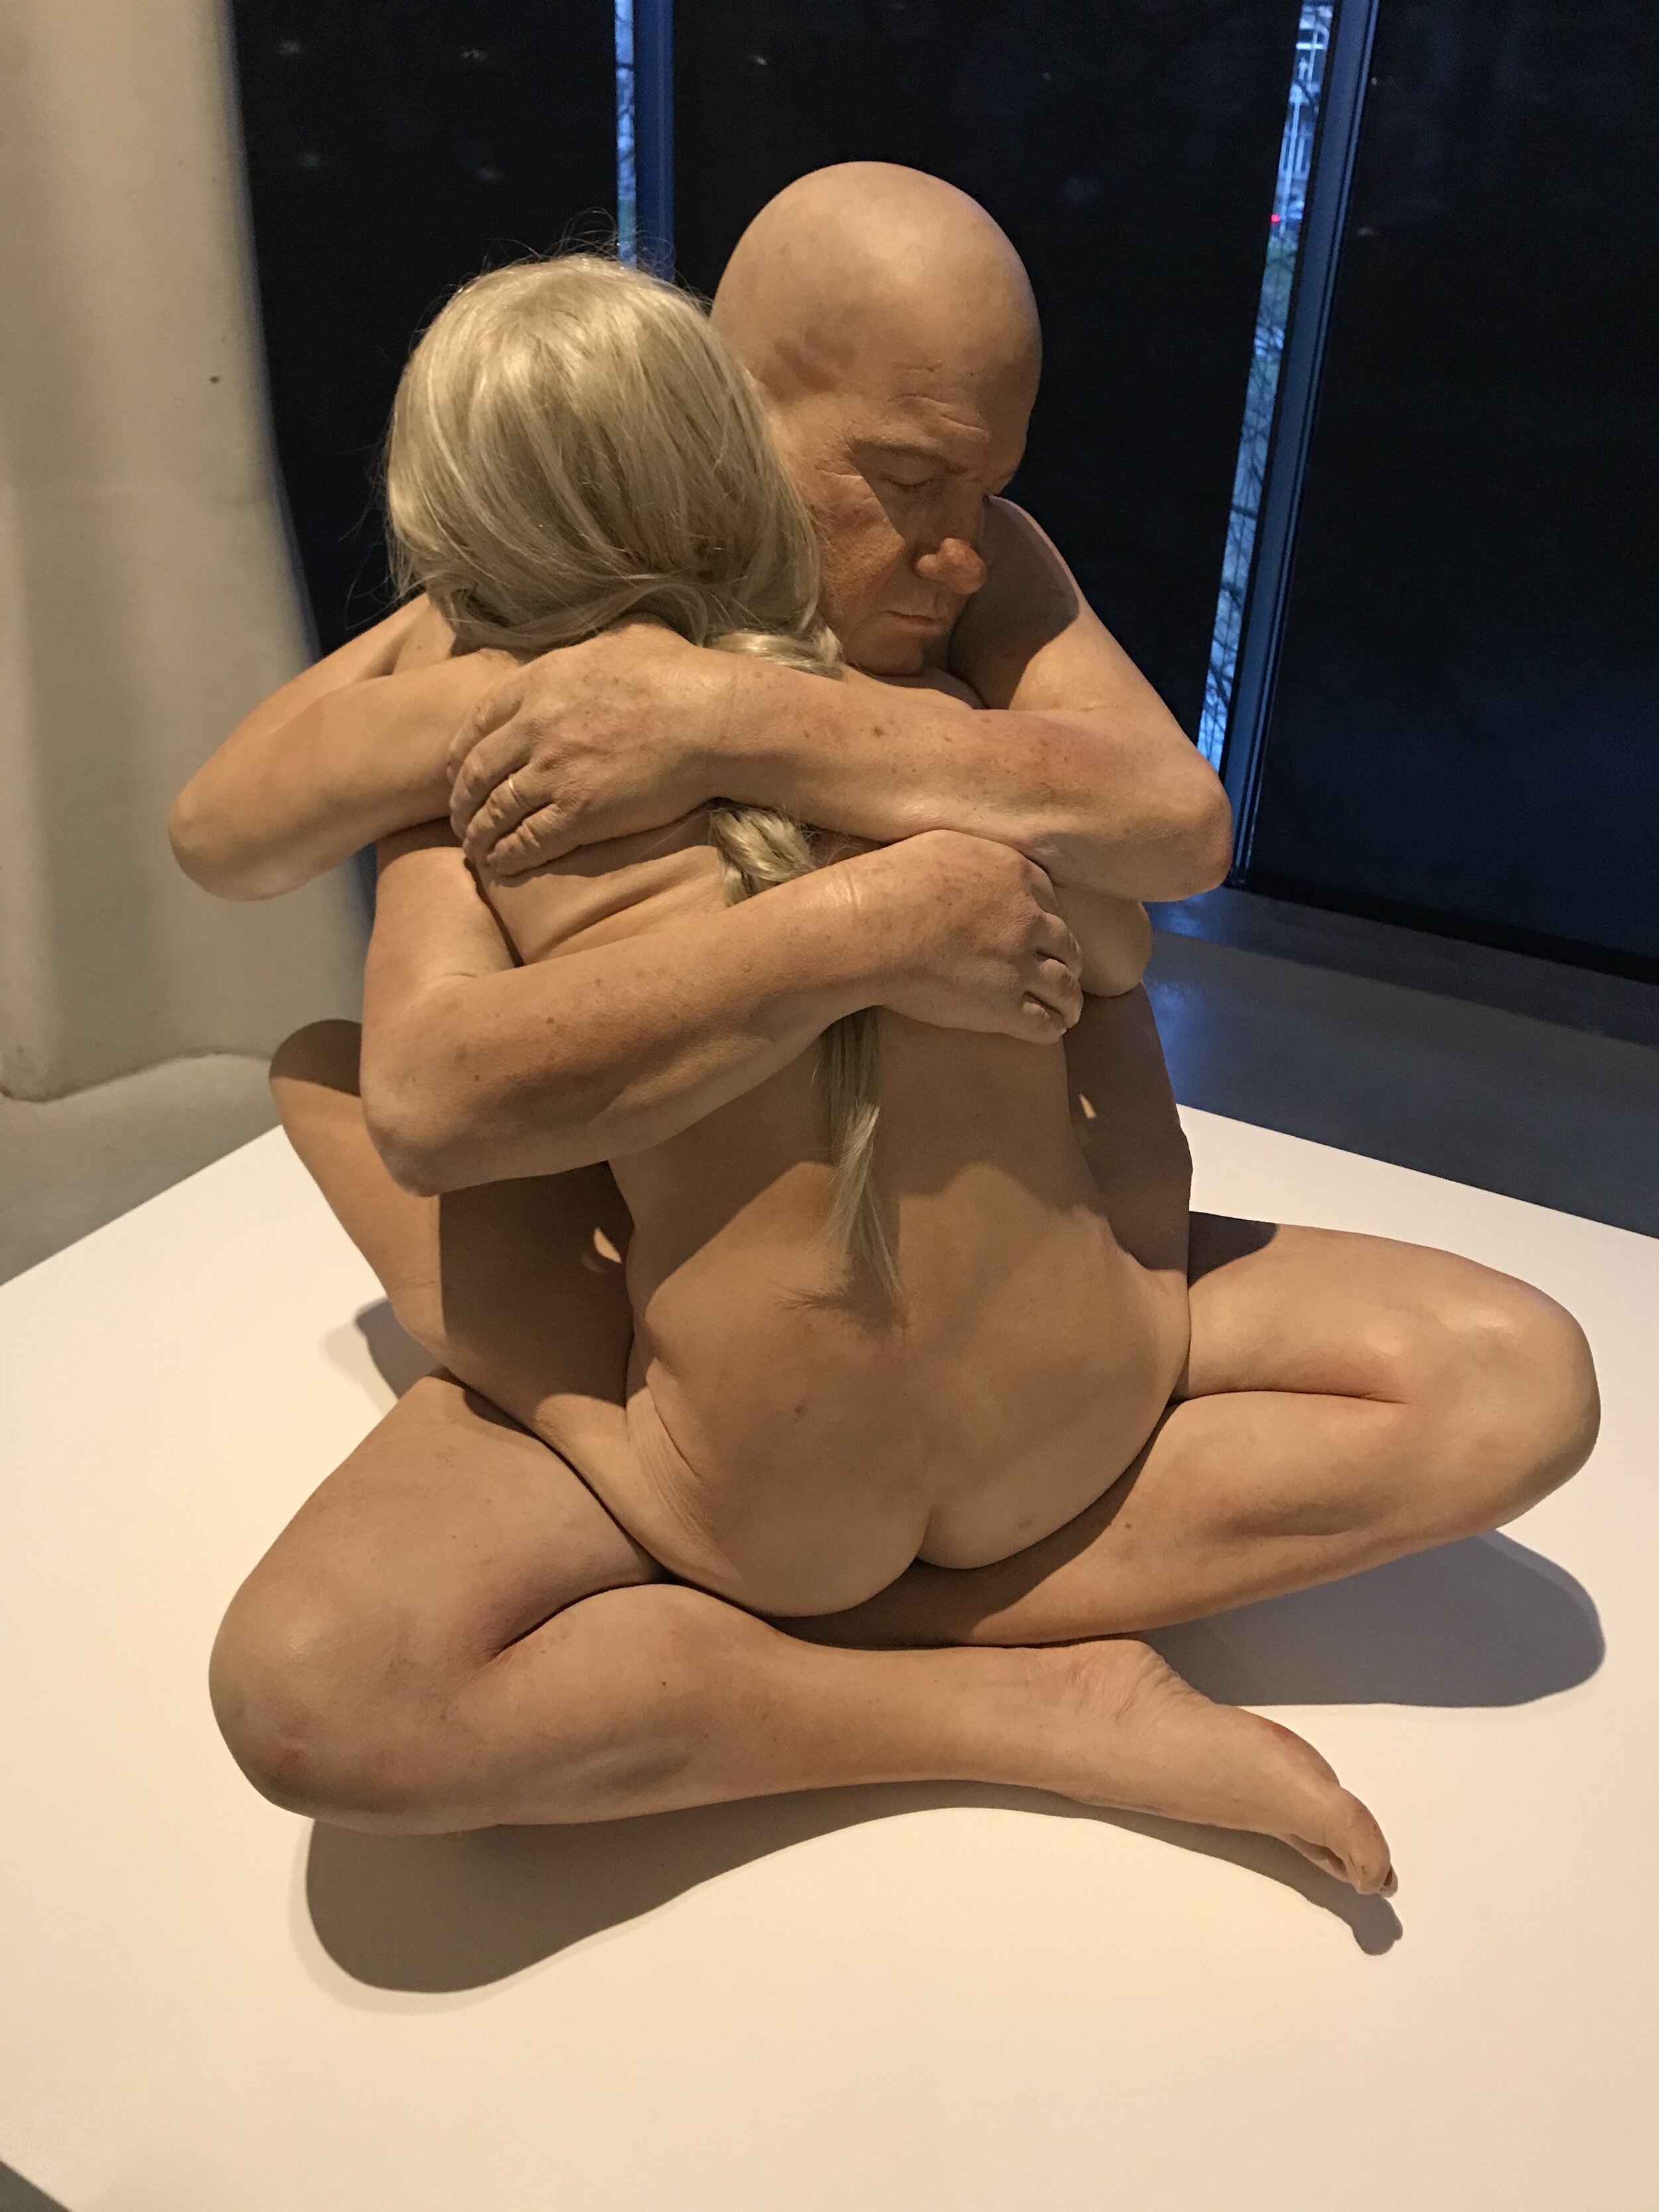

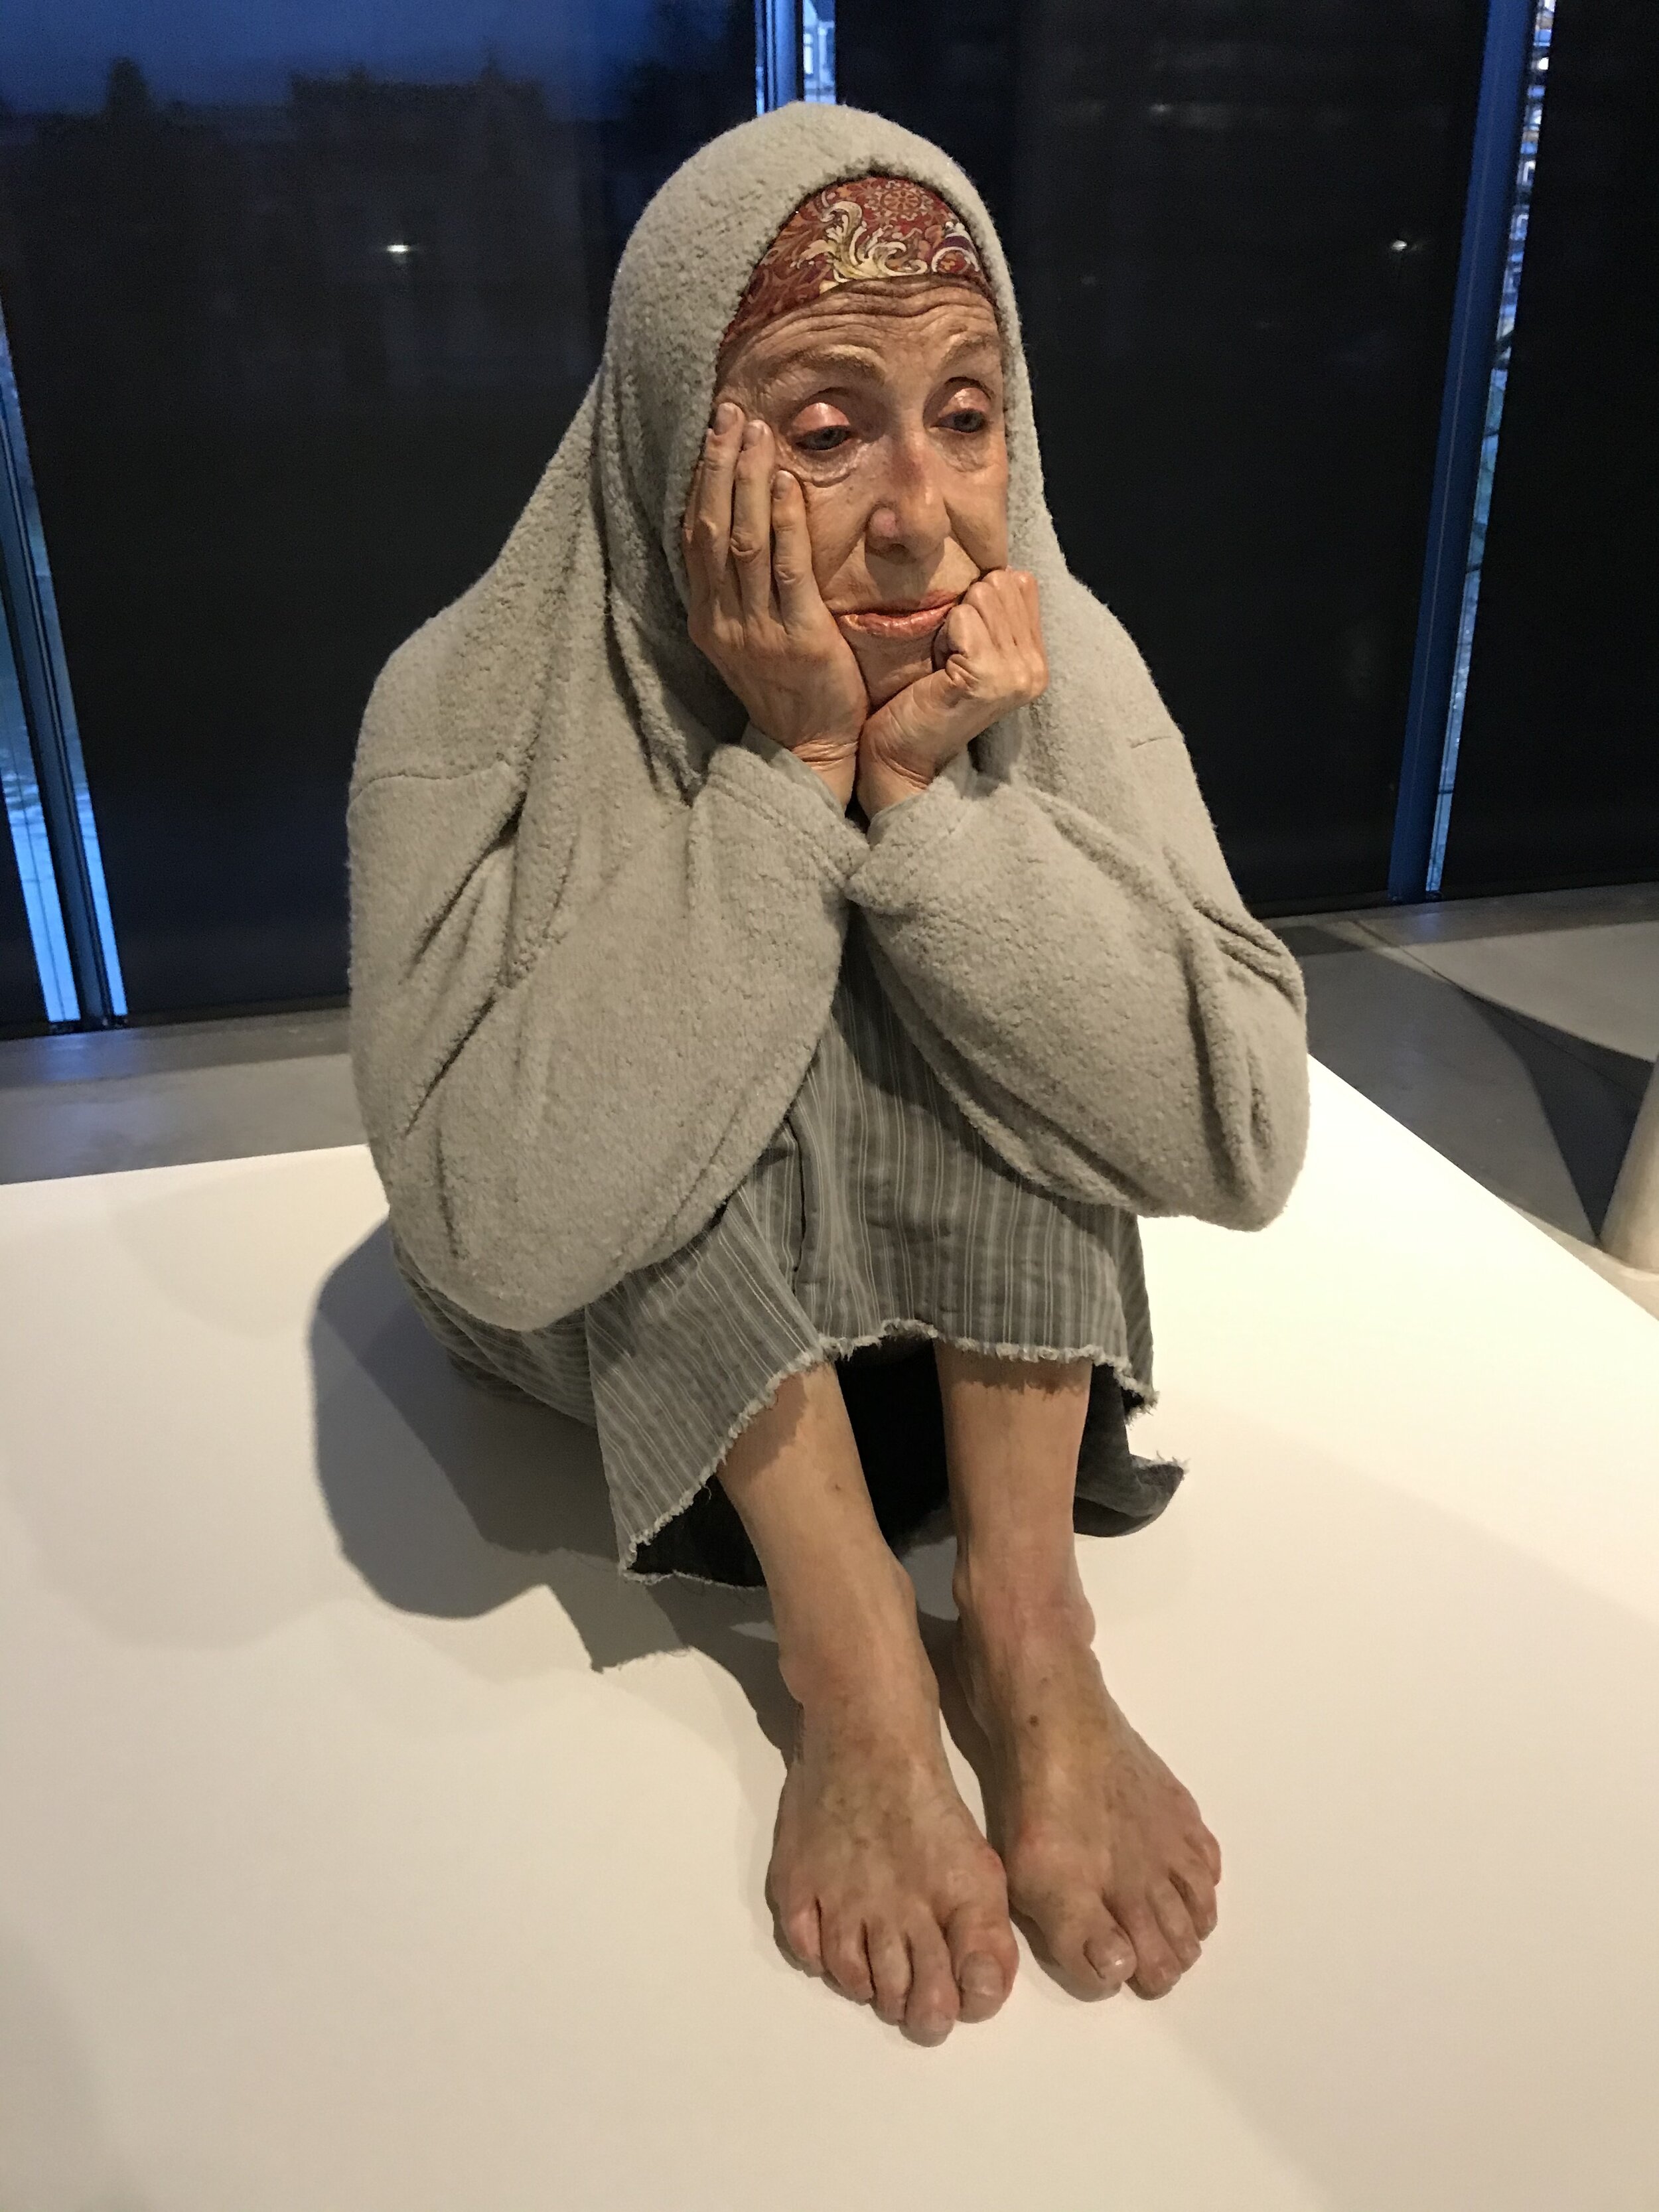
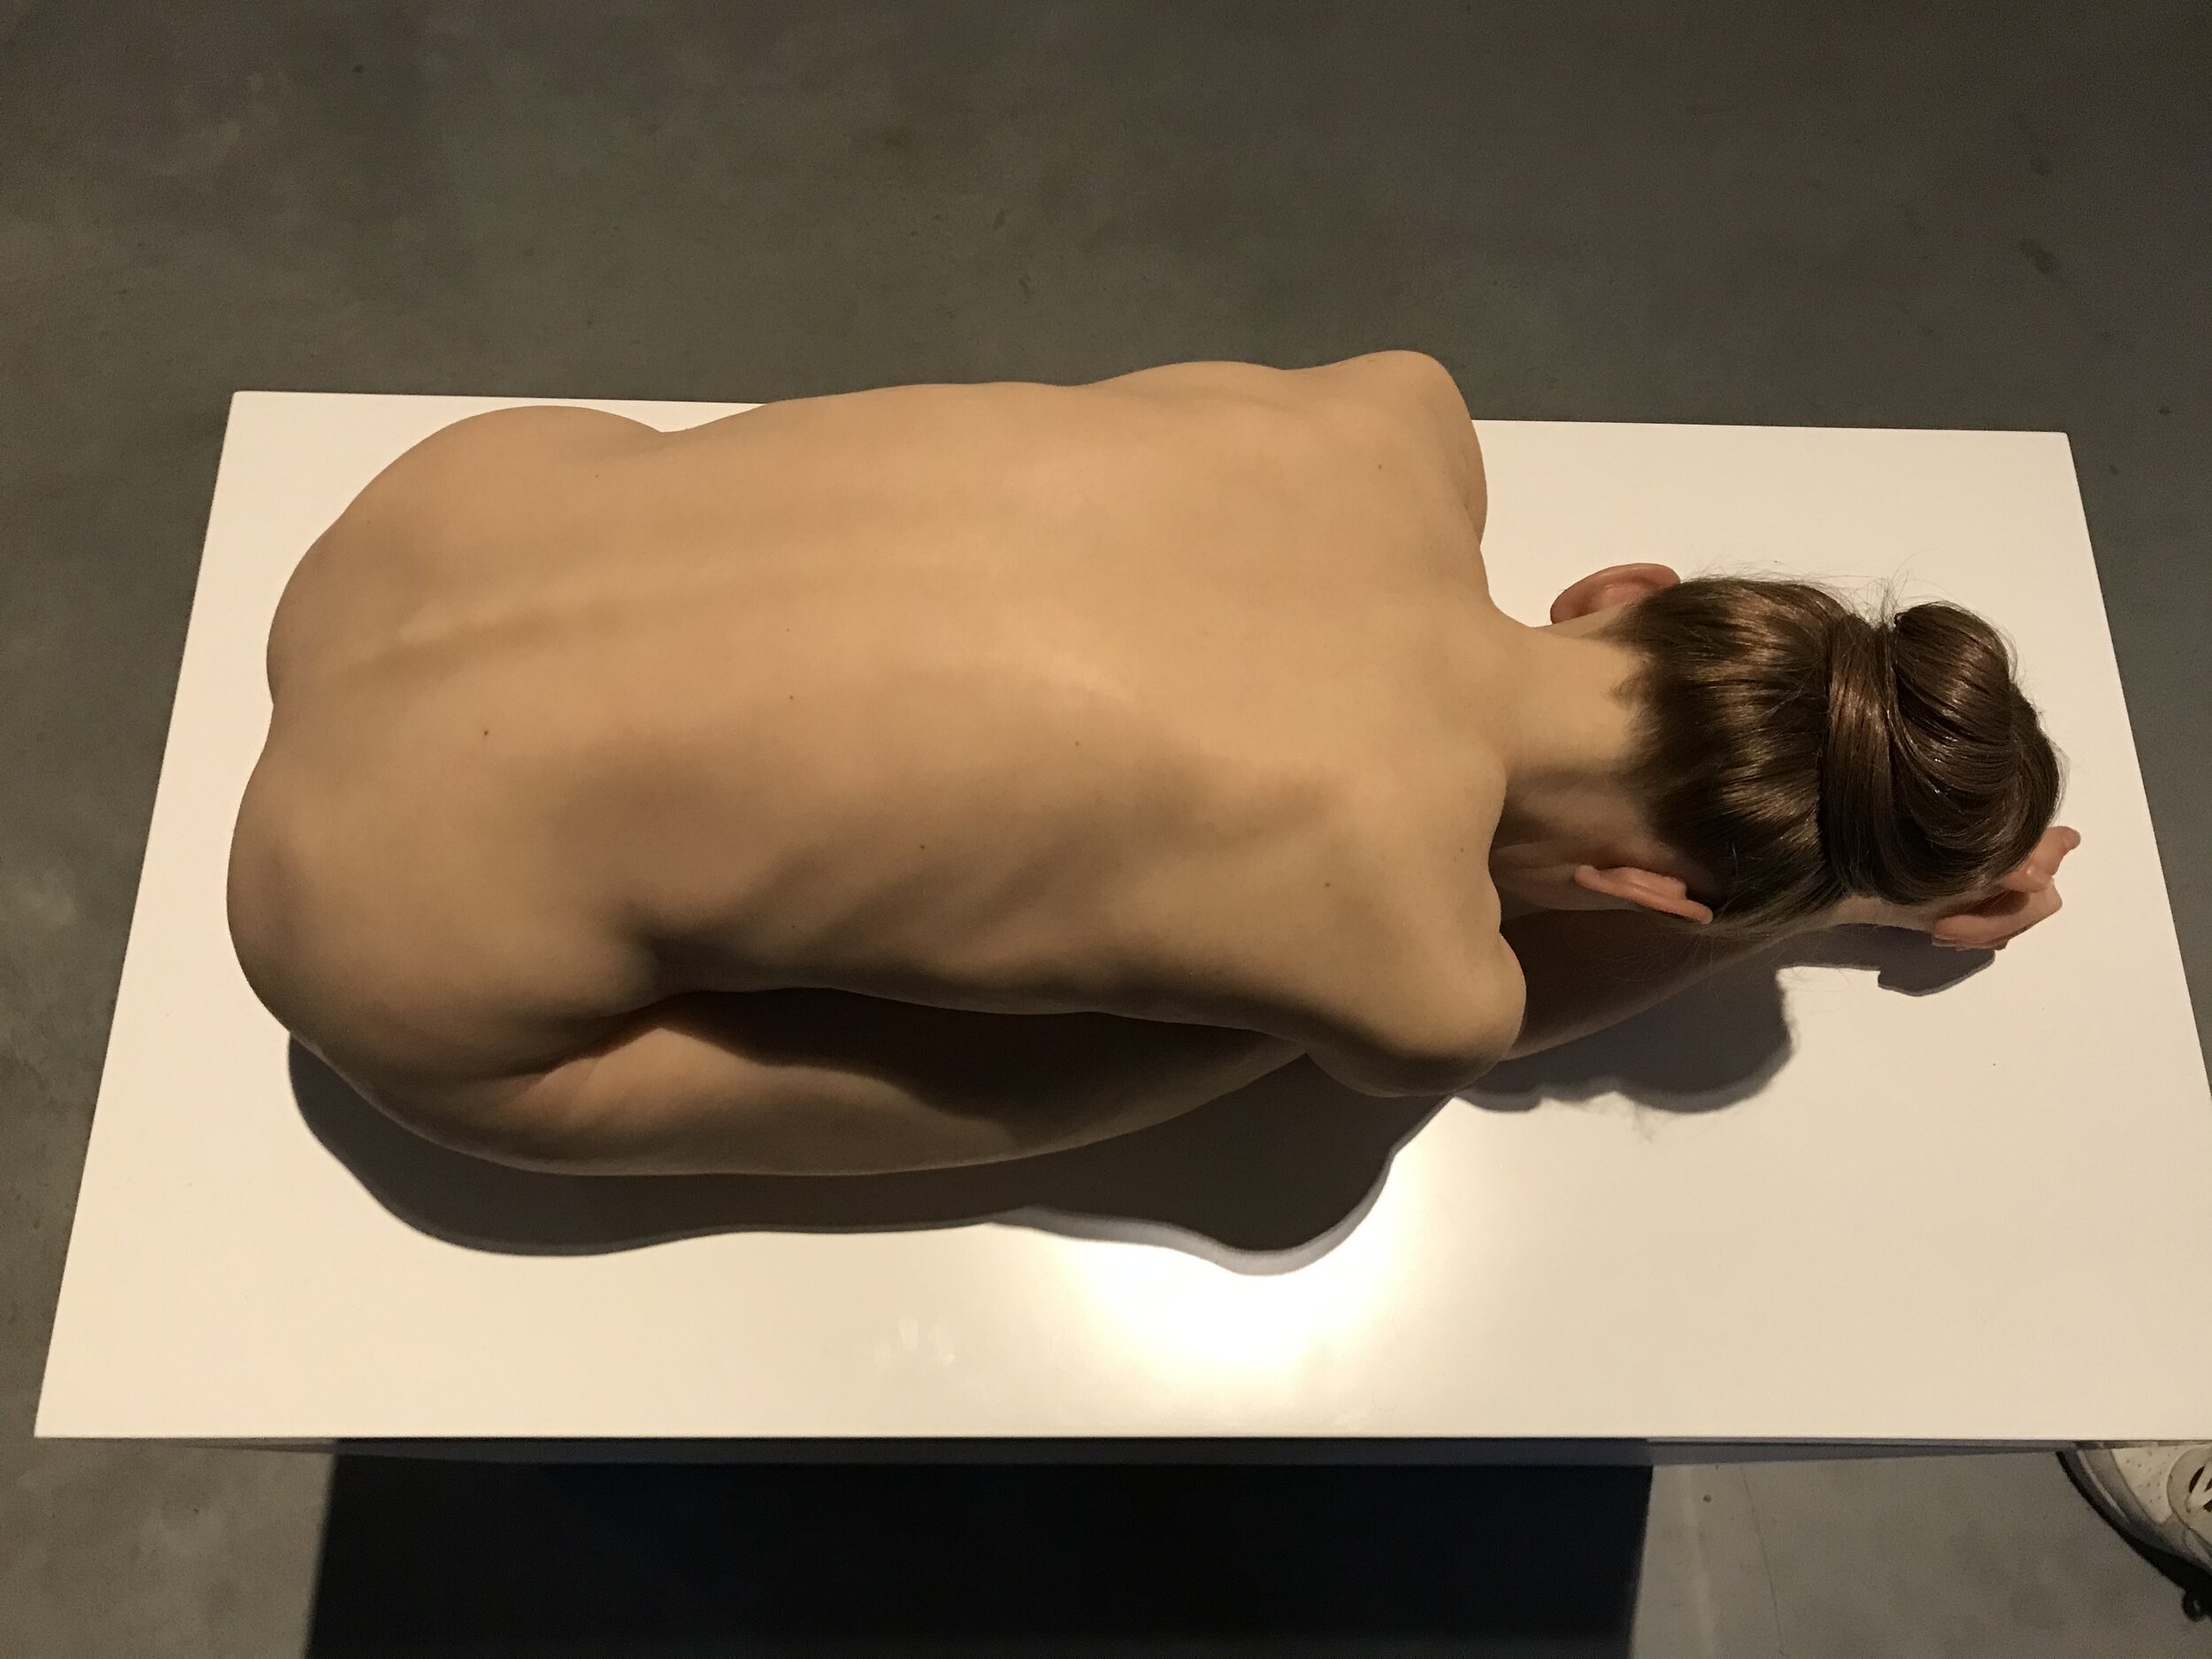
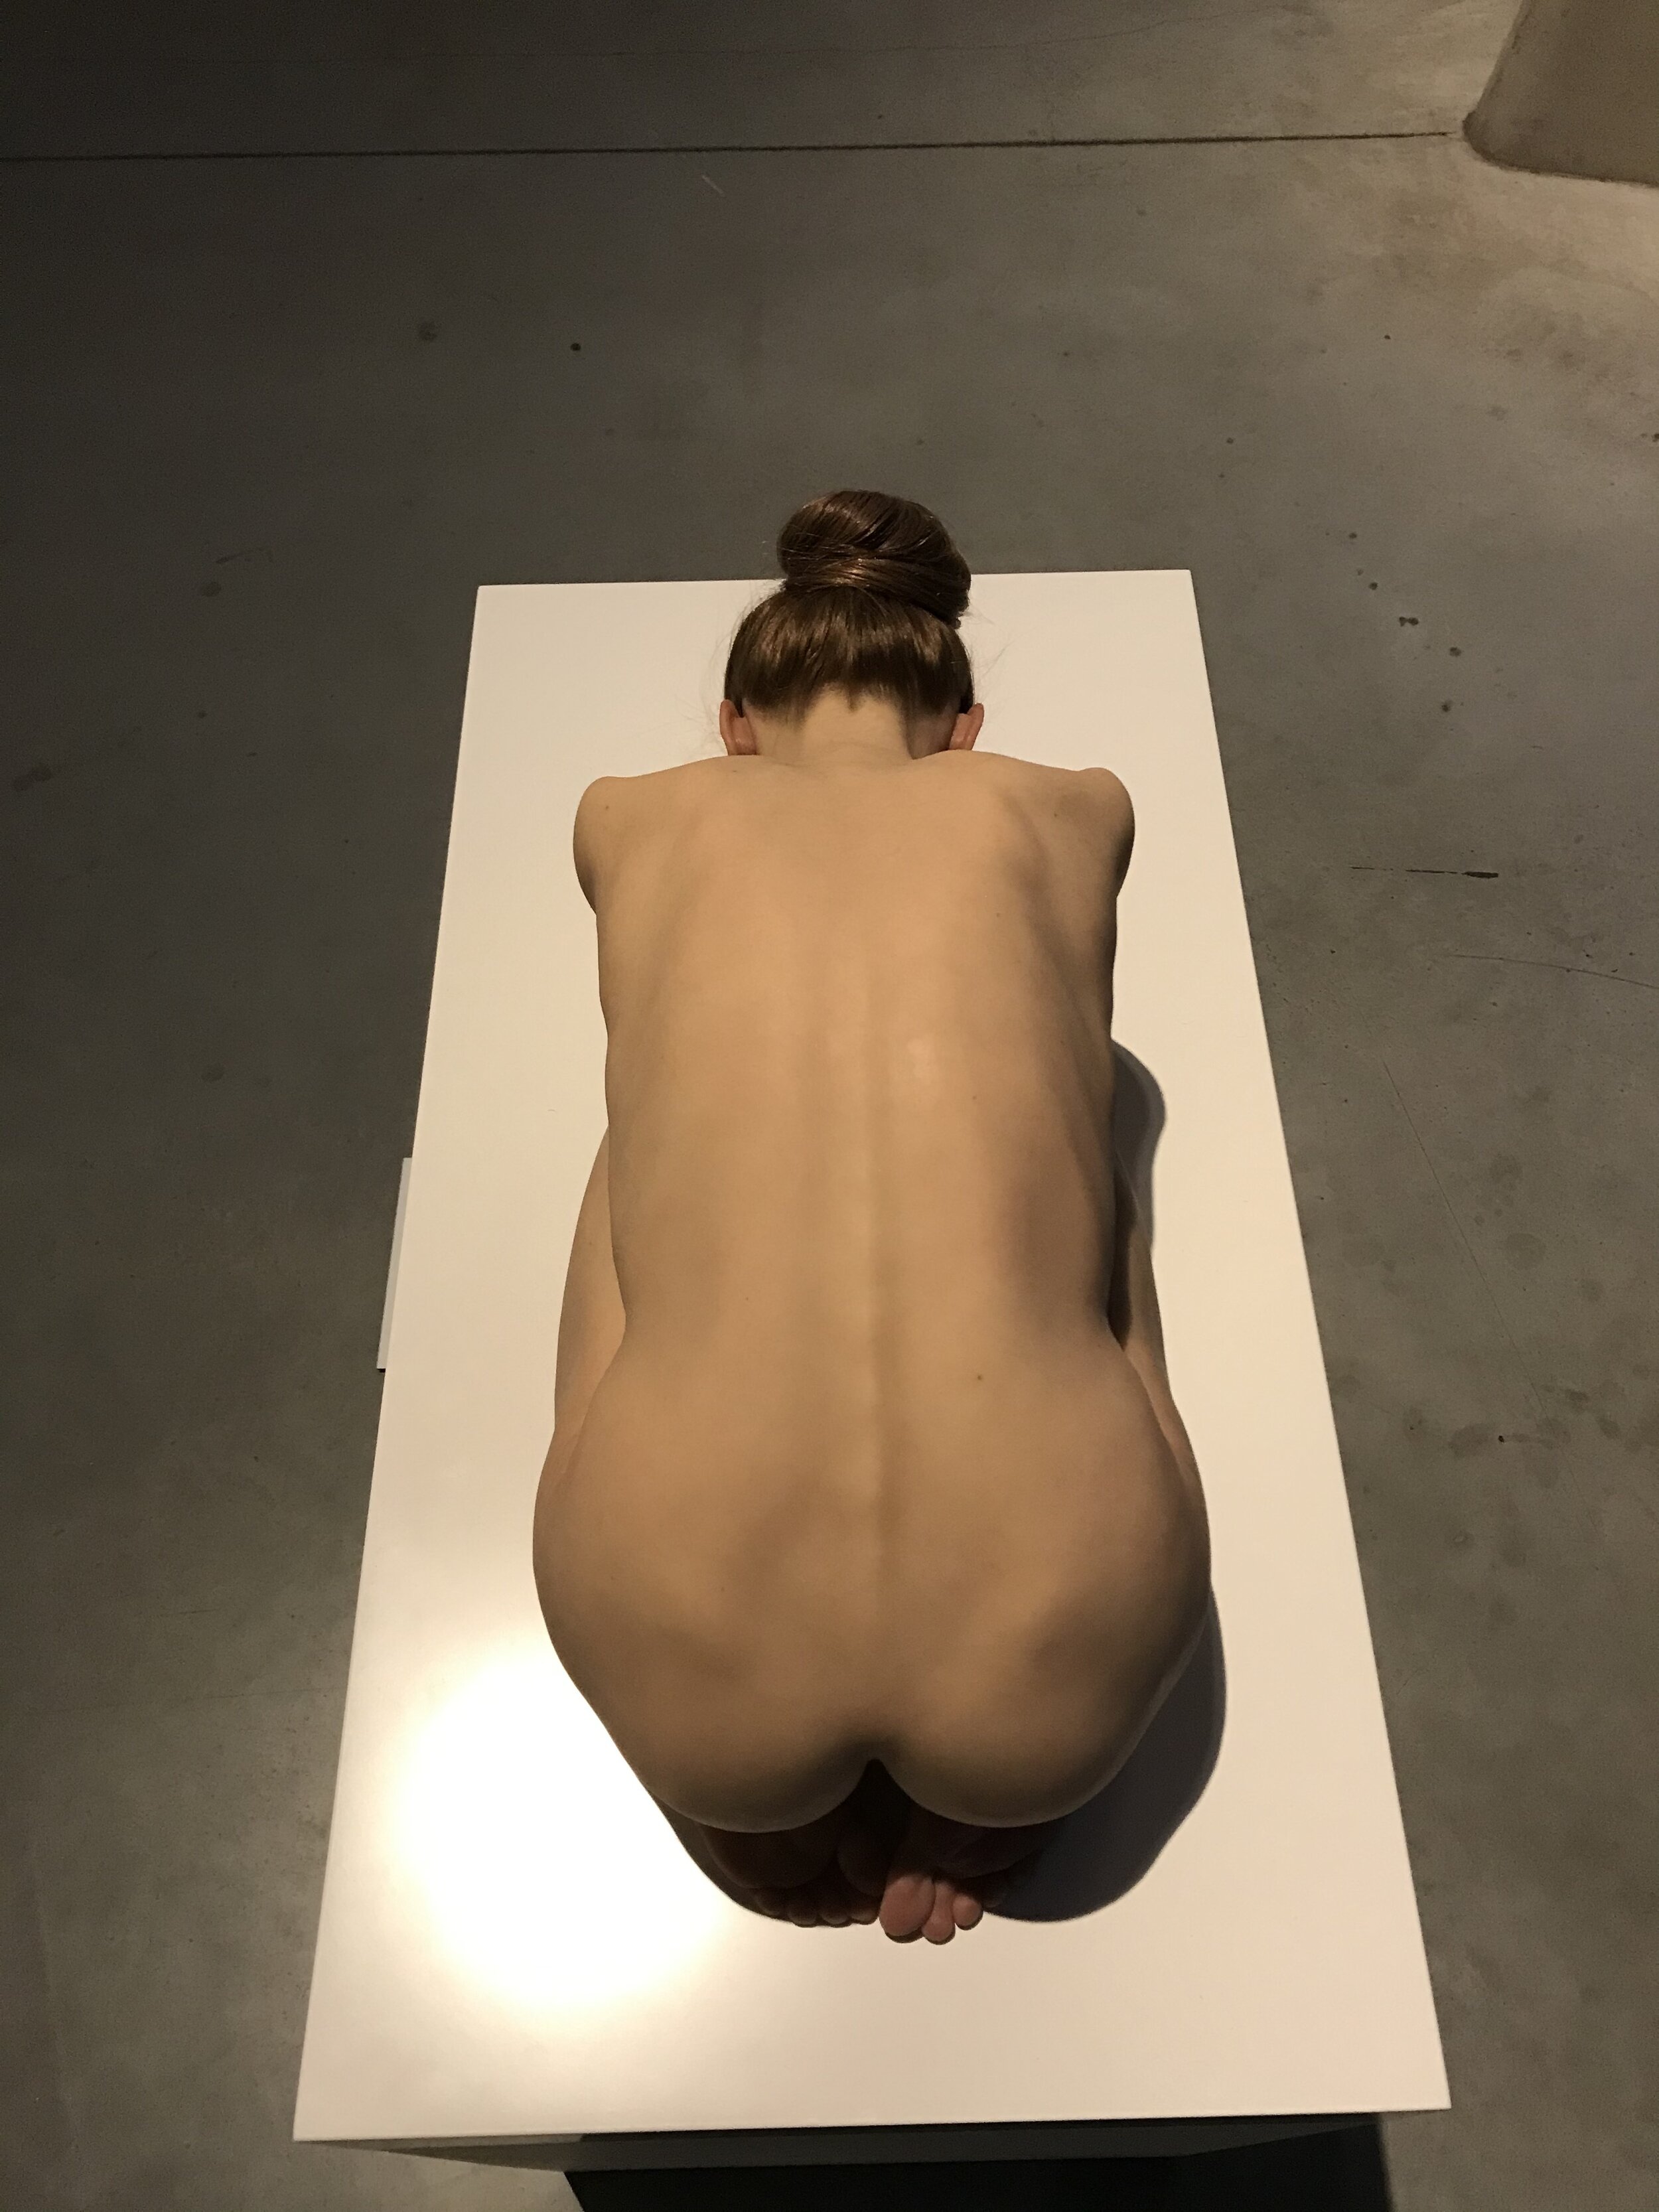
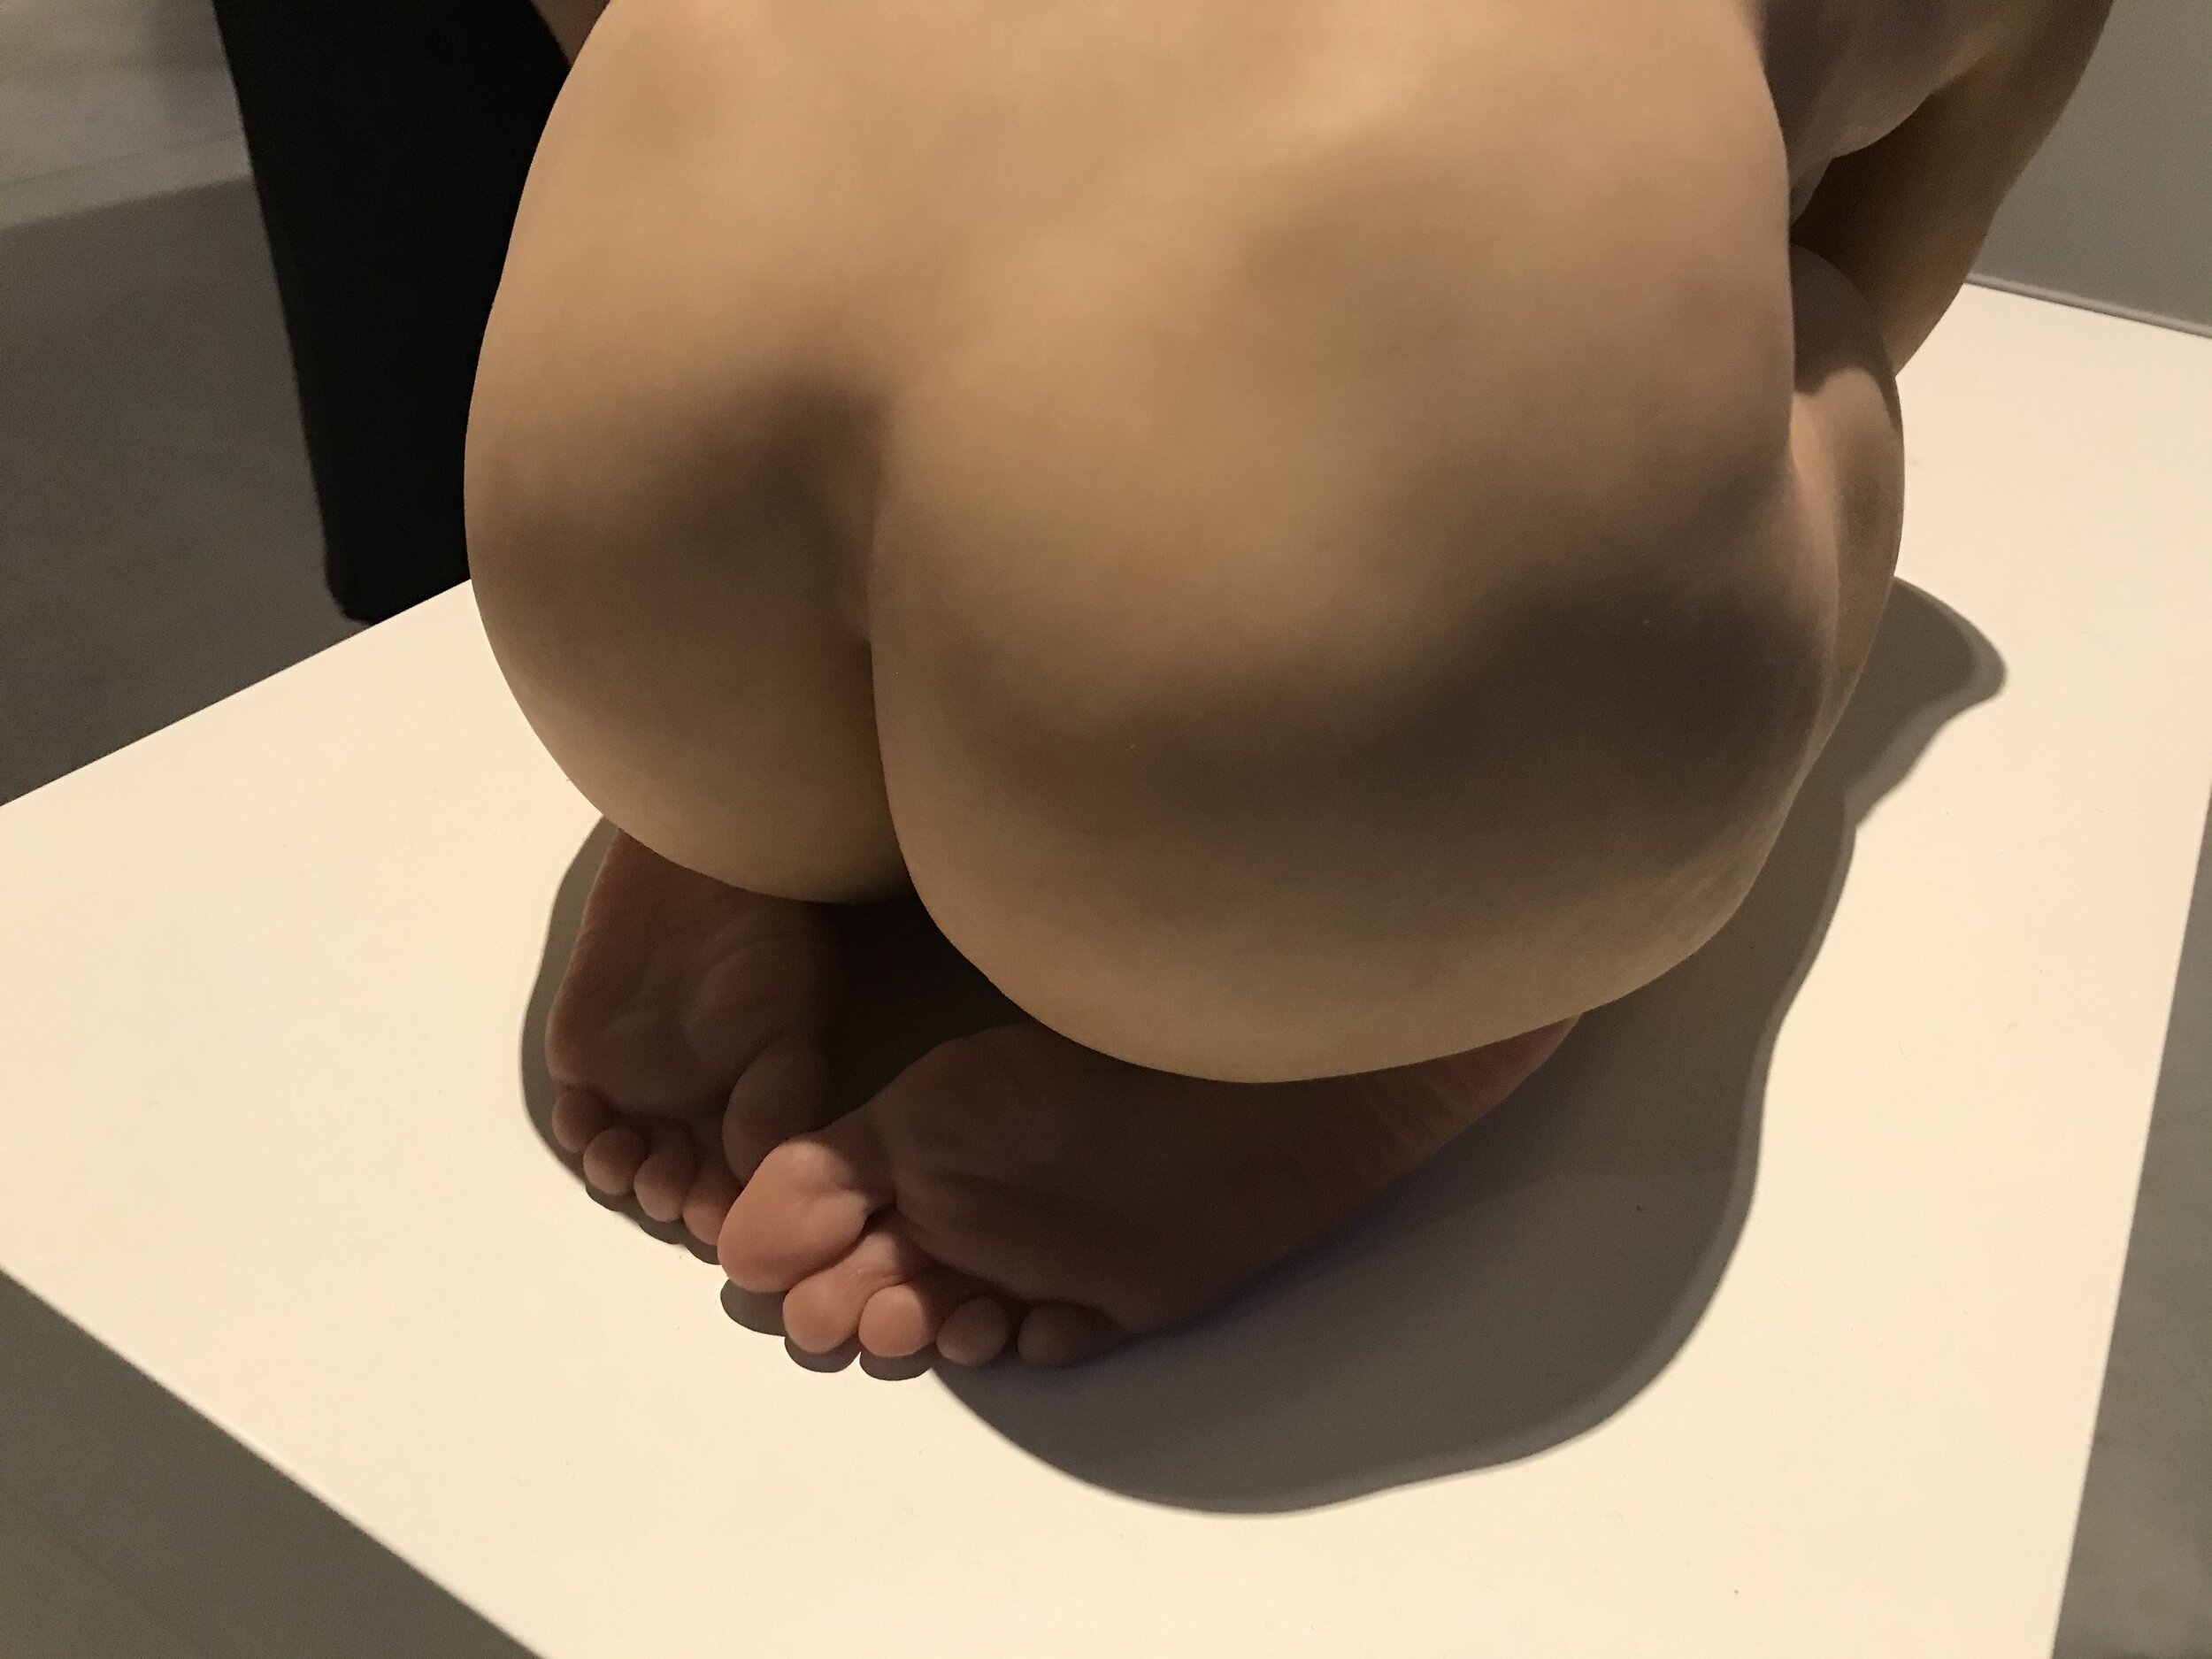
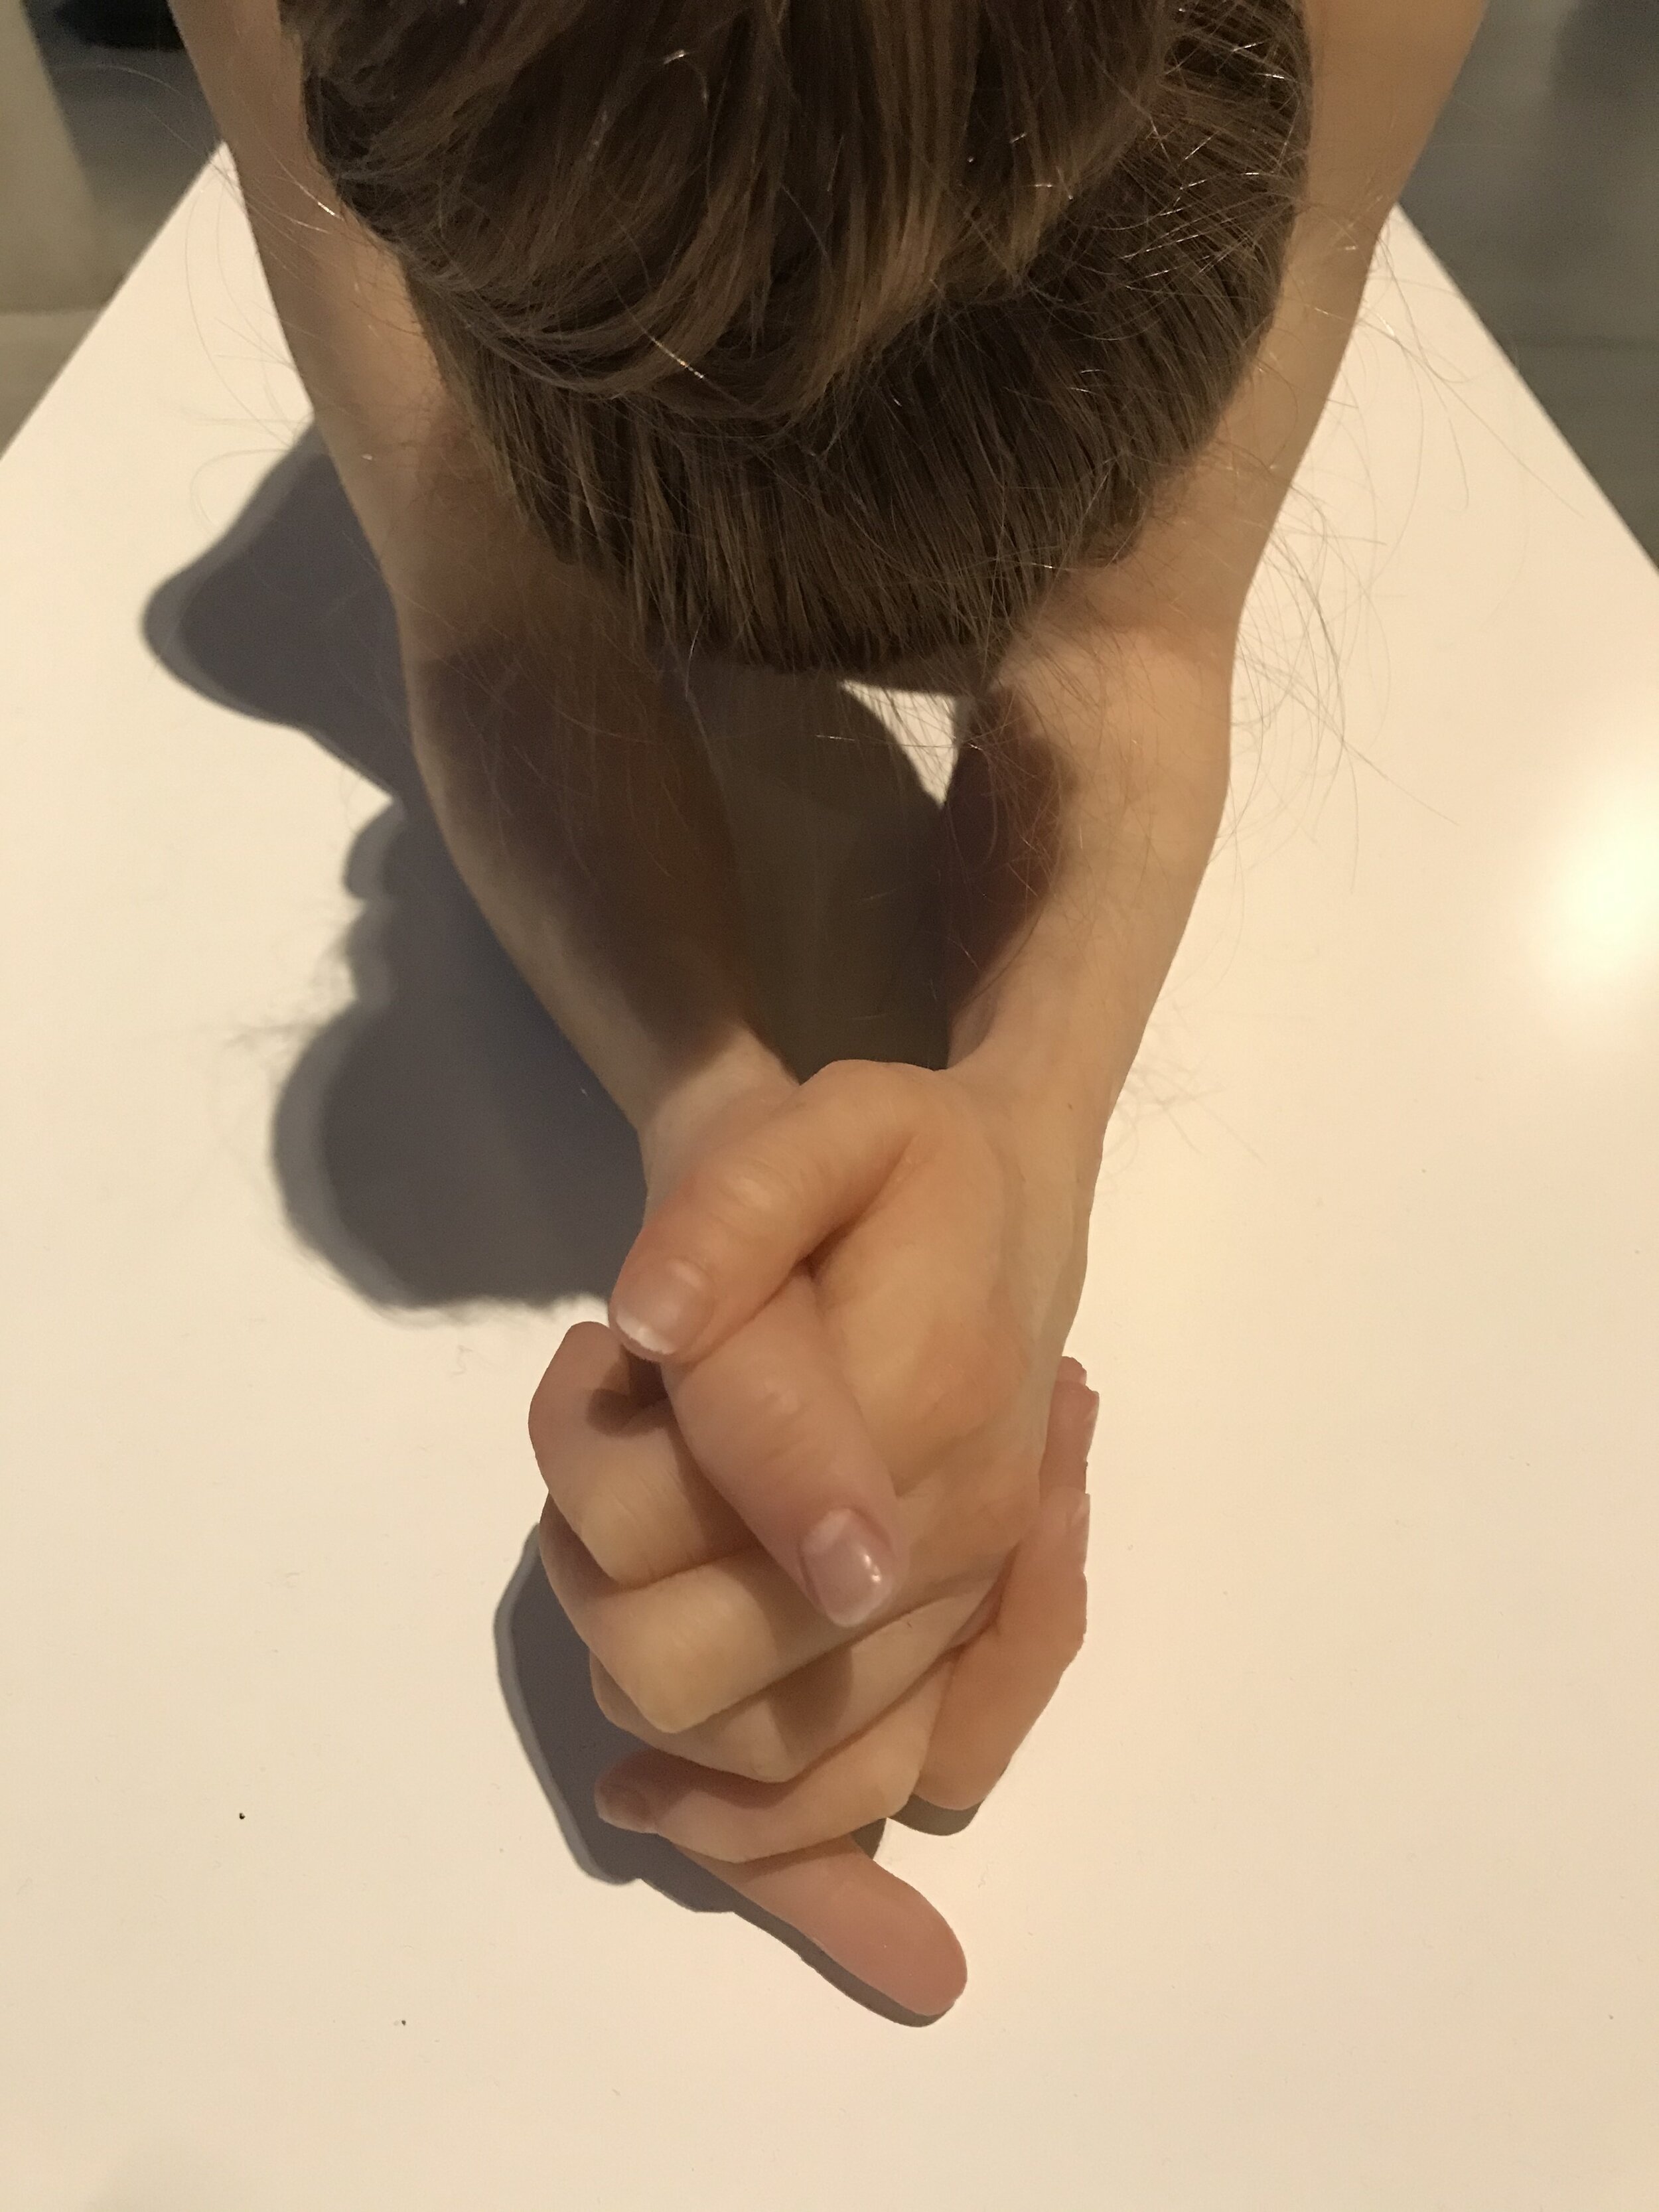
Marc Sijan - “Embrace”
Materials And Techniques
From a purely technical standpoint, there were three observable characteristics that really stood out when contemplating what, in particular, made a sculpture feel more or less “realistic” or lifelike: depth of color, silicone opacity / transparency, and hair quality. These three qualities are also integral to the success of a prosthesis, so I’ll try to break down how these factors relate to both anaplastology and the works on display in achieving the designation of “hyperrealism”.
Depth of Color
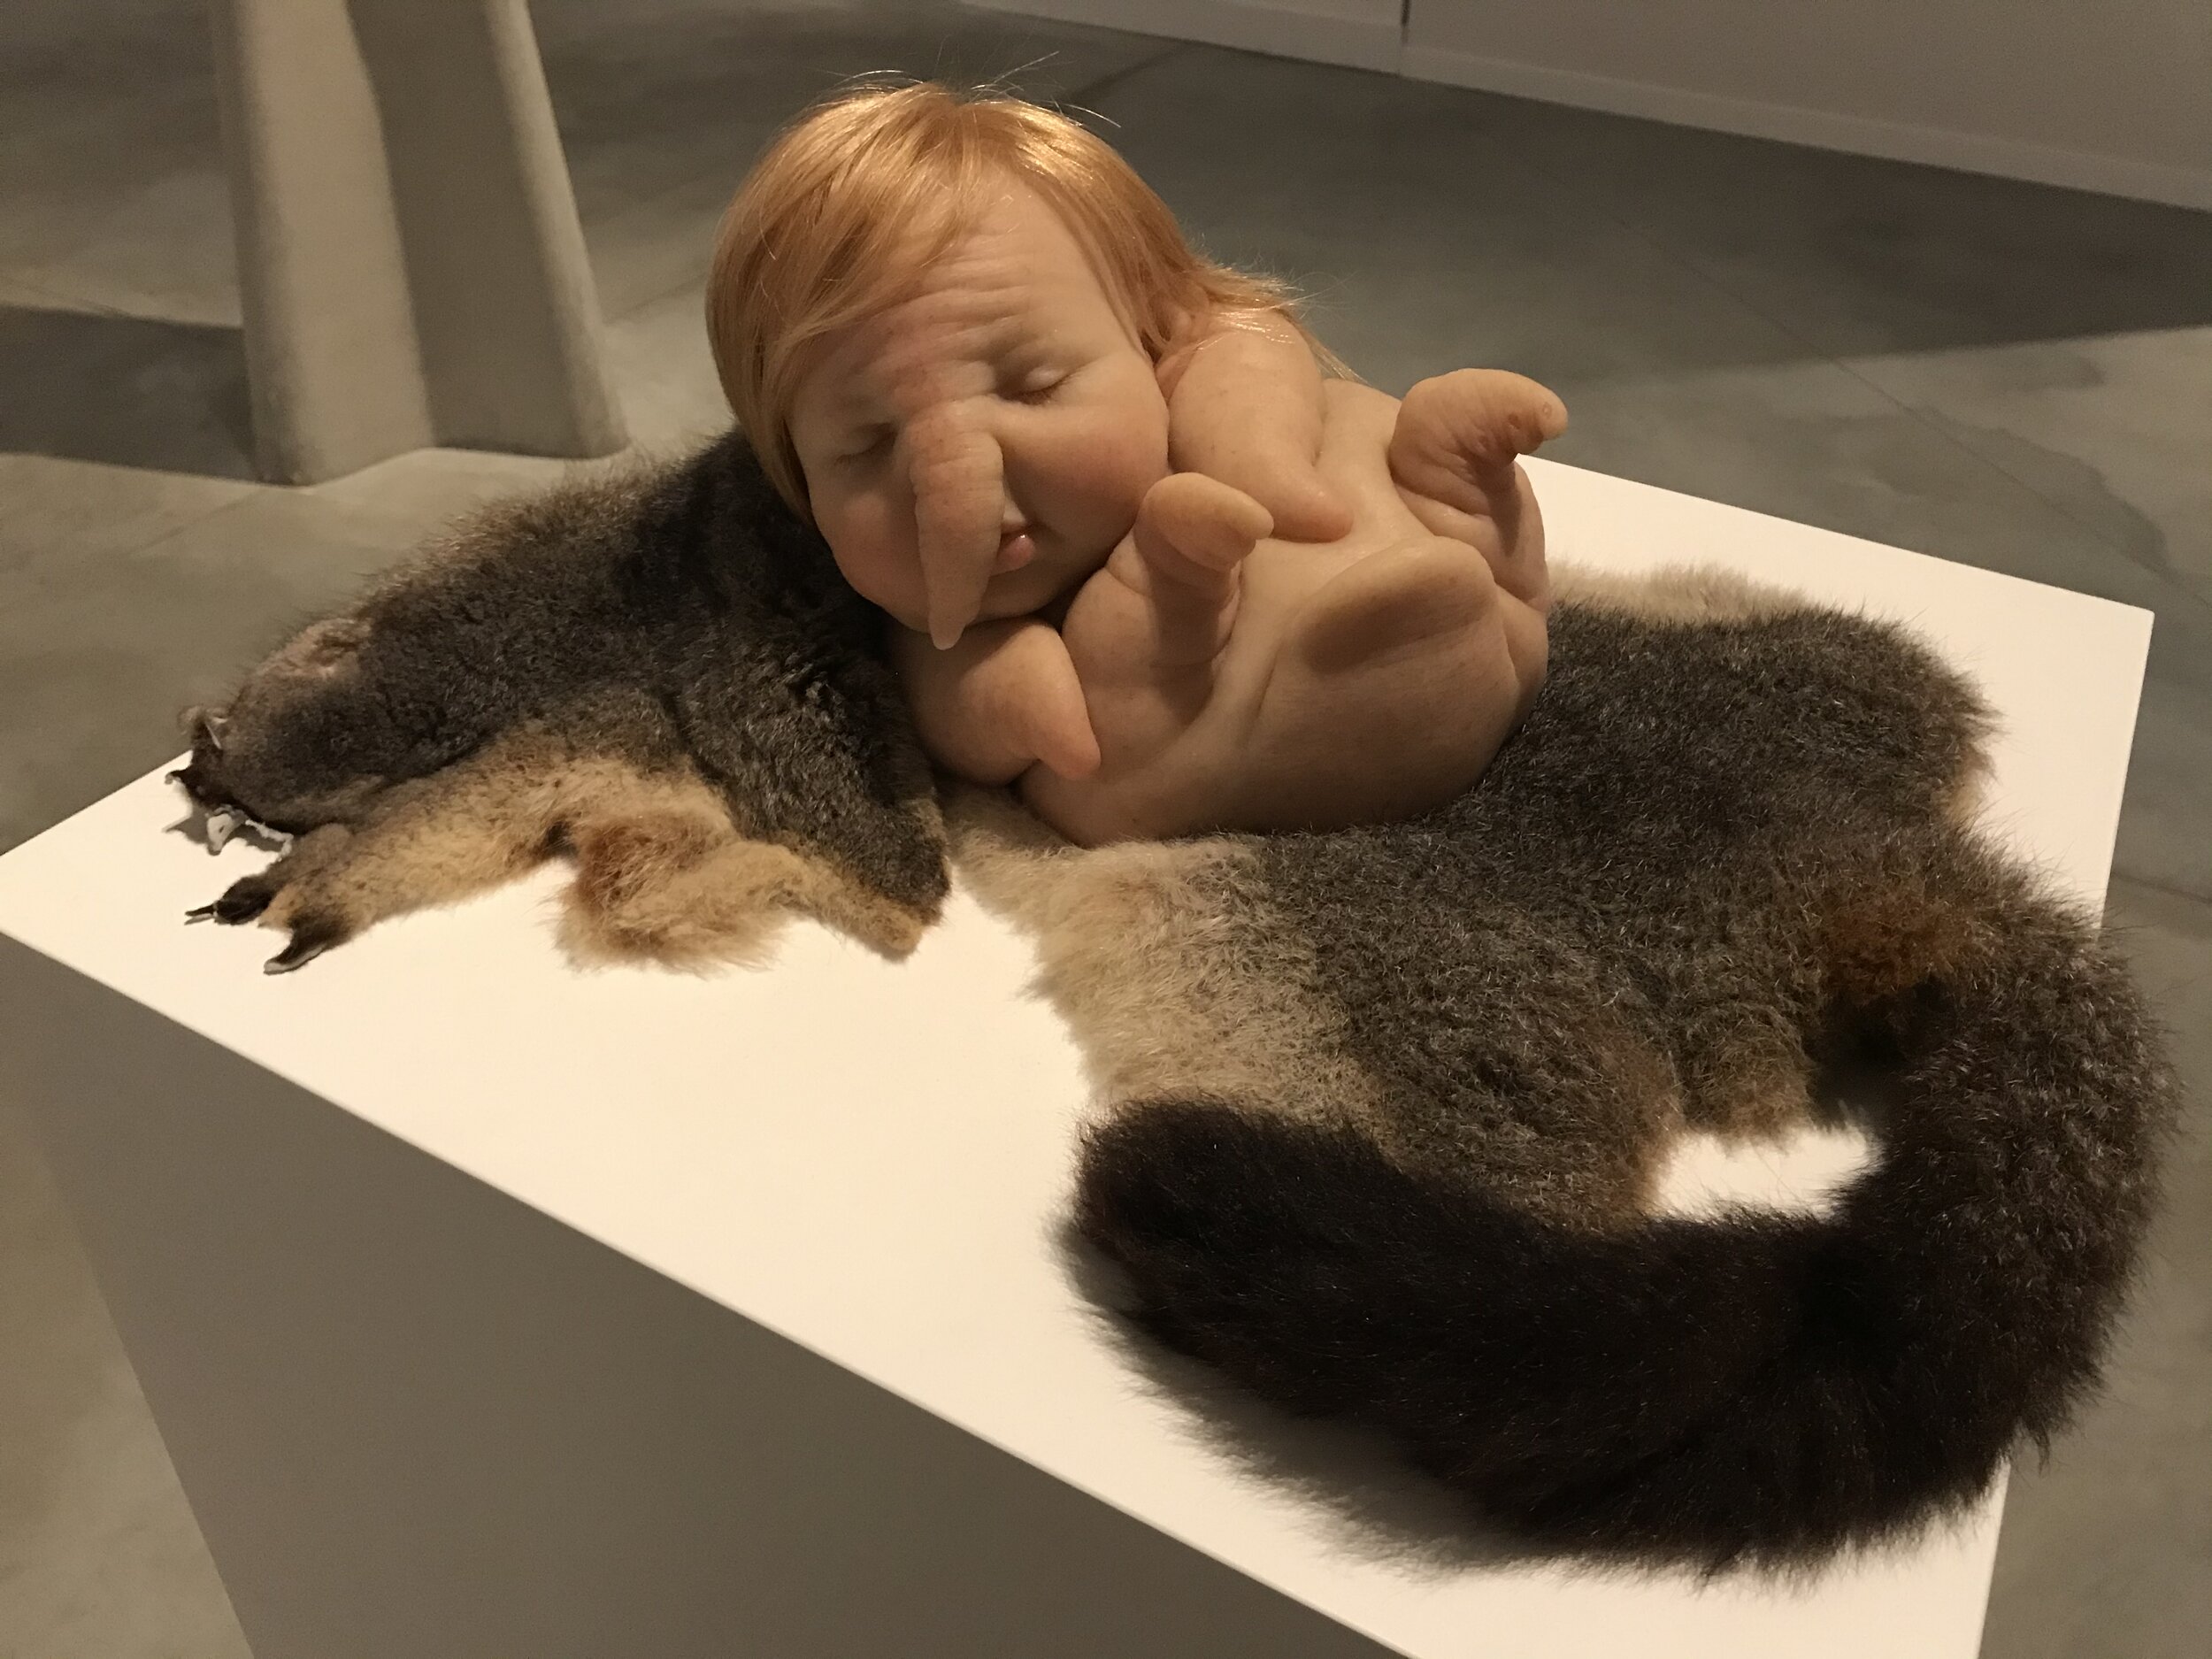
Broadly speaking, silicone can be colored either intrinsically or extrinsically, and oftentimes a combination of these two methods will yield the best results. When using a primarily extrinsic coloring approach, a neutral “base” flesh tone is mixed, packed into a mold, then vulcanized, then the subtle variations in tone are created by painting thin washes of color over the surface of the sculpt. With intrinsic coloring, multiple flesh-toned silicone batches are mixed, painted into key areas of the mold, then vulcanized to achieve a similar effect. In most instances it’s possible to spot the differences between silicone that has been cast in a single base color and painted extrinsically, versus silicone that has been colored and blended intrinsically. Neither technique is better than the other, but they do offer slightly different aesthetic results as far as depth of color is concerned. Adding flocking of different colors also helps to scatter the light and color within the silicone, further enhancing this effect of depth and more accurately mimicking the tiny color variations in the skin. Small amounts of color can always be added extrinsically to bump up and accentuate certain areas when necessary. Moles, freckles, blemishes, and prominent vasculature can either be painted directly into the top-most layer of a mold (before packing it with your silicone base), or added extrinsically. When applied in different combinations, these techniques can result in an incredibly broad range of depth and color variation. Sam Jinks’ piece “Woman and Child” is an amazing example of how a wide spectrum of painting techniques can push the boundaries of realism - the contrast of the liver spots on the old woman’s hands with the translucency of the newborn’s skin are particularly impressive.
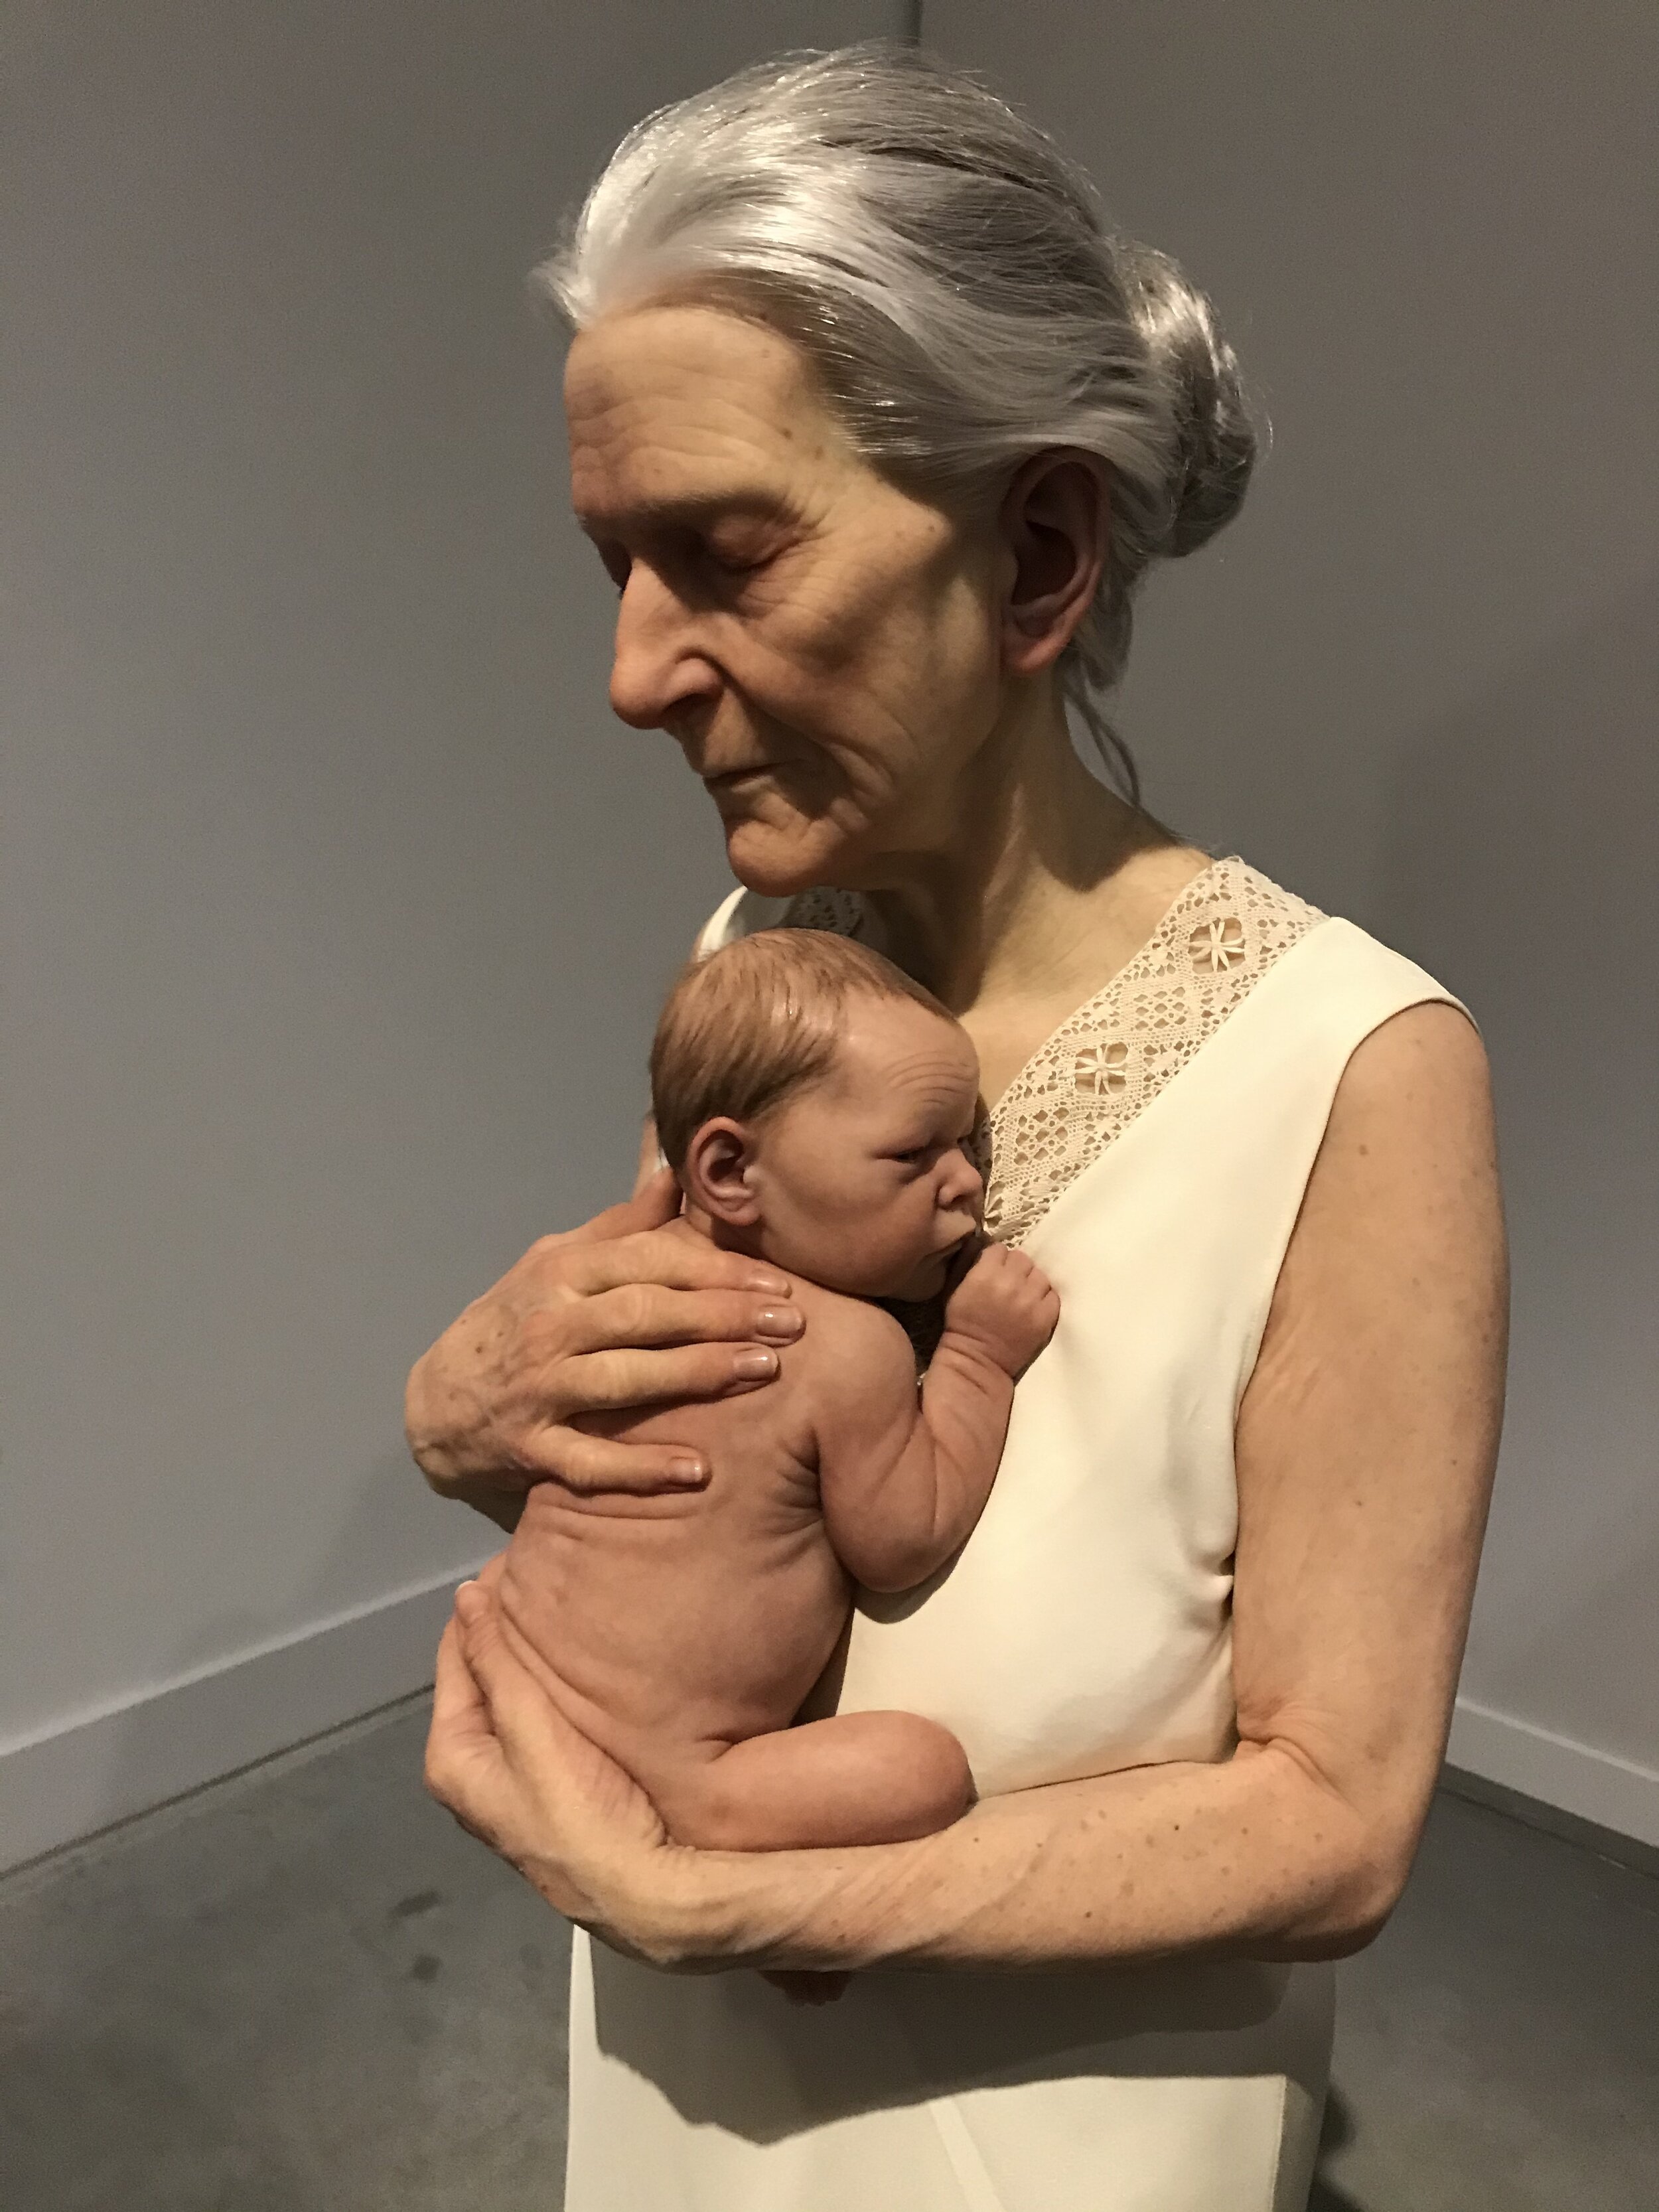
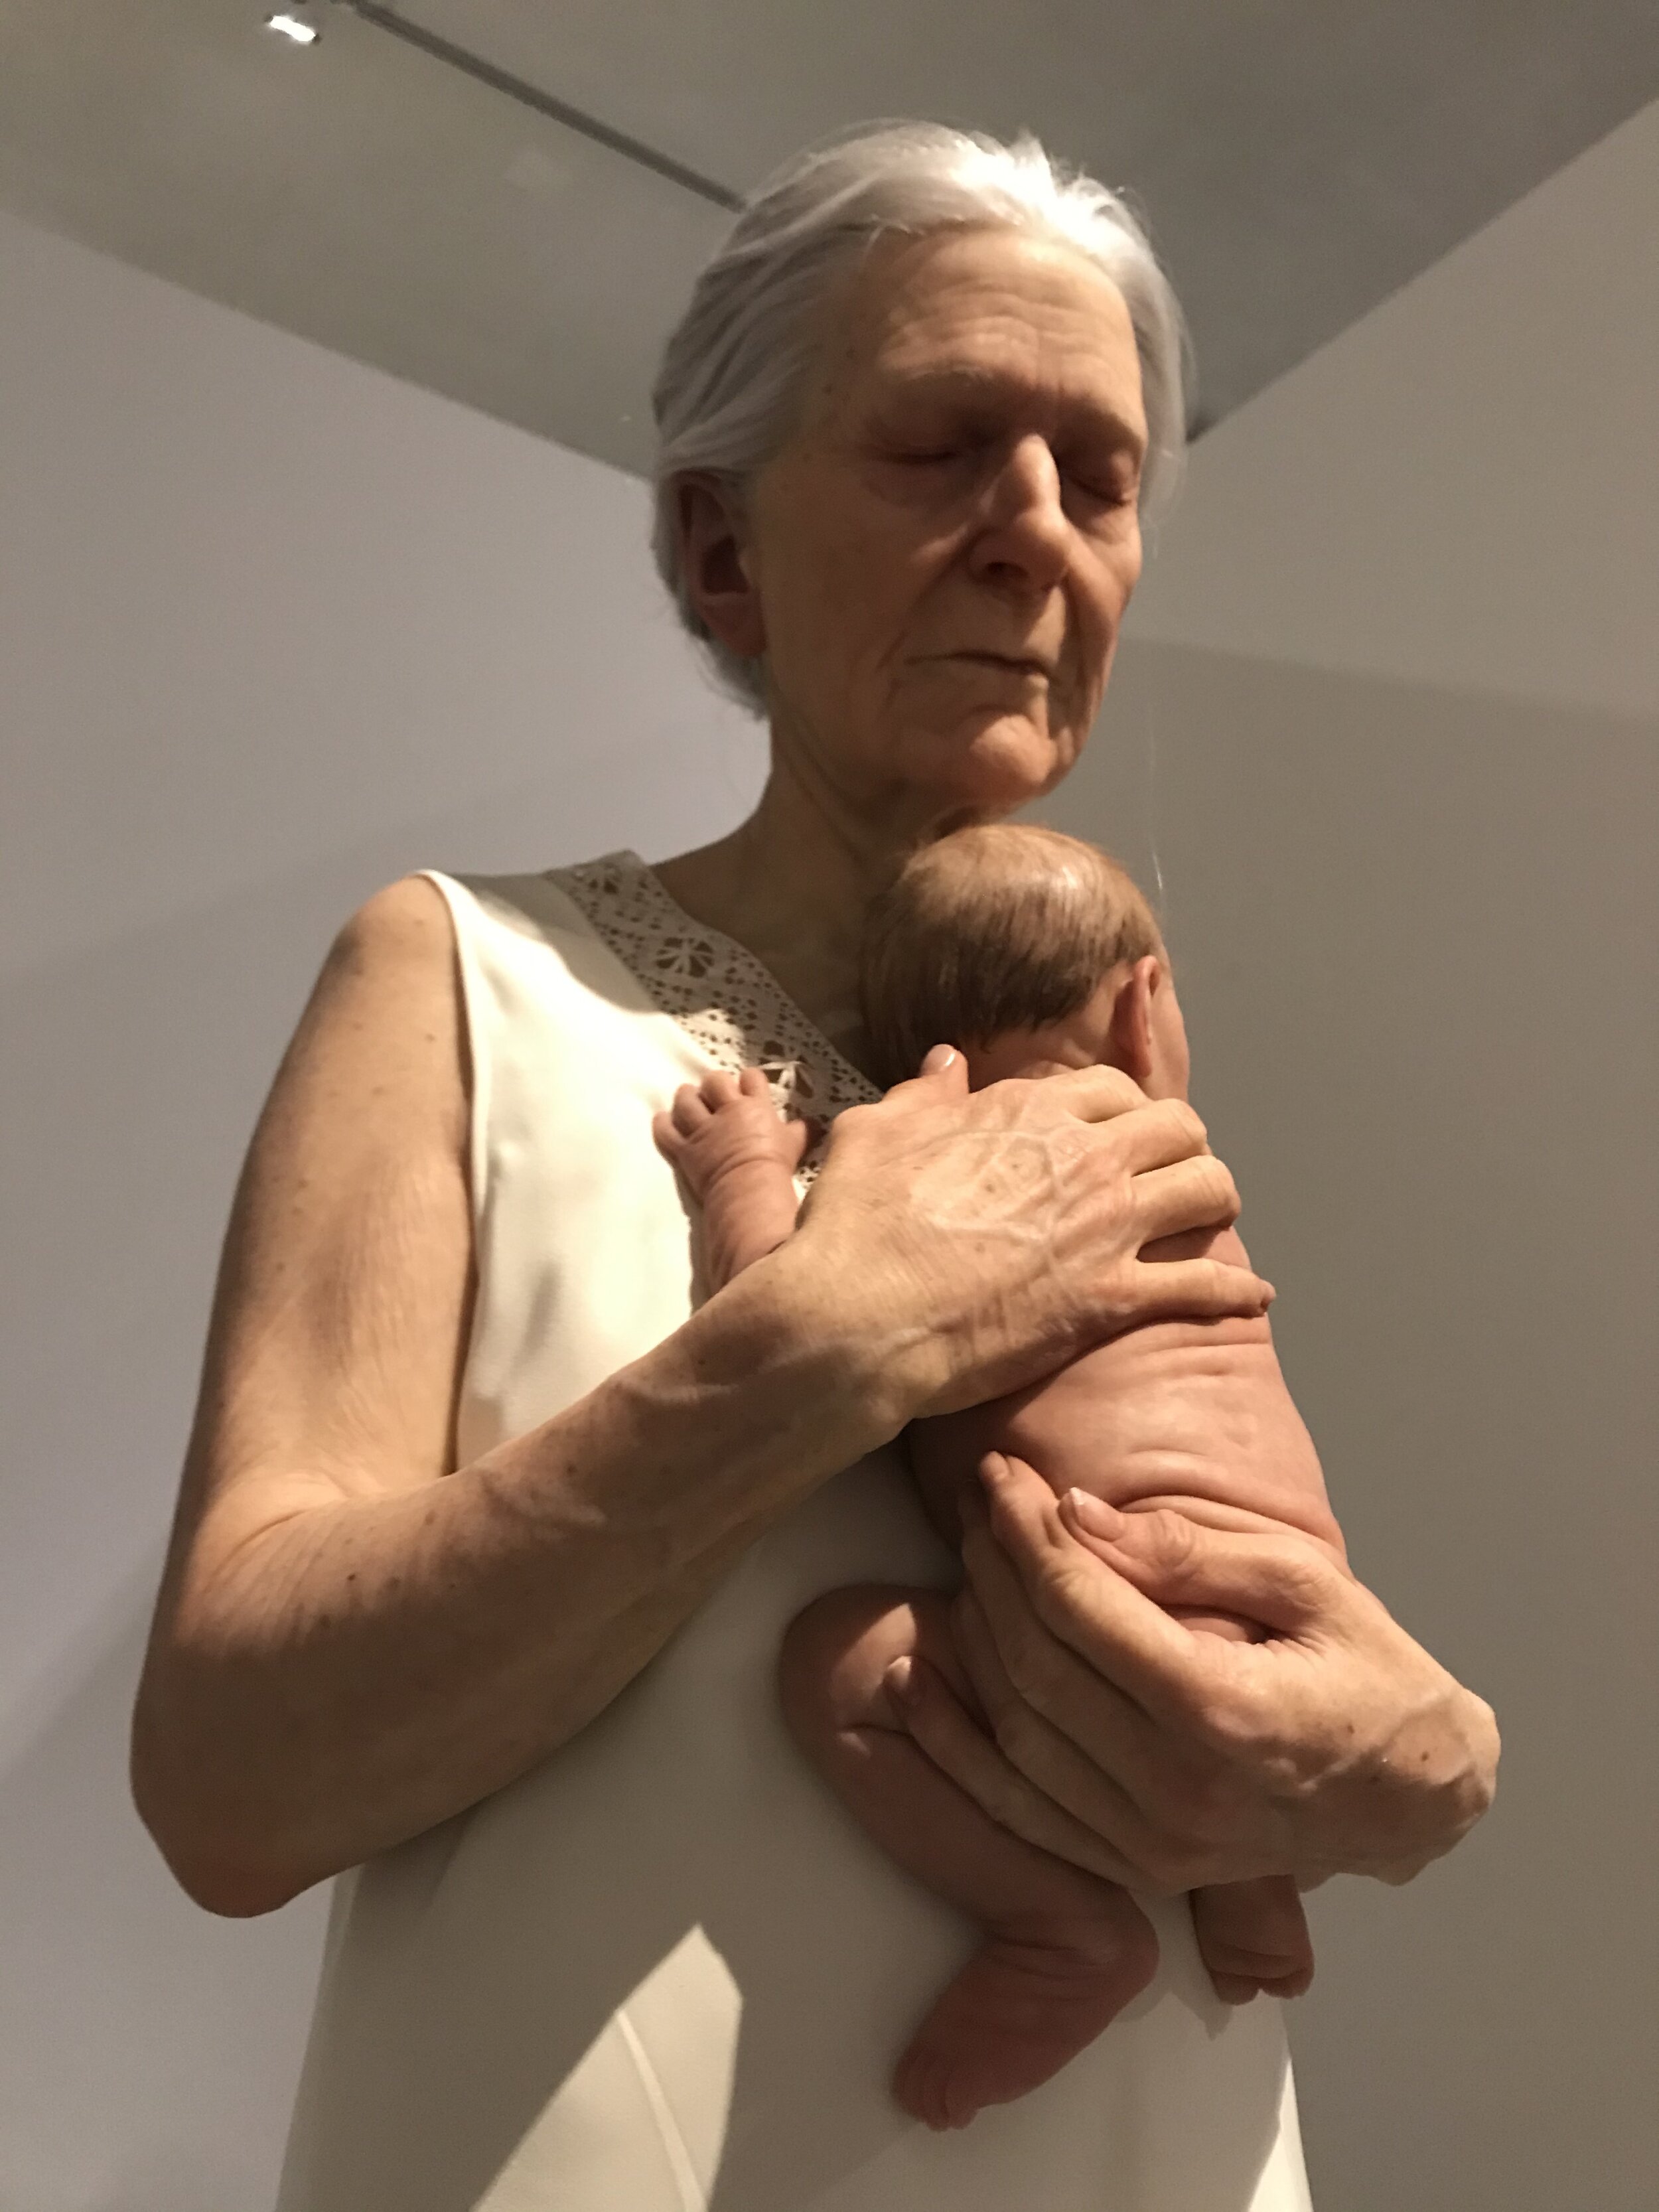
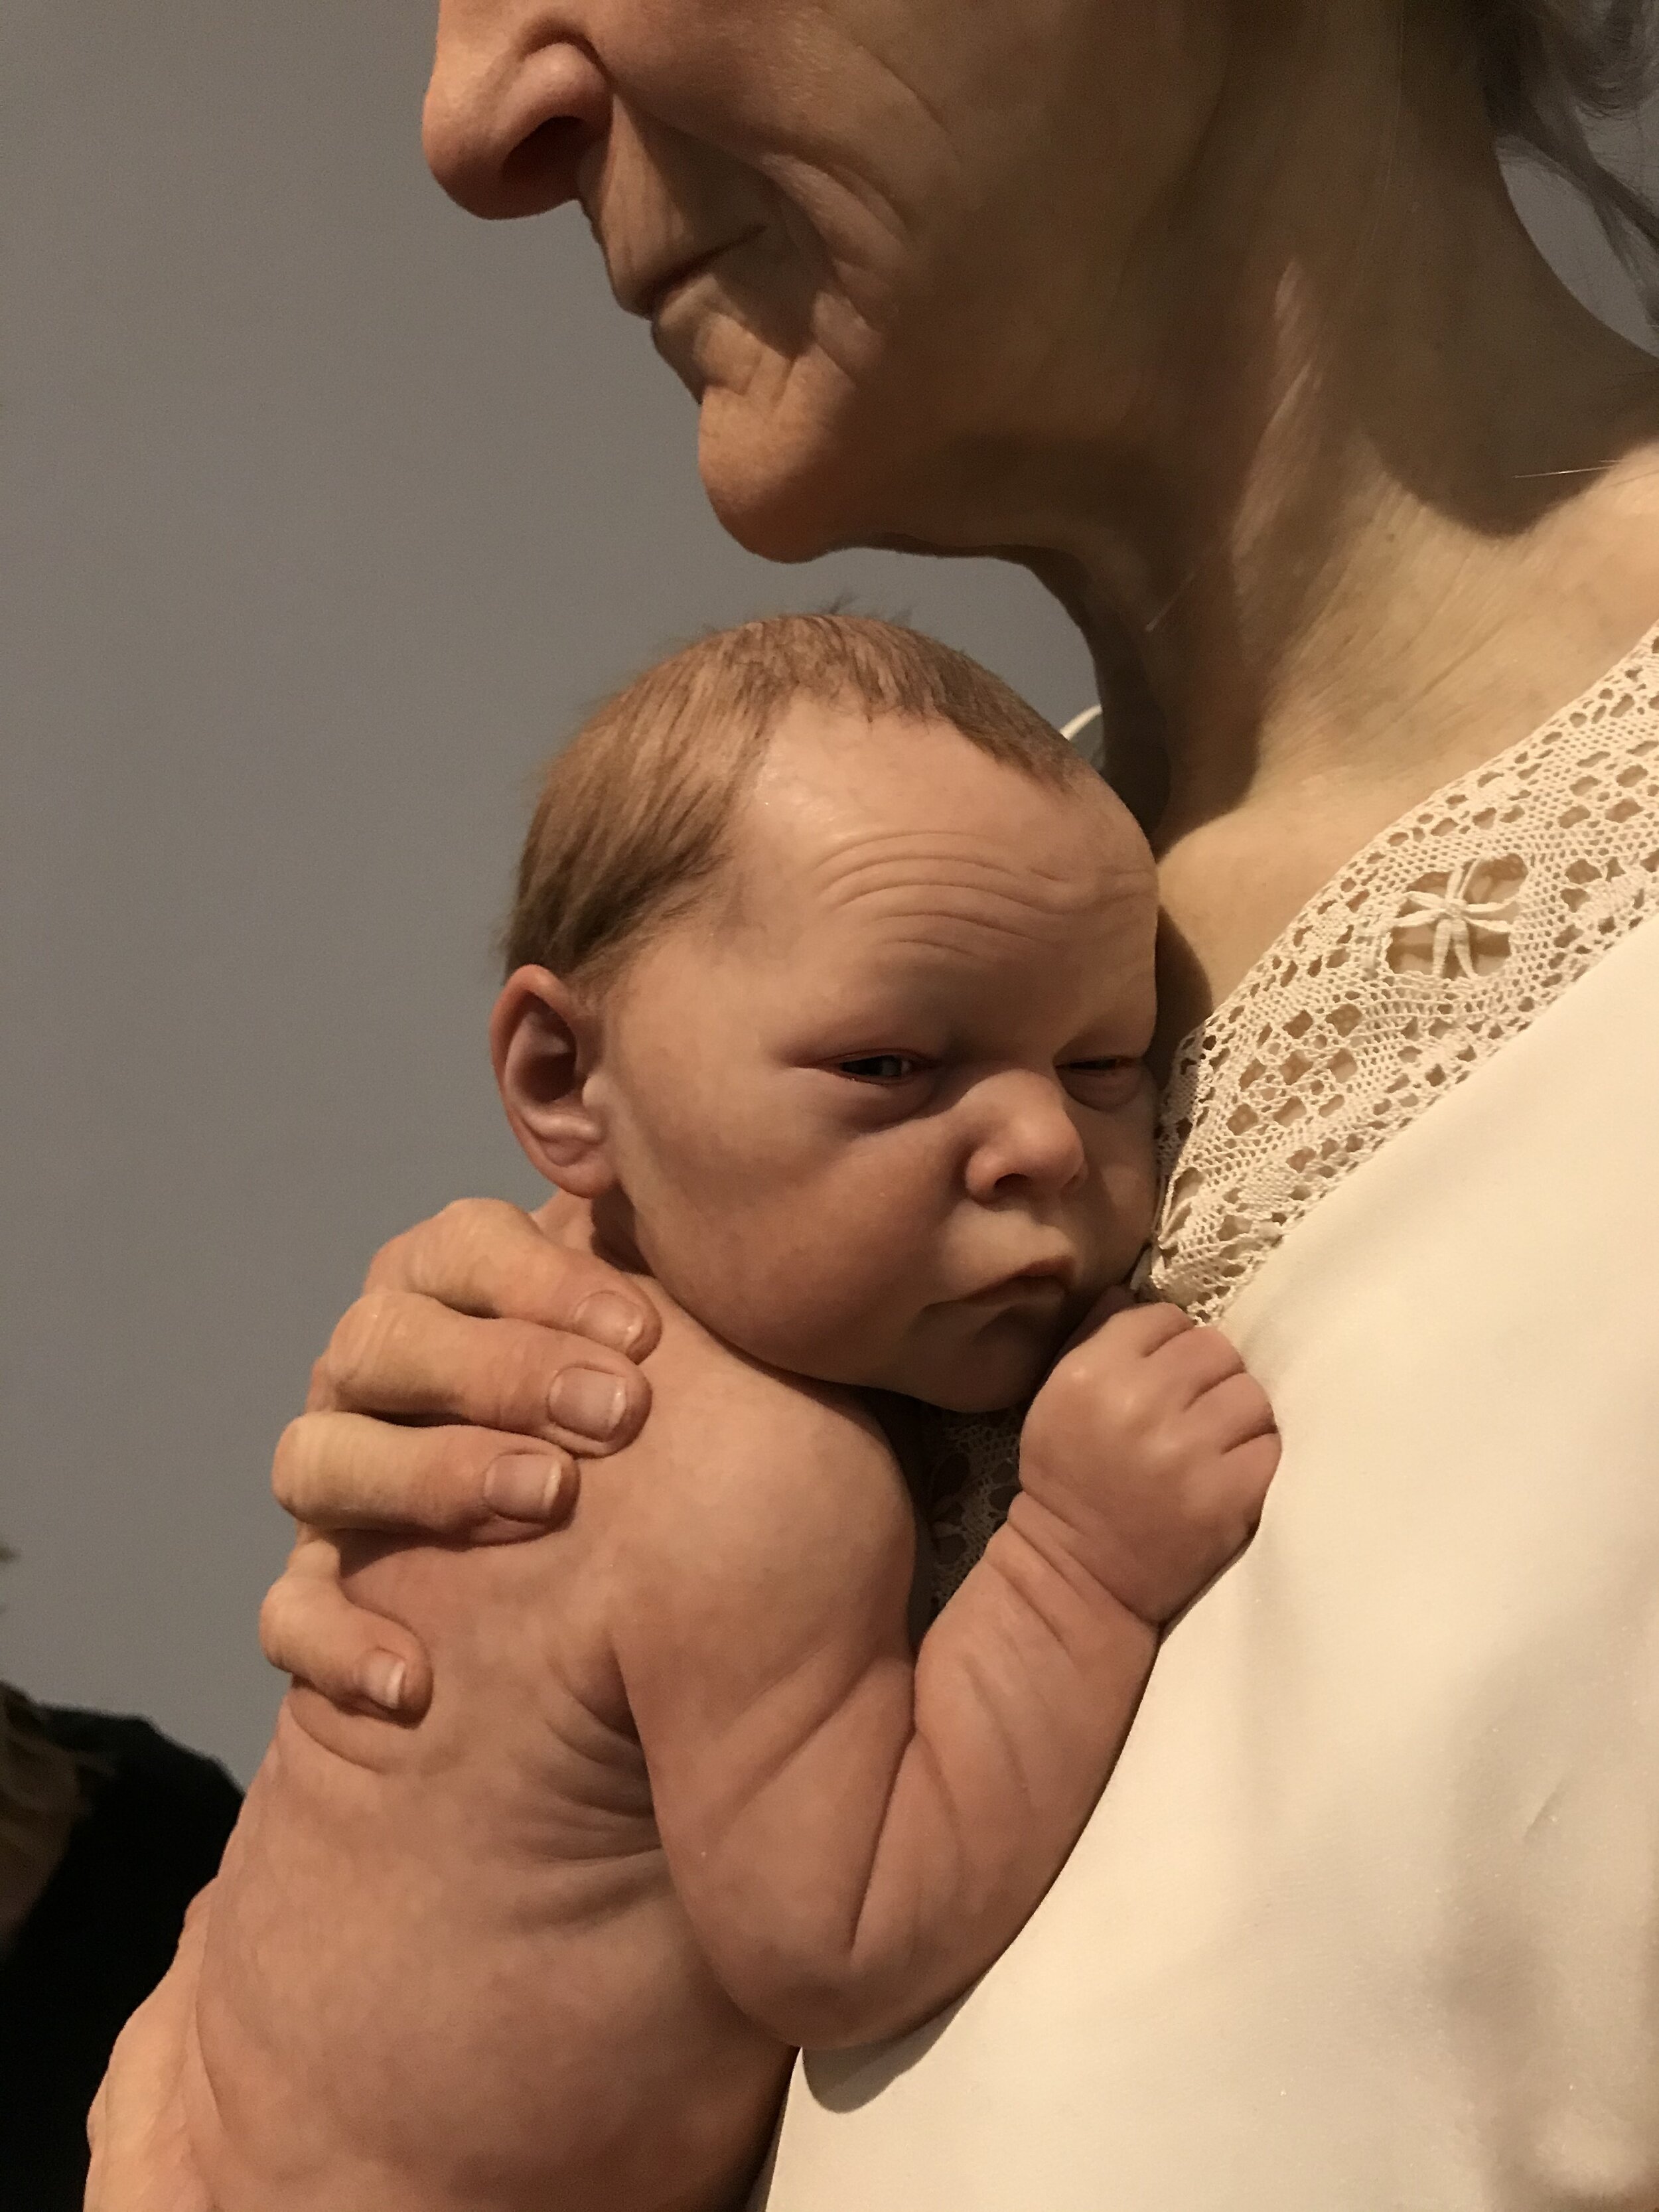
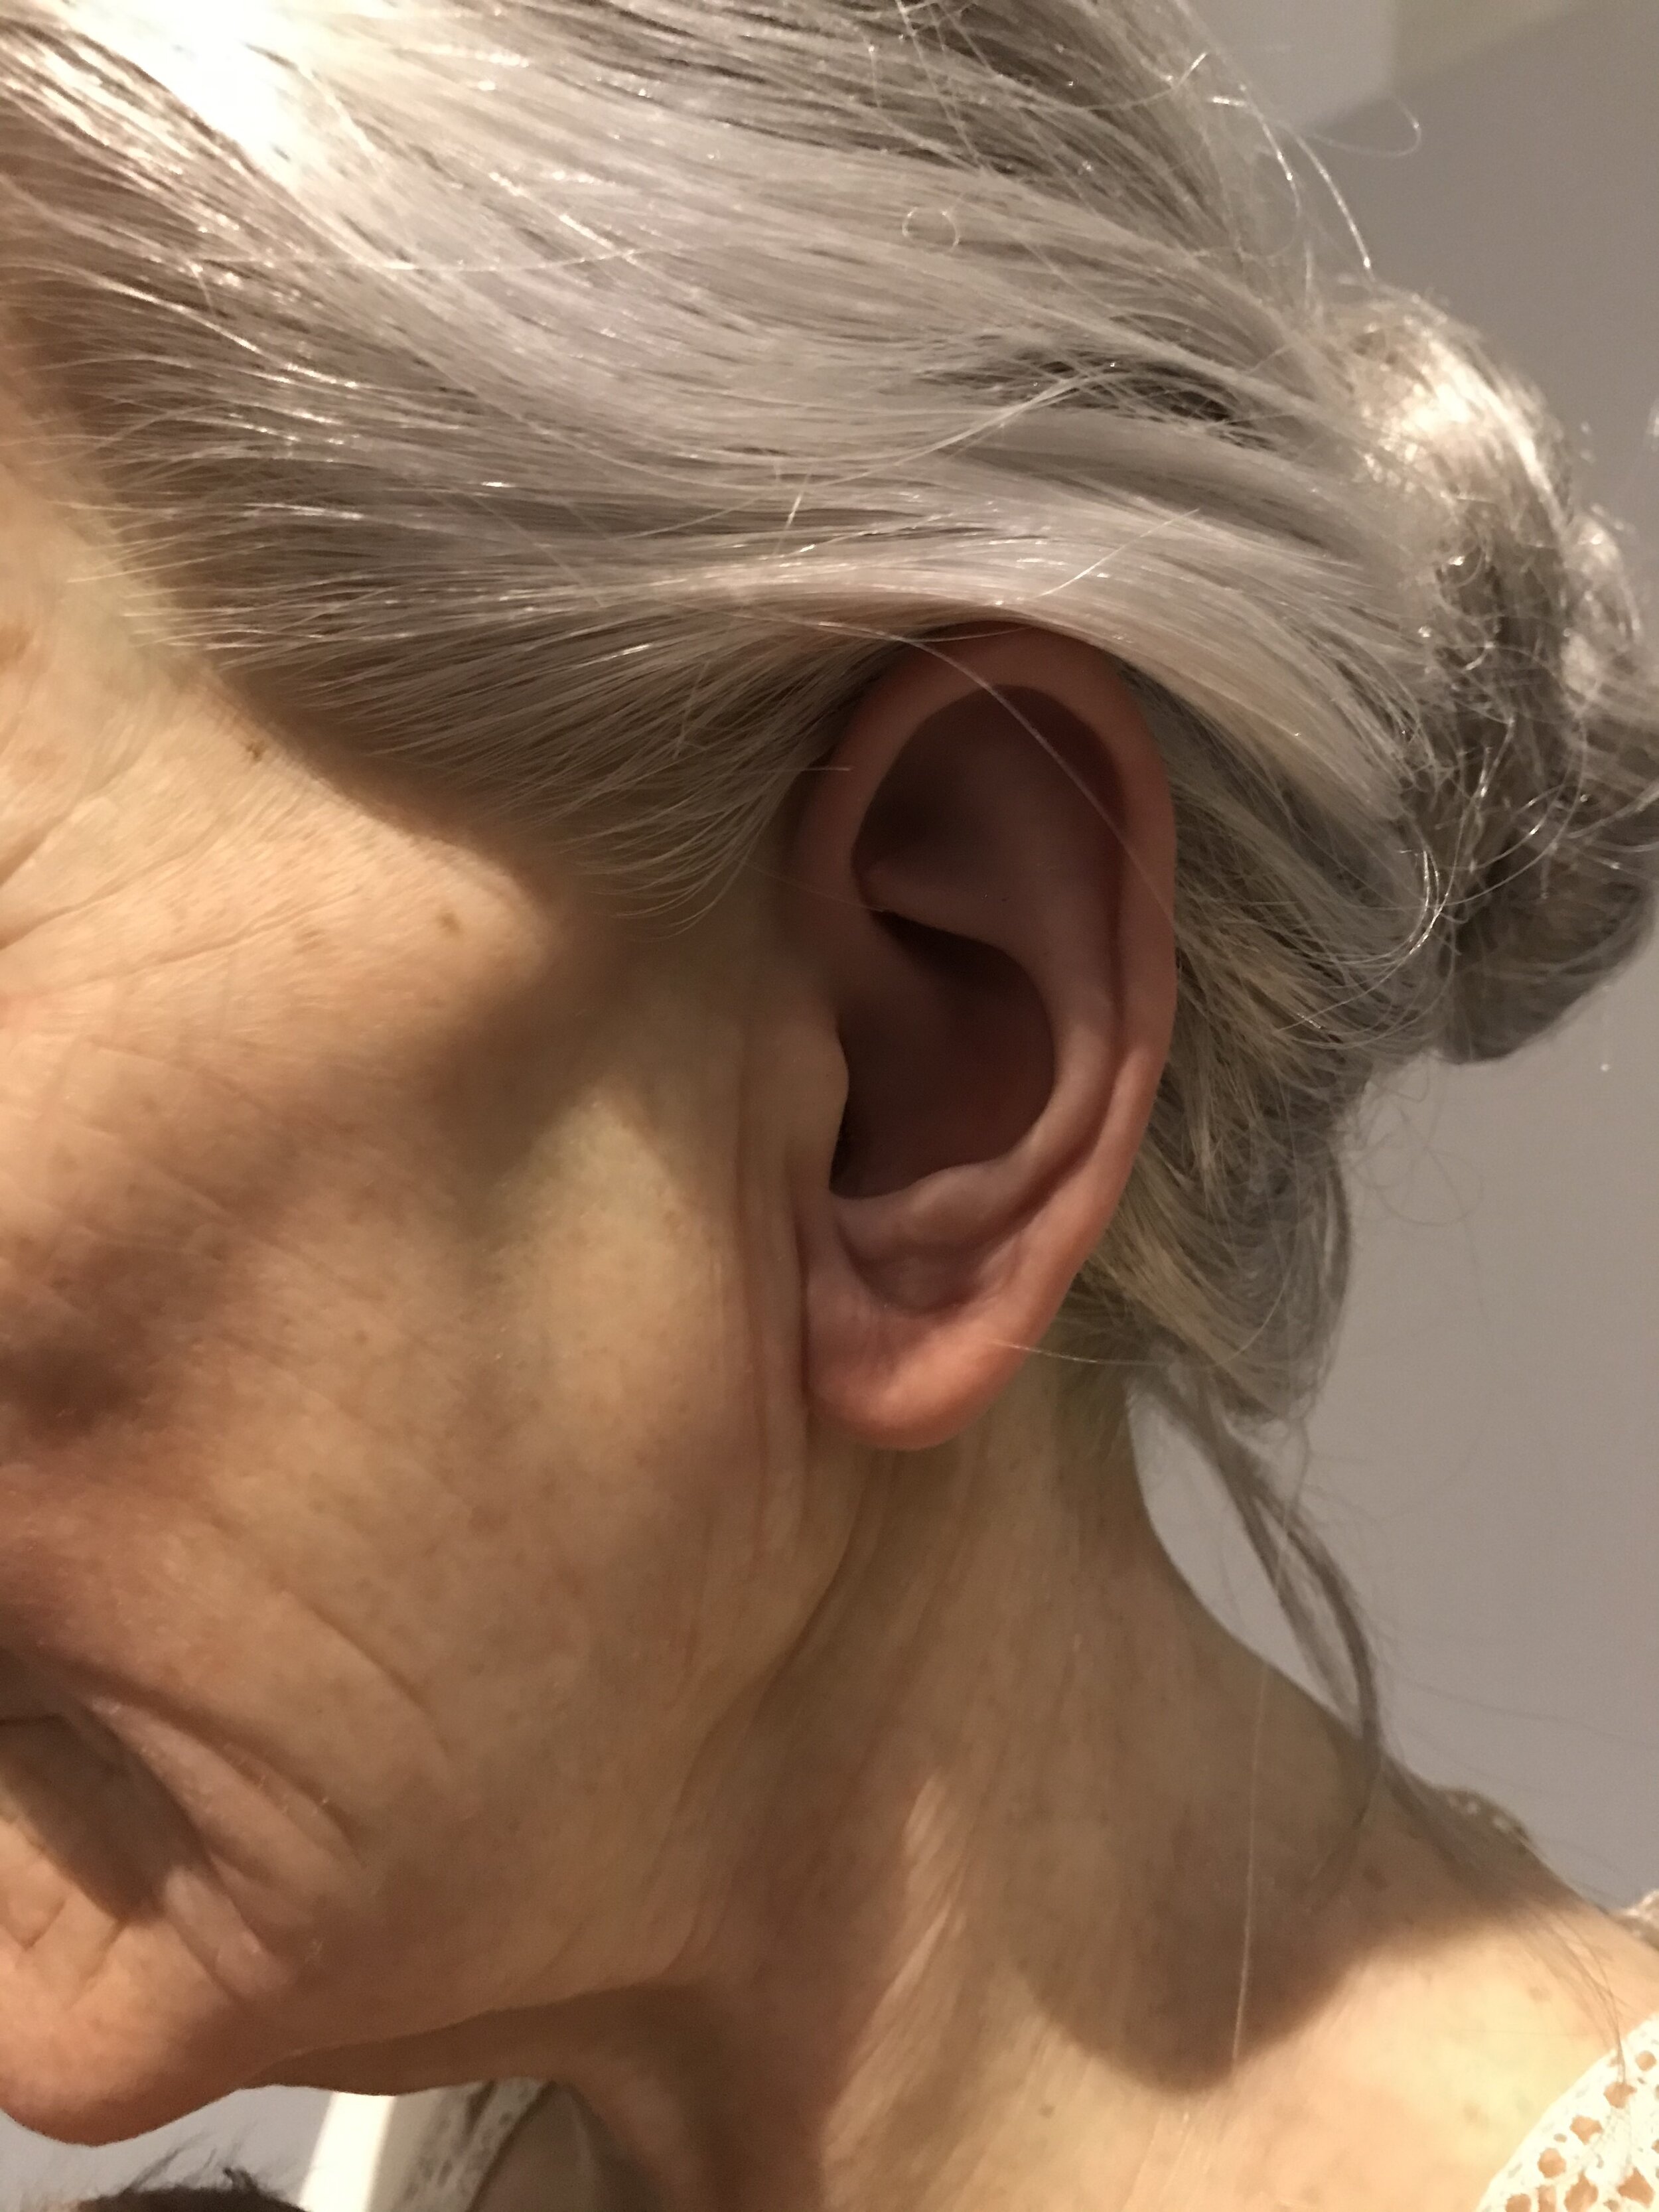

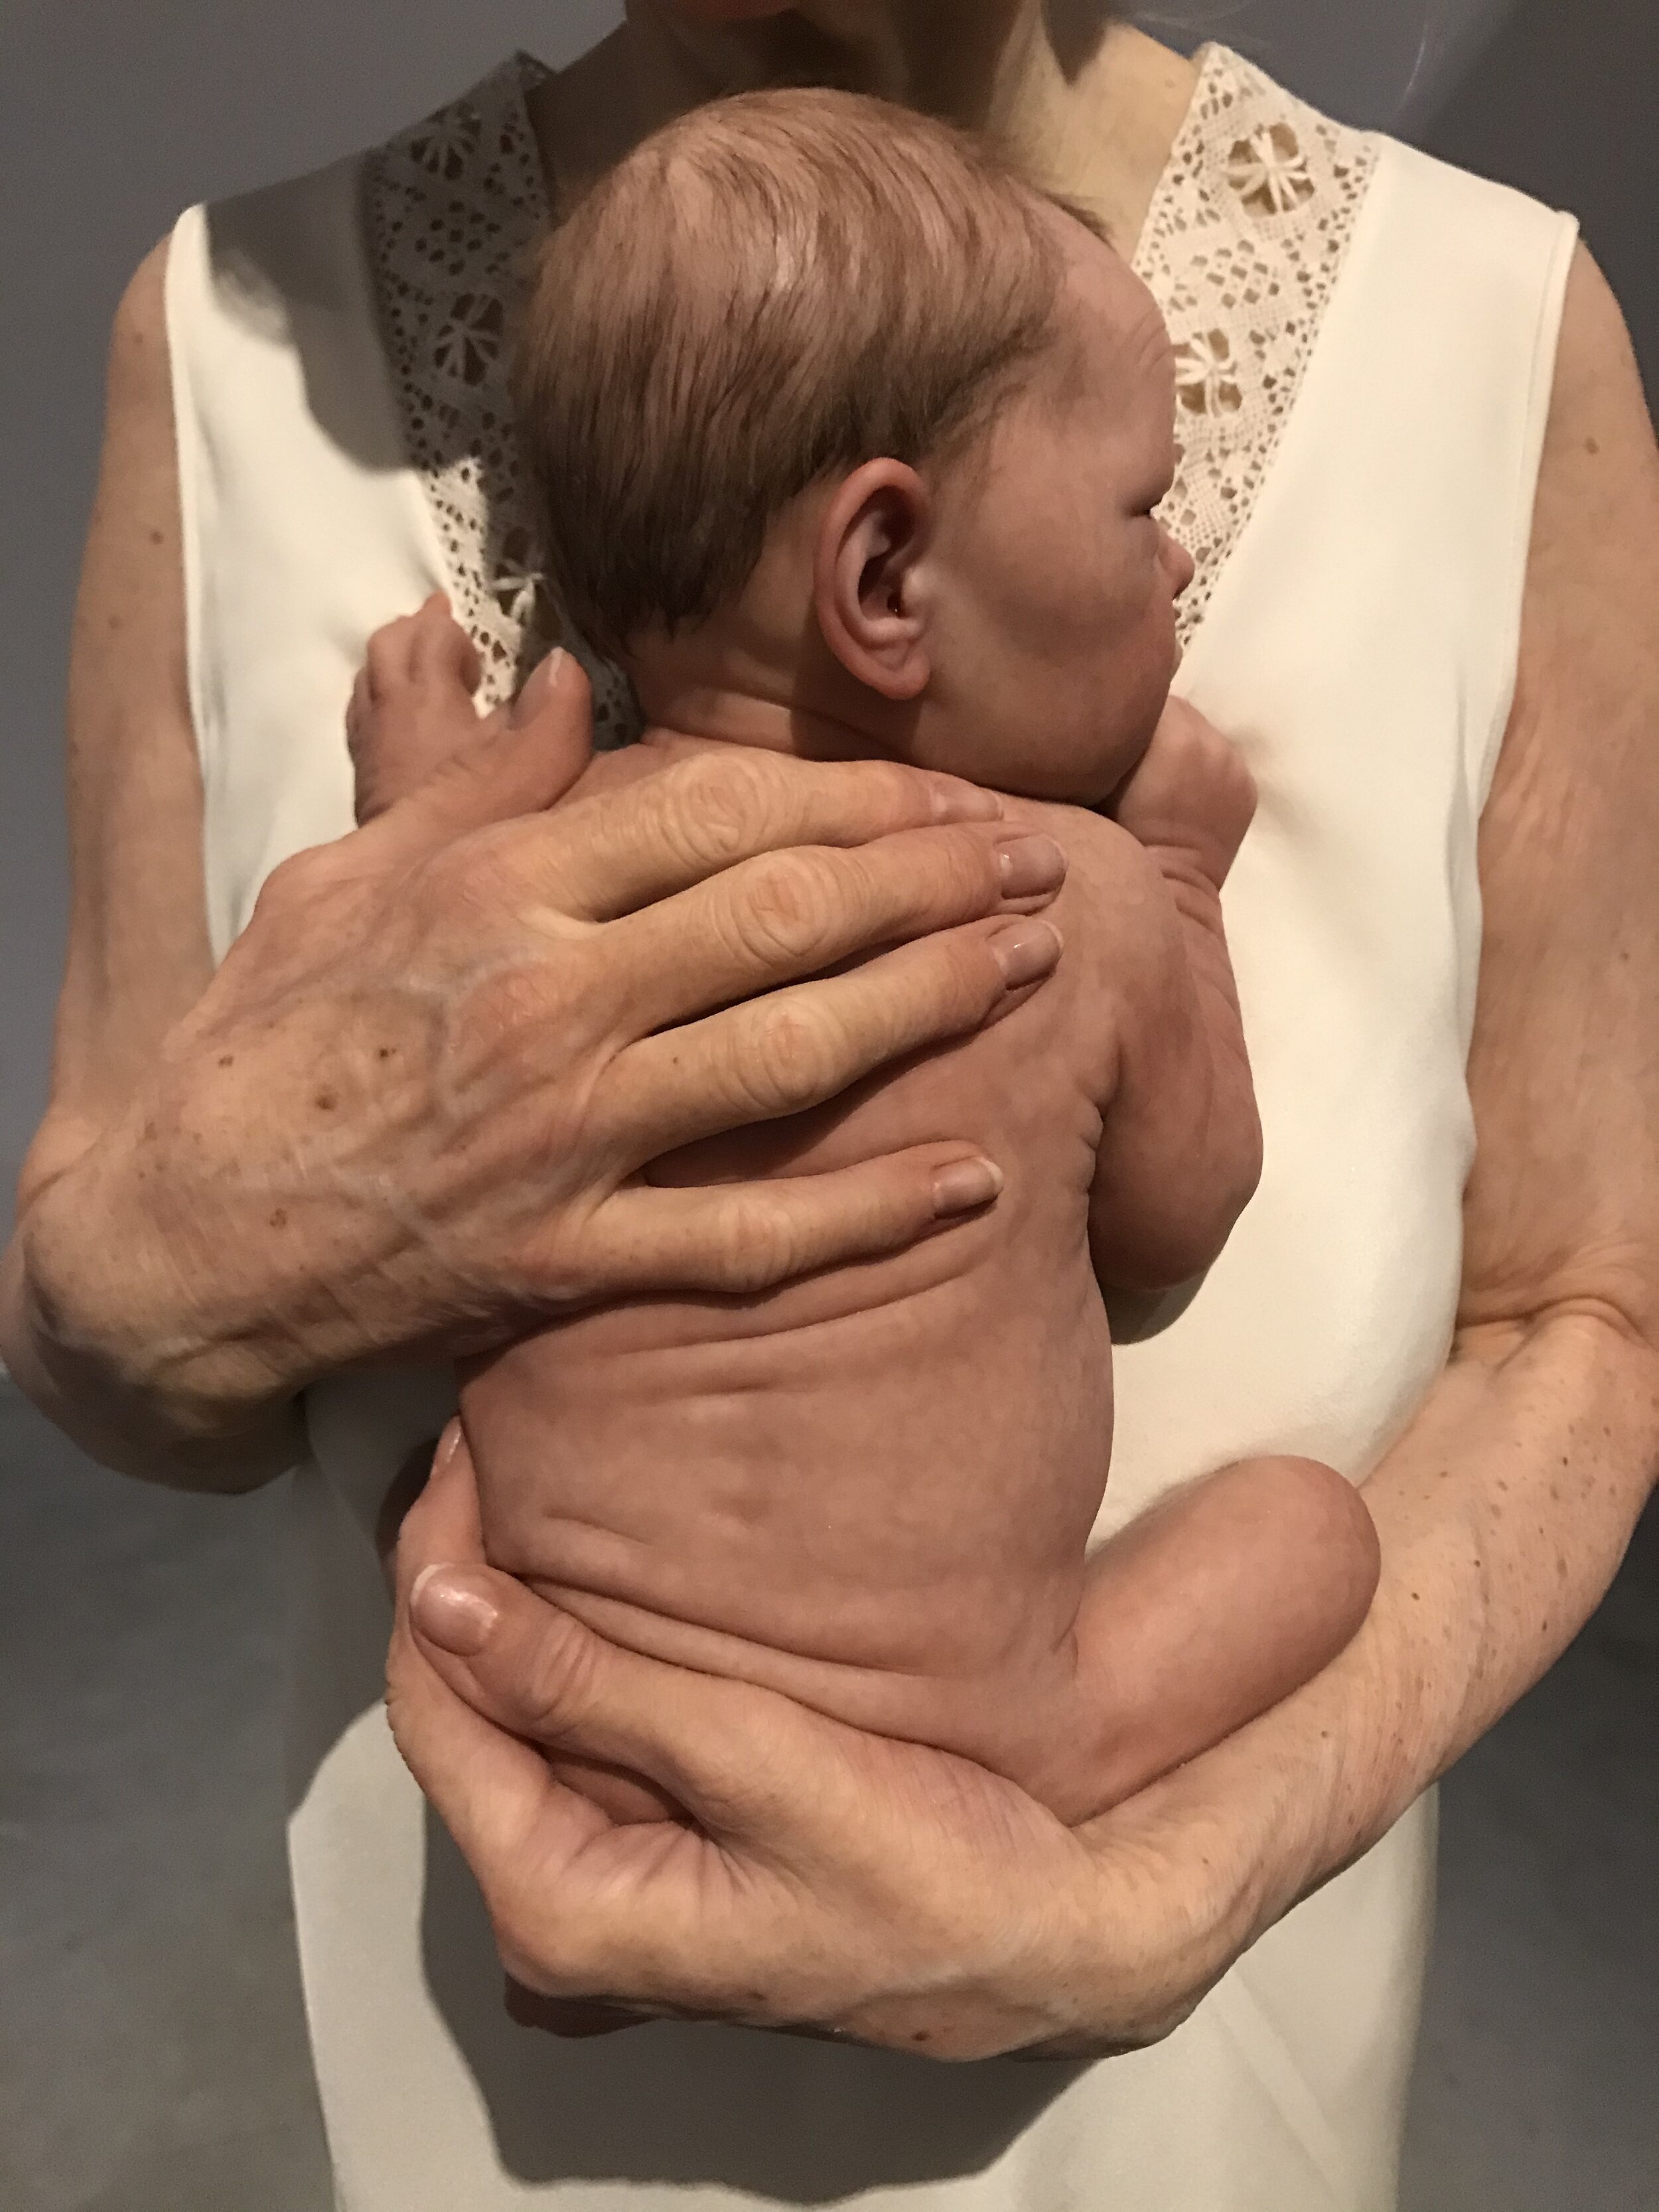
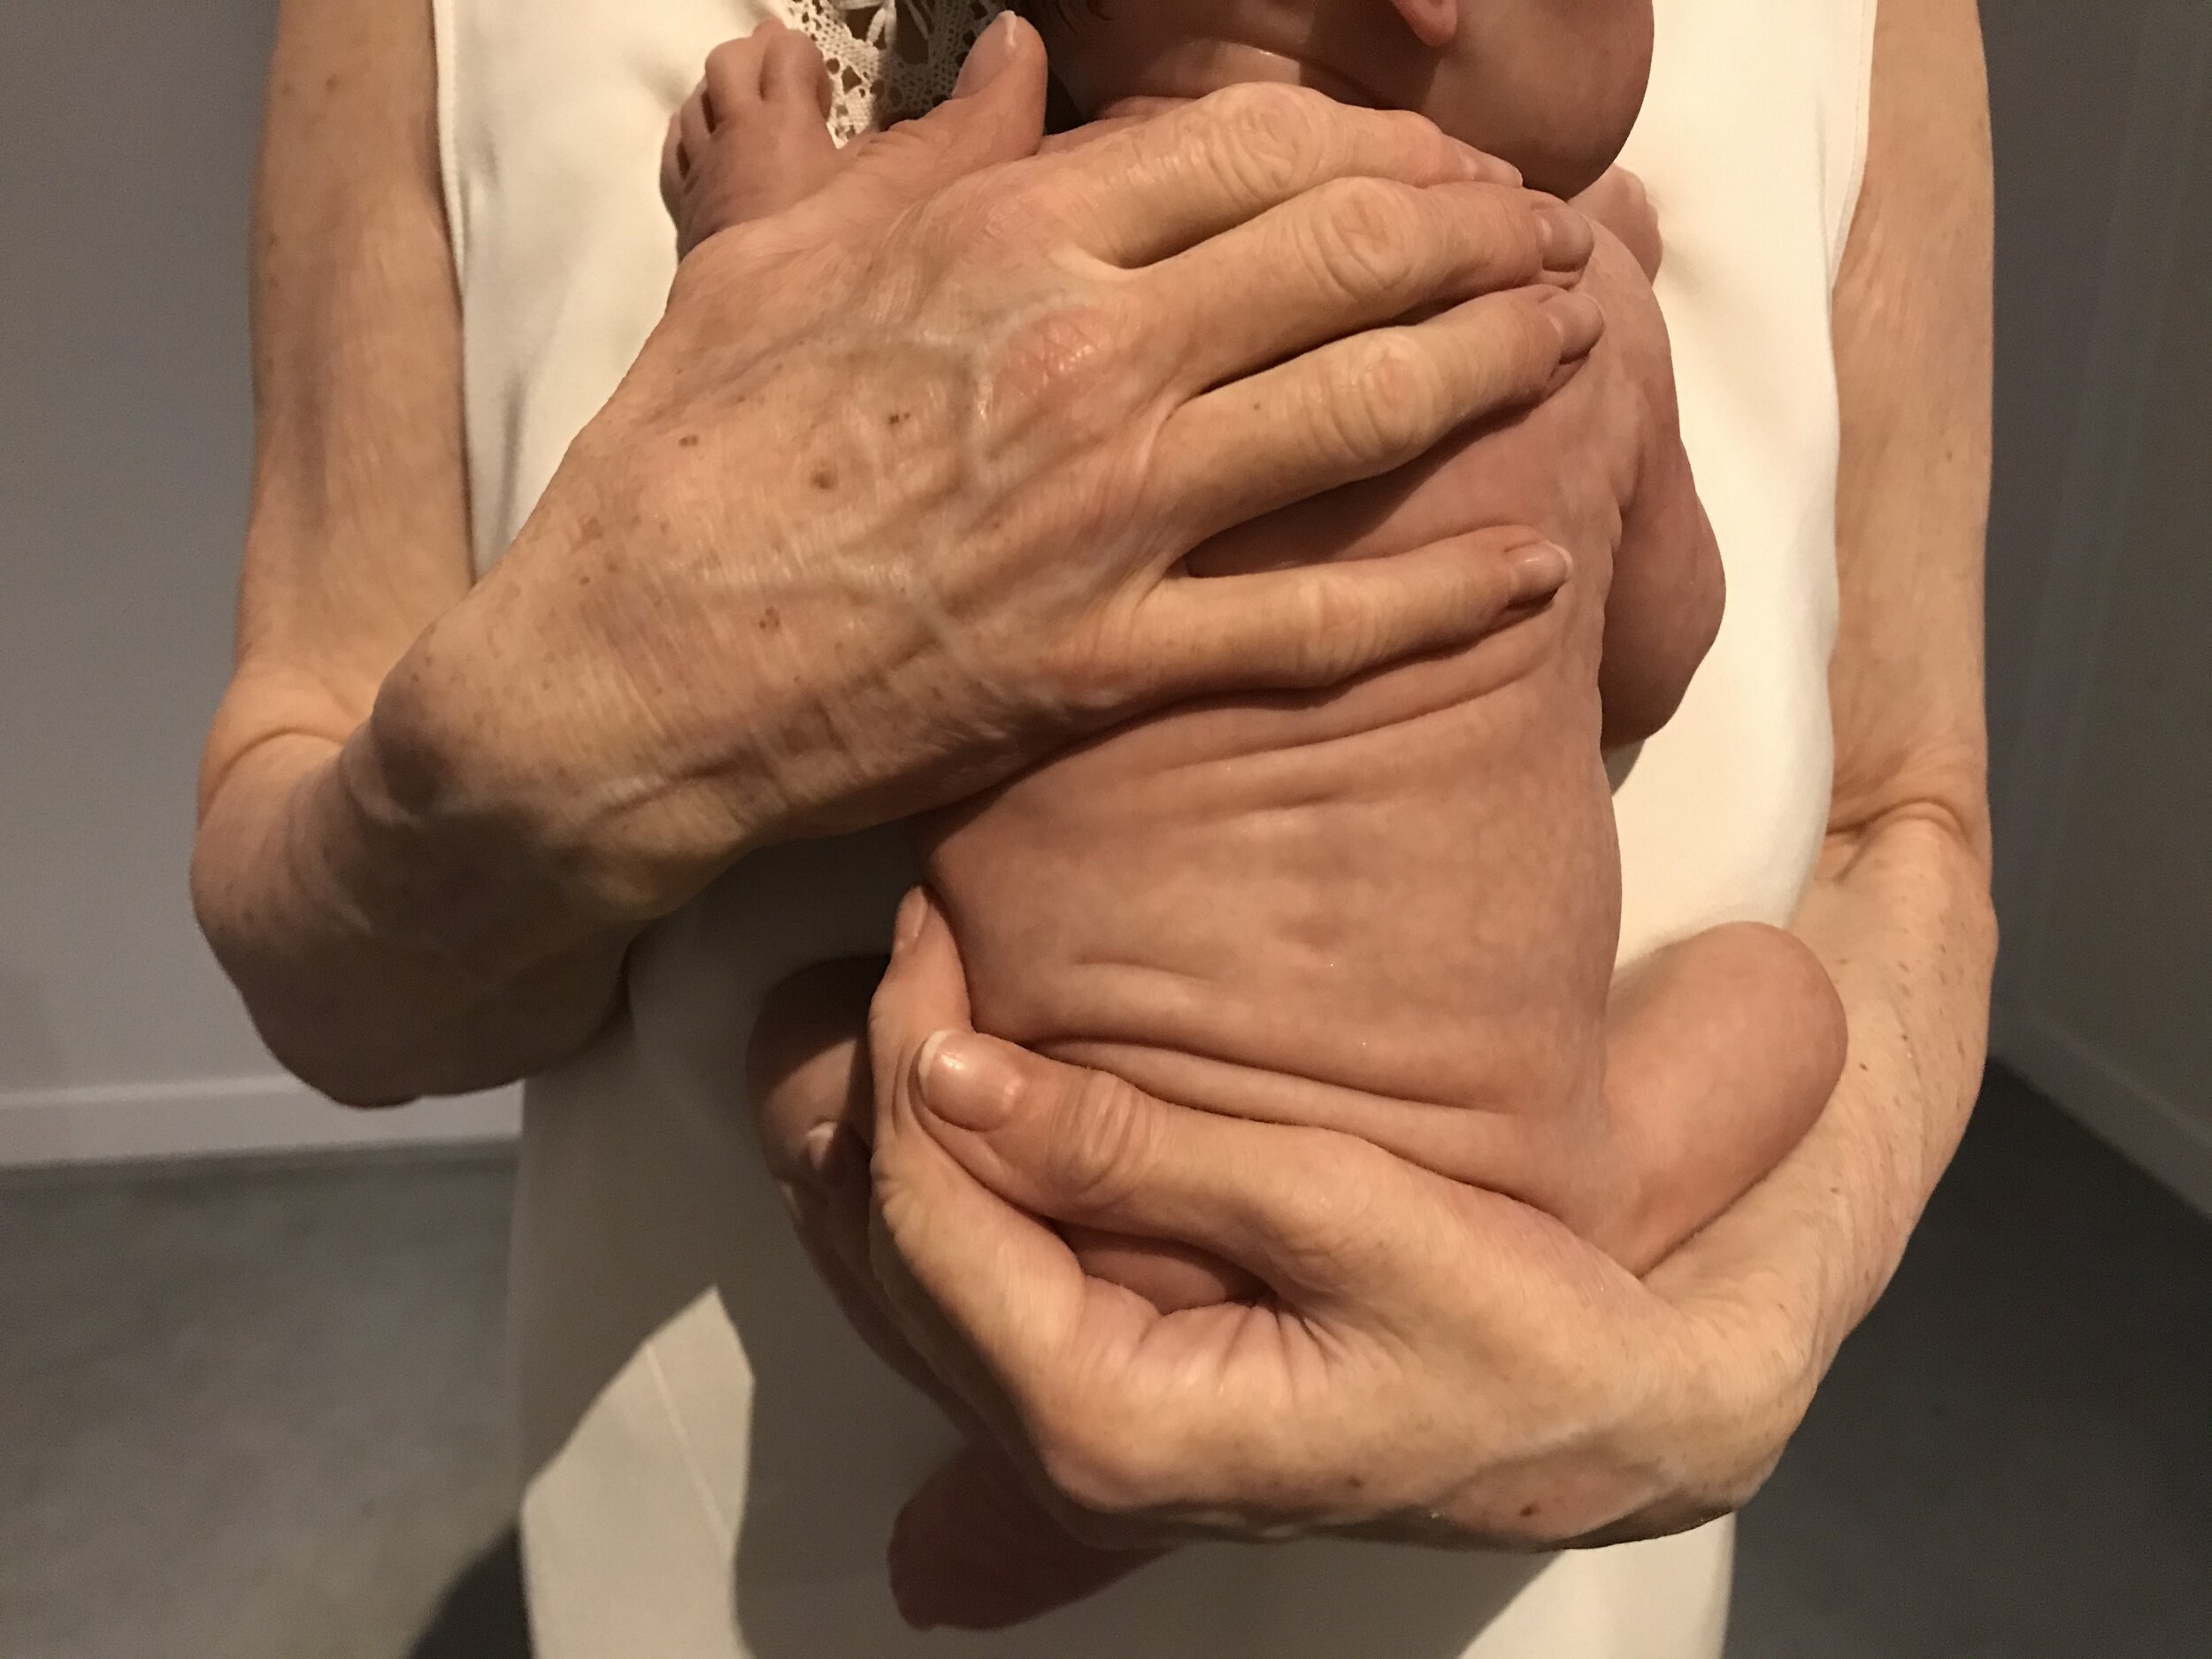
Sam Jinks - “Woman and Child”
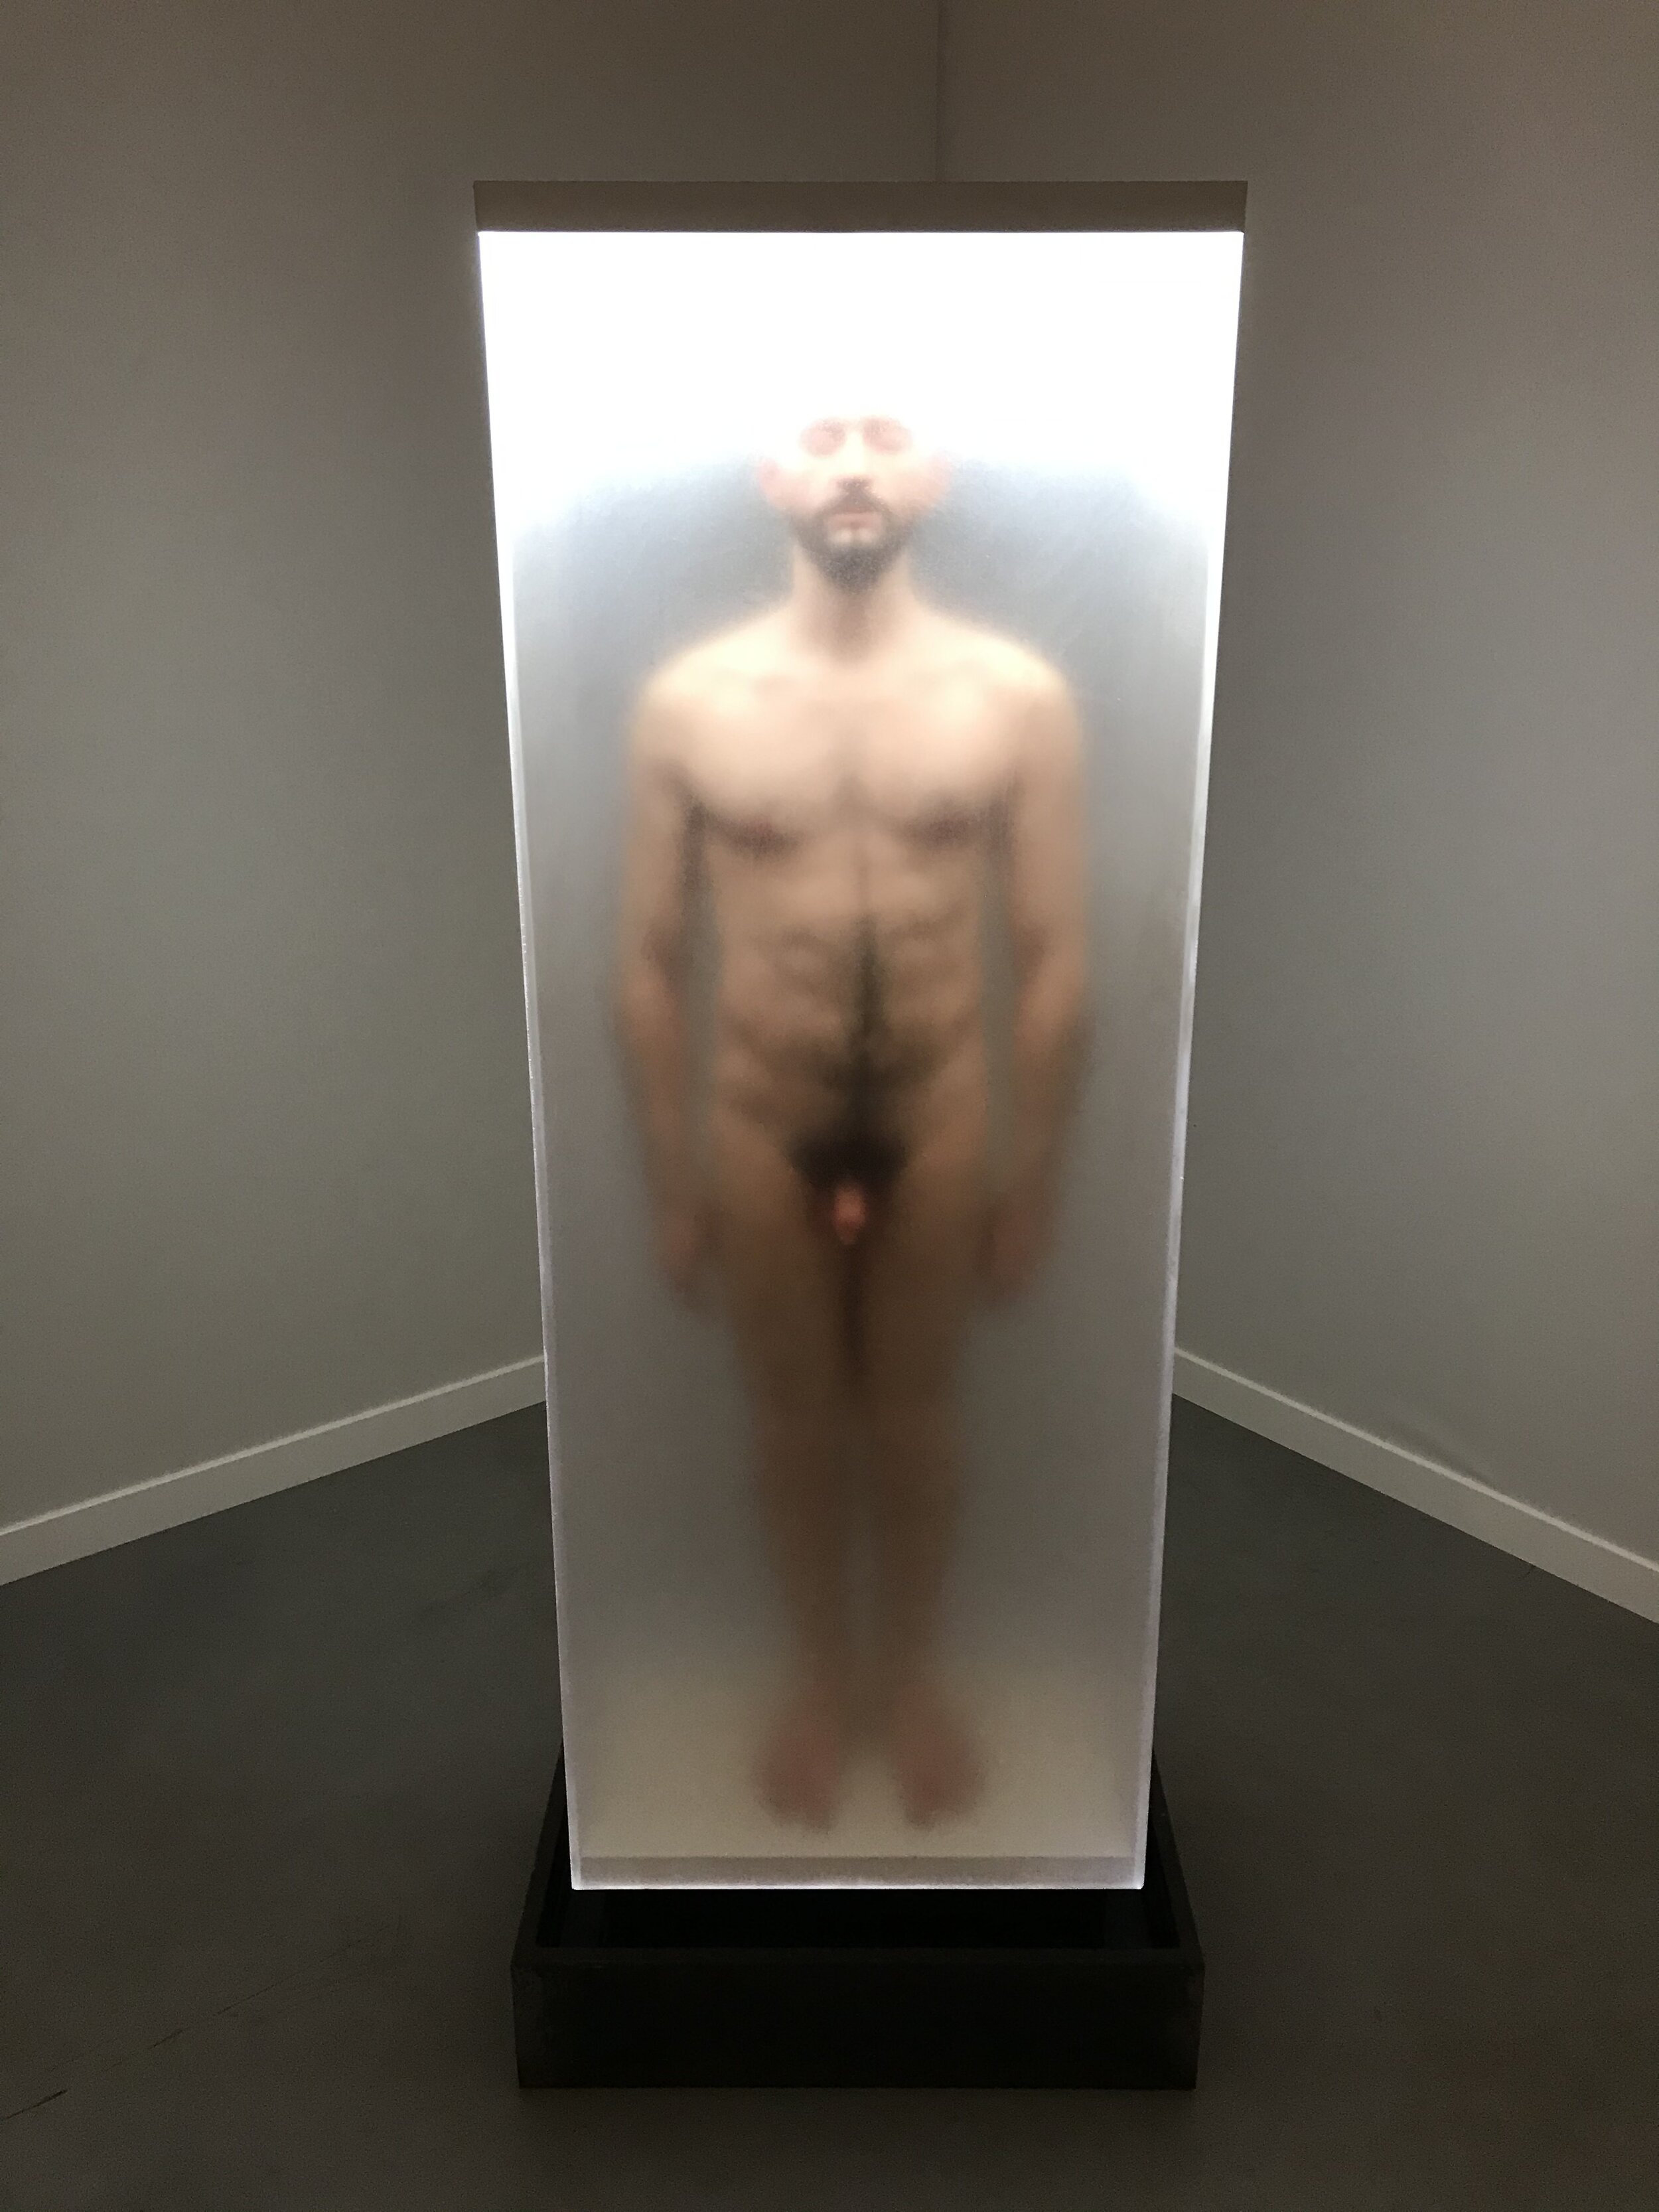
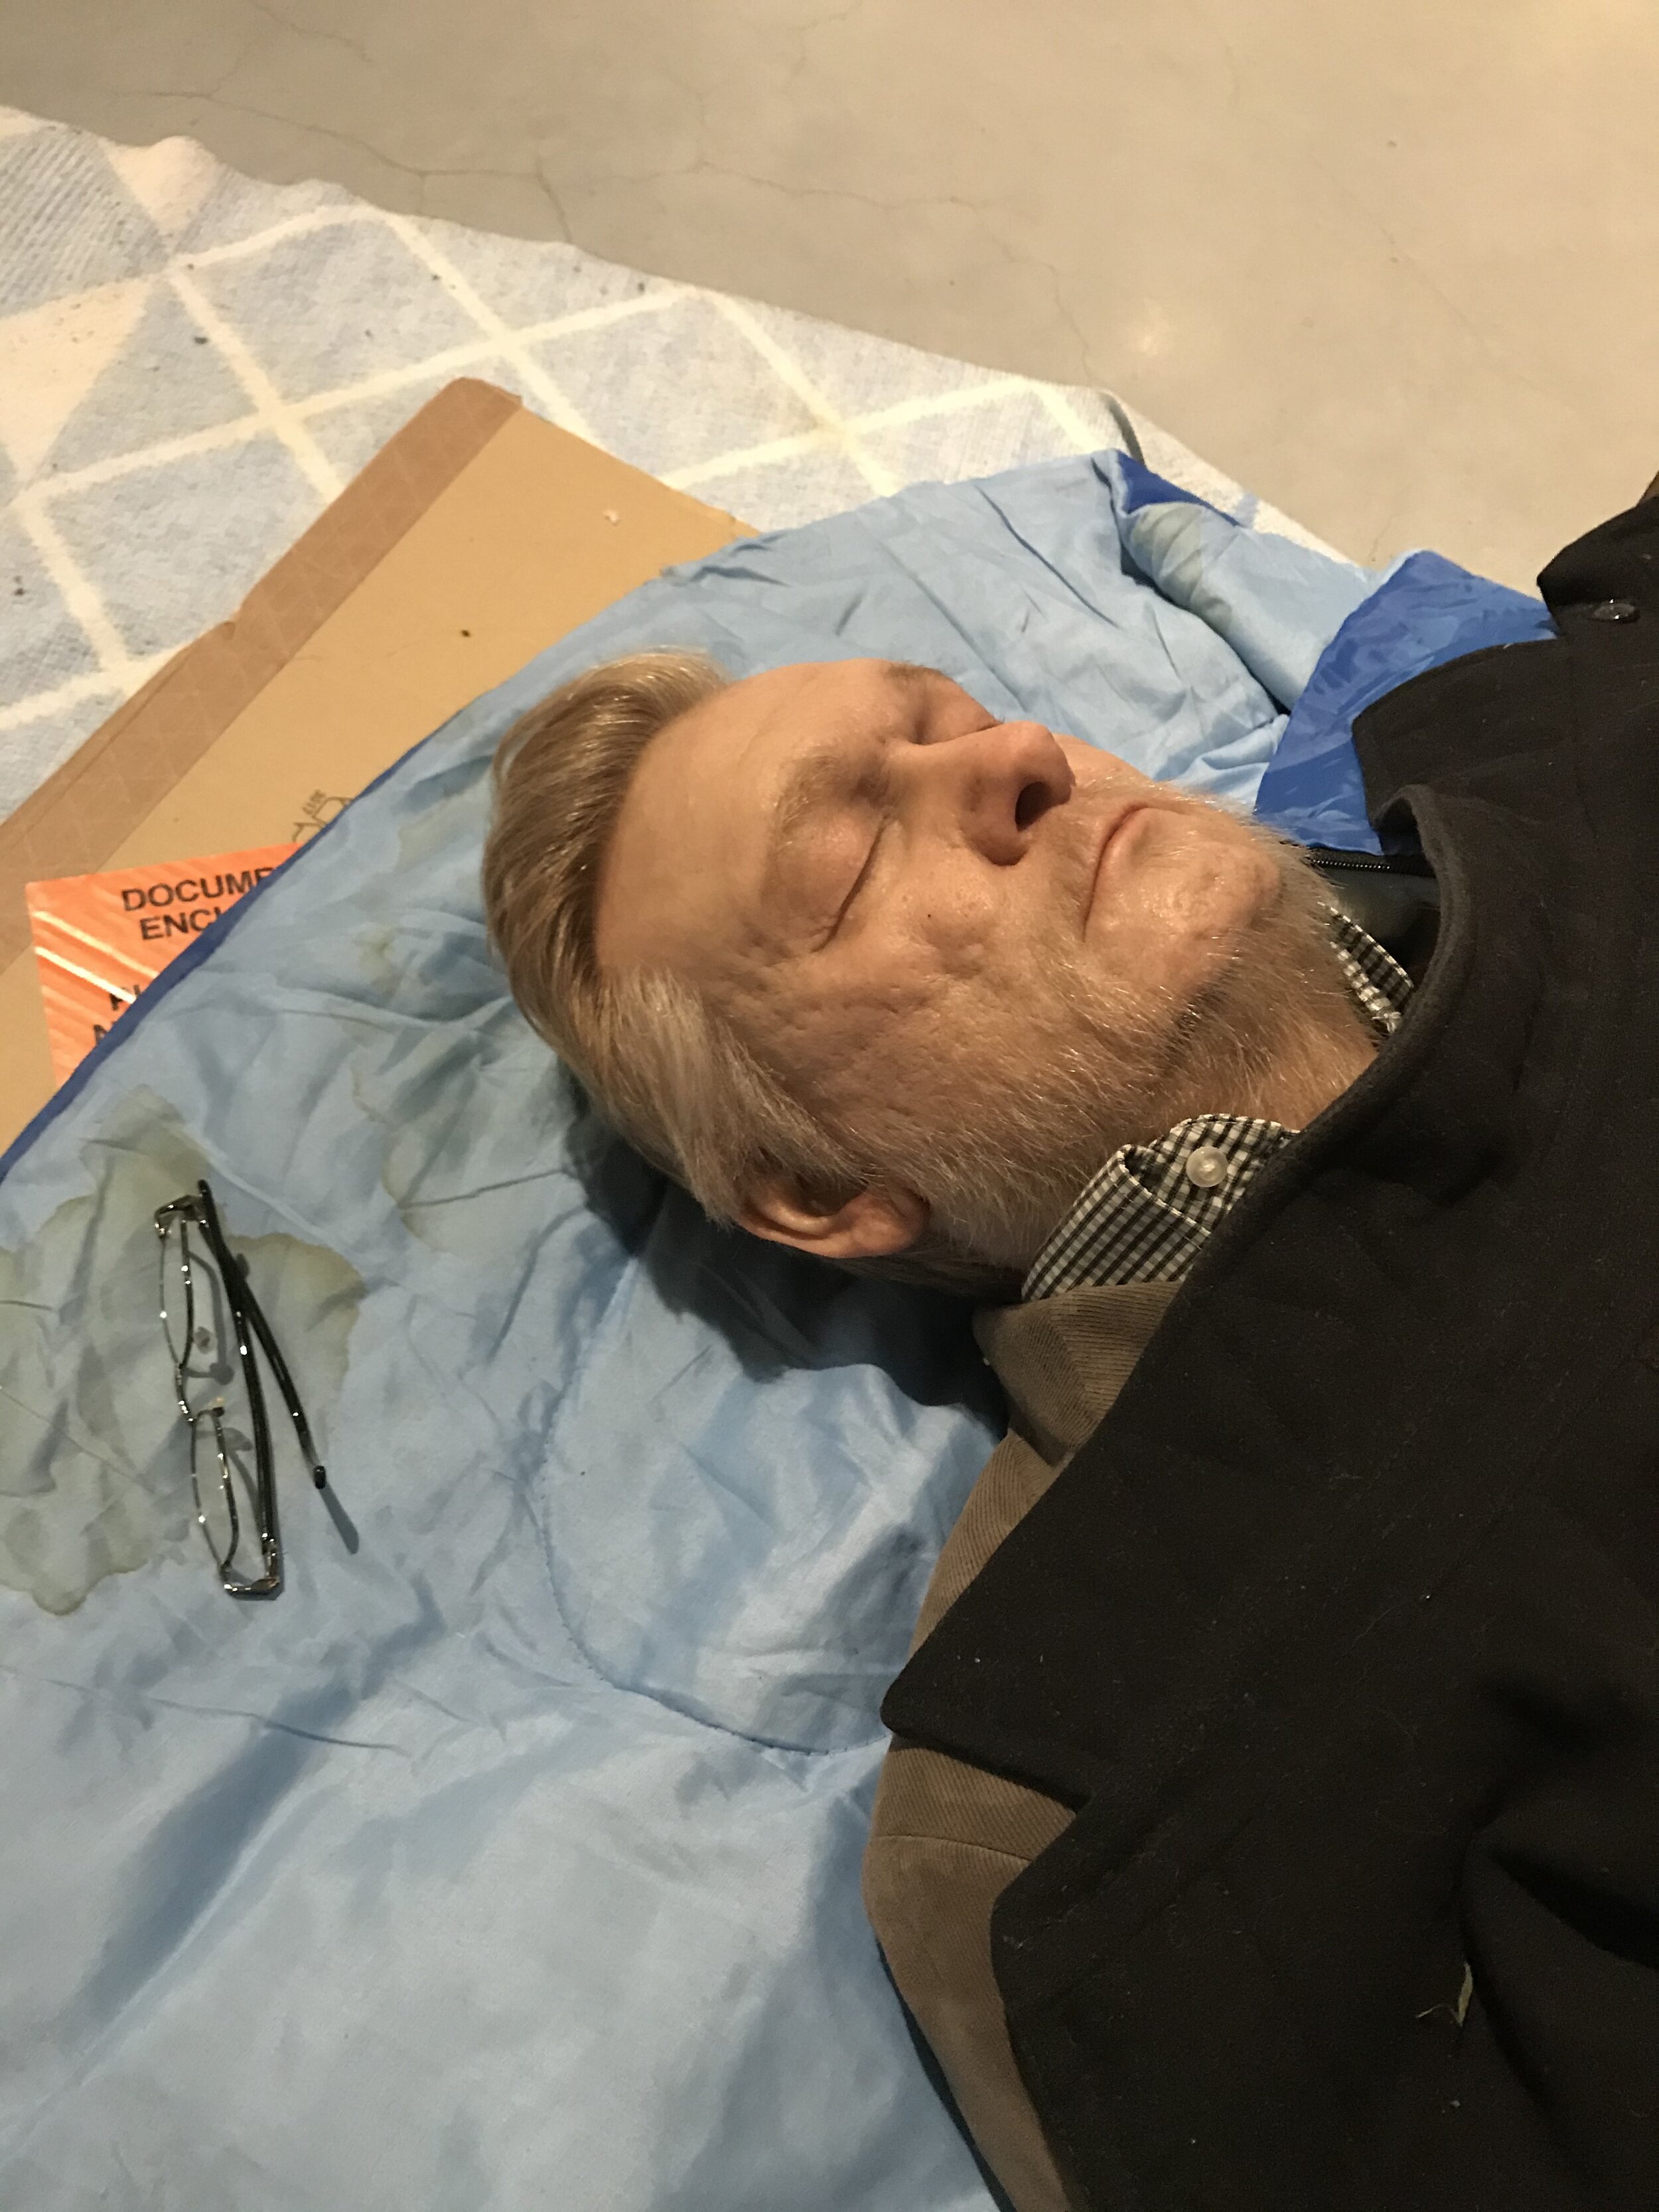
Due to the sheer size of some of the pieces on display, extrinsic coloration techniques almost seemed to be a requirement, and in most cases airbrush was the method of choice for adding color. When your entire sculpture is less than 30 grams, which is often the case with a facial prosthesis, you have the time and flexibility to play around with intrinsic methods. From a practical standpoint, the previously mentioned intrinsic painting methods wouldn’t really be feasible for something like the larger-than-life busts by Kazu Hiro. Instead, focusing on matching an accurate base silicone with the proper opacity is likely the best option, as it creates a solid foundation which can then be painted extrinsically, in full detail.
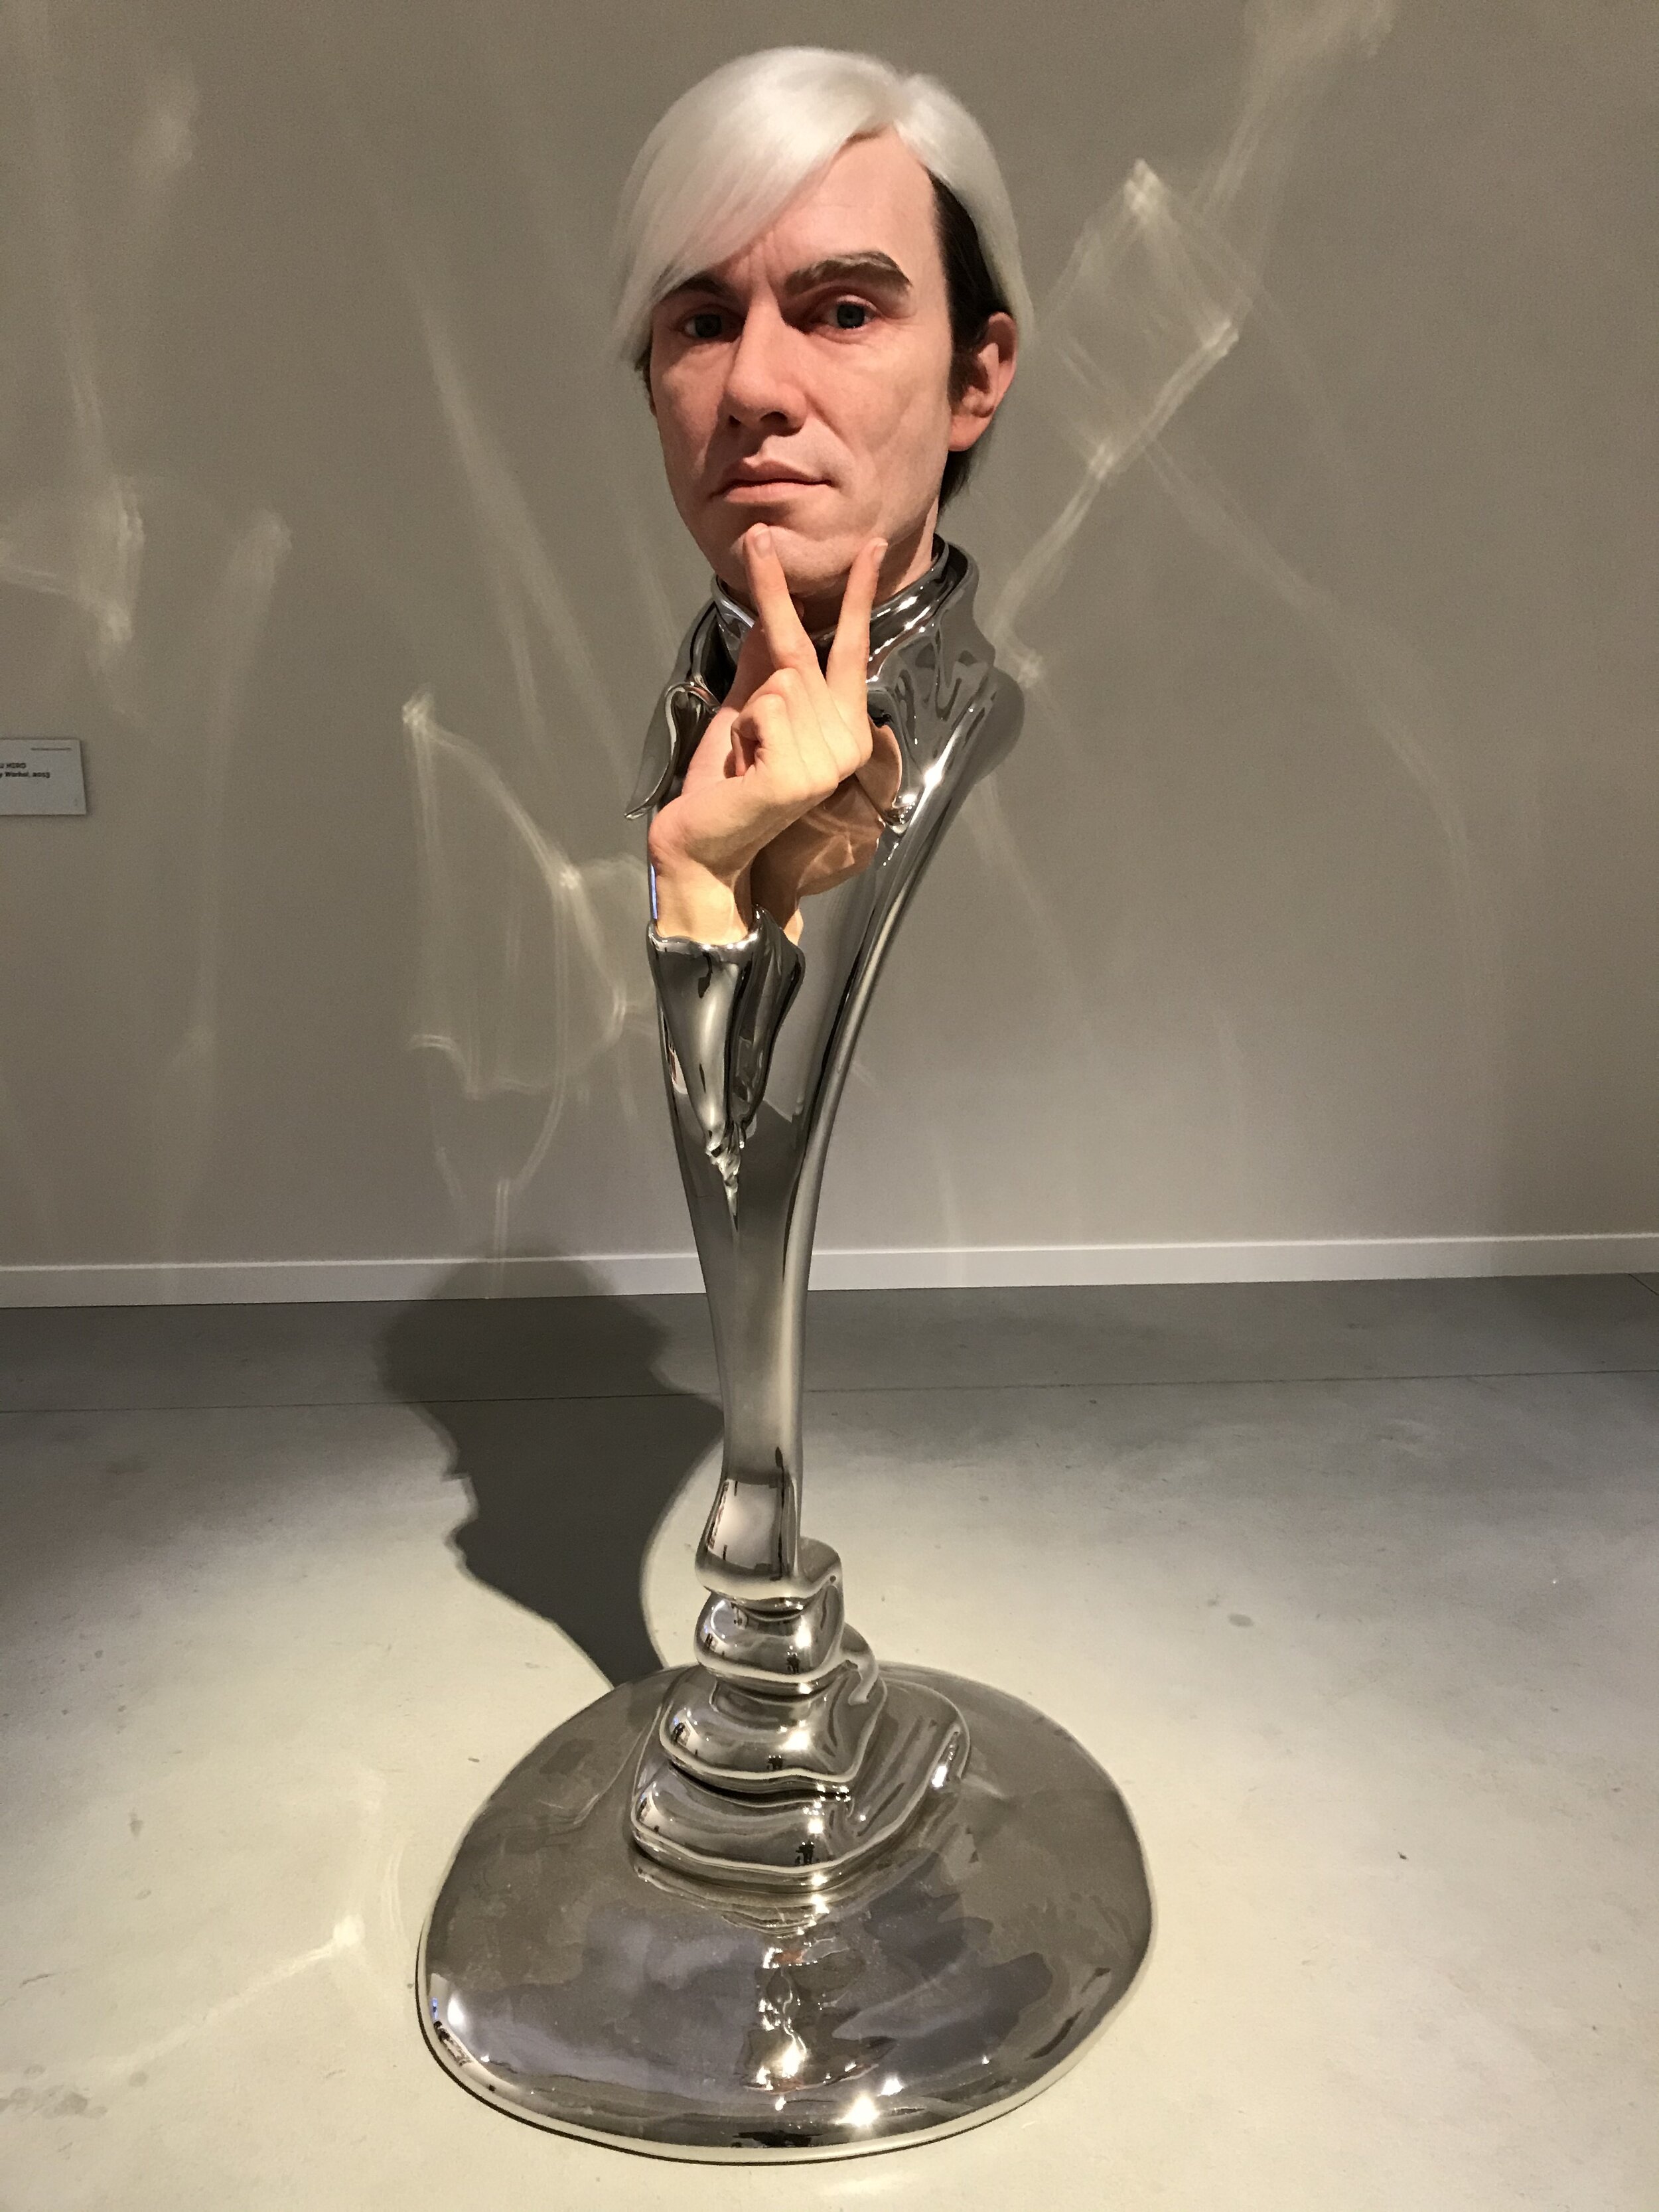
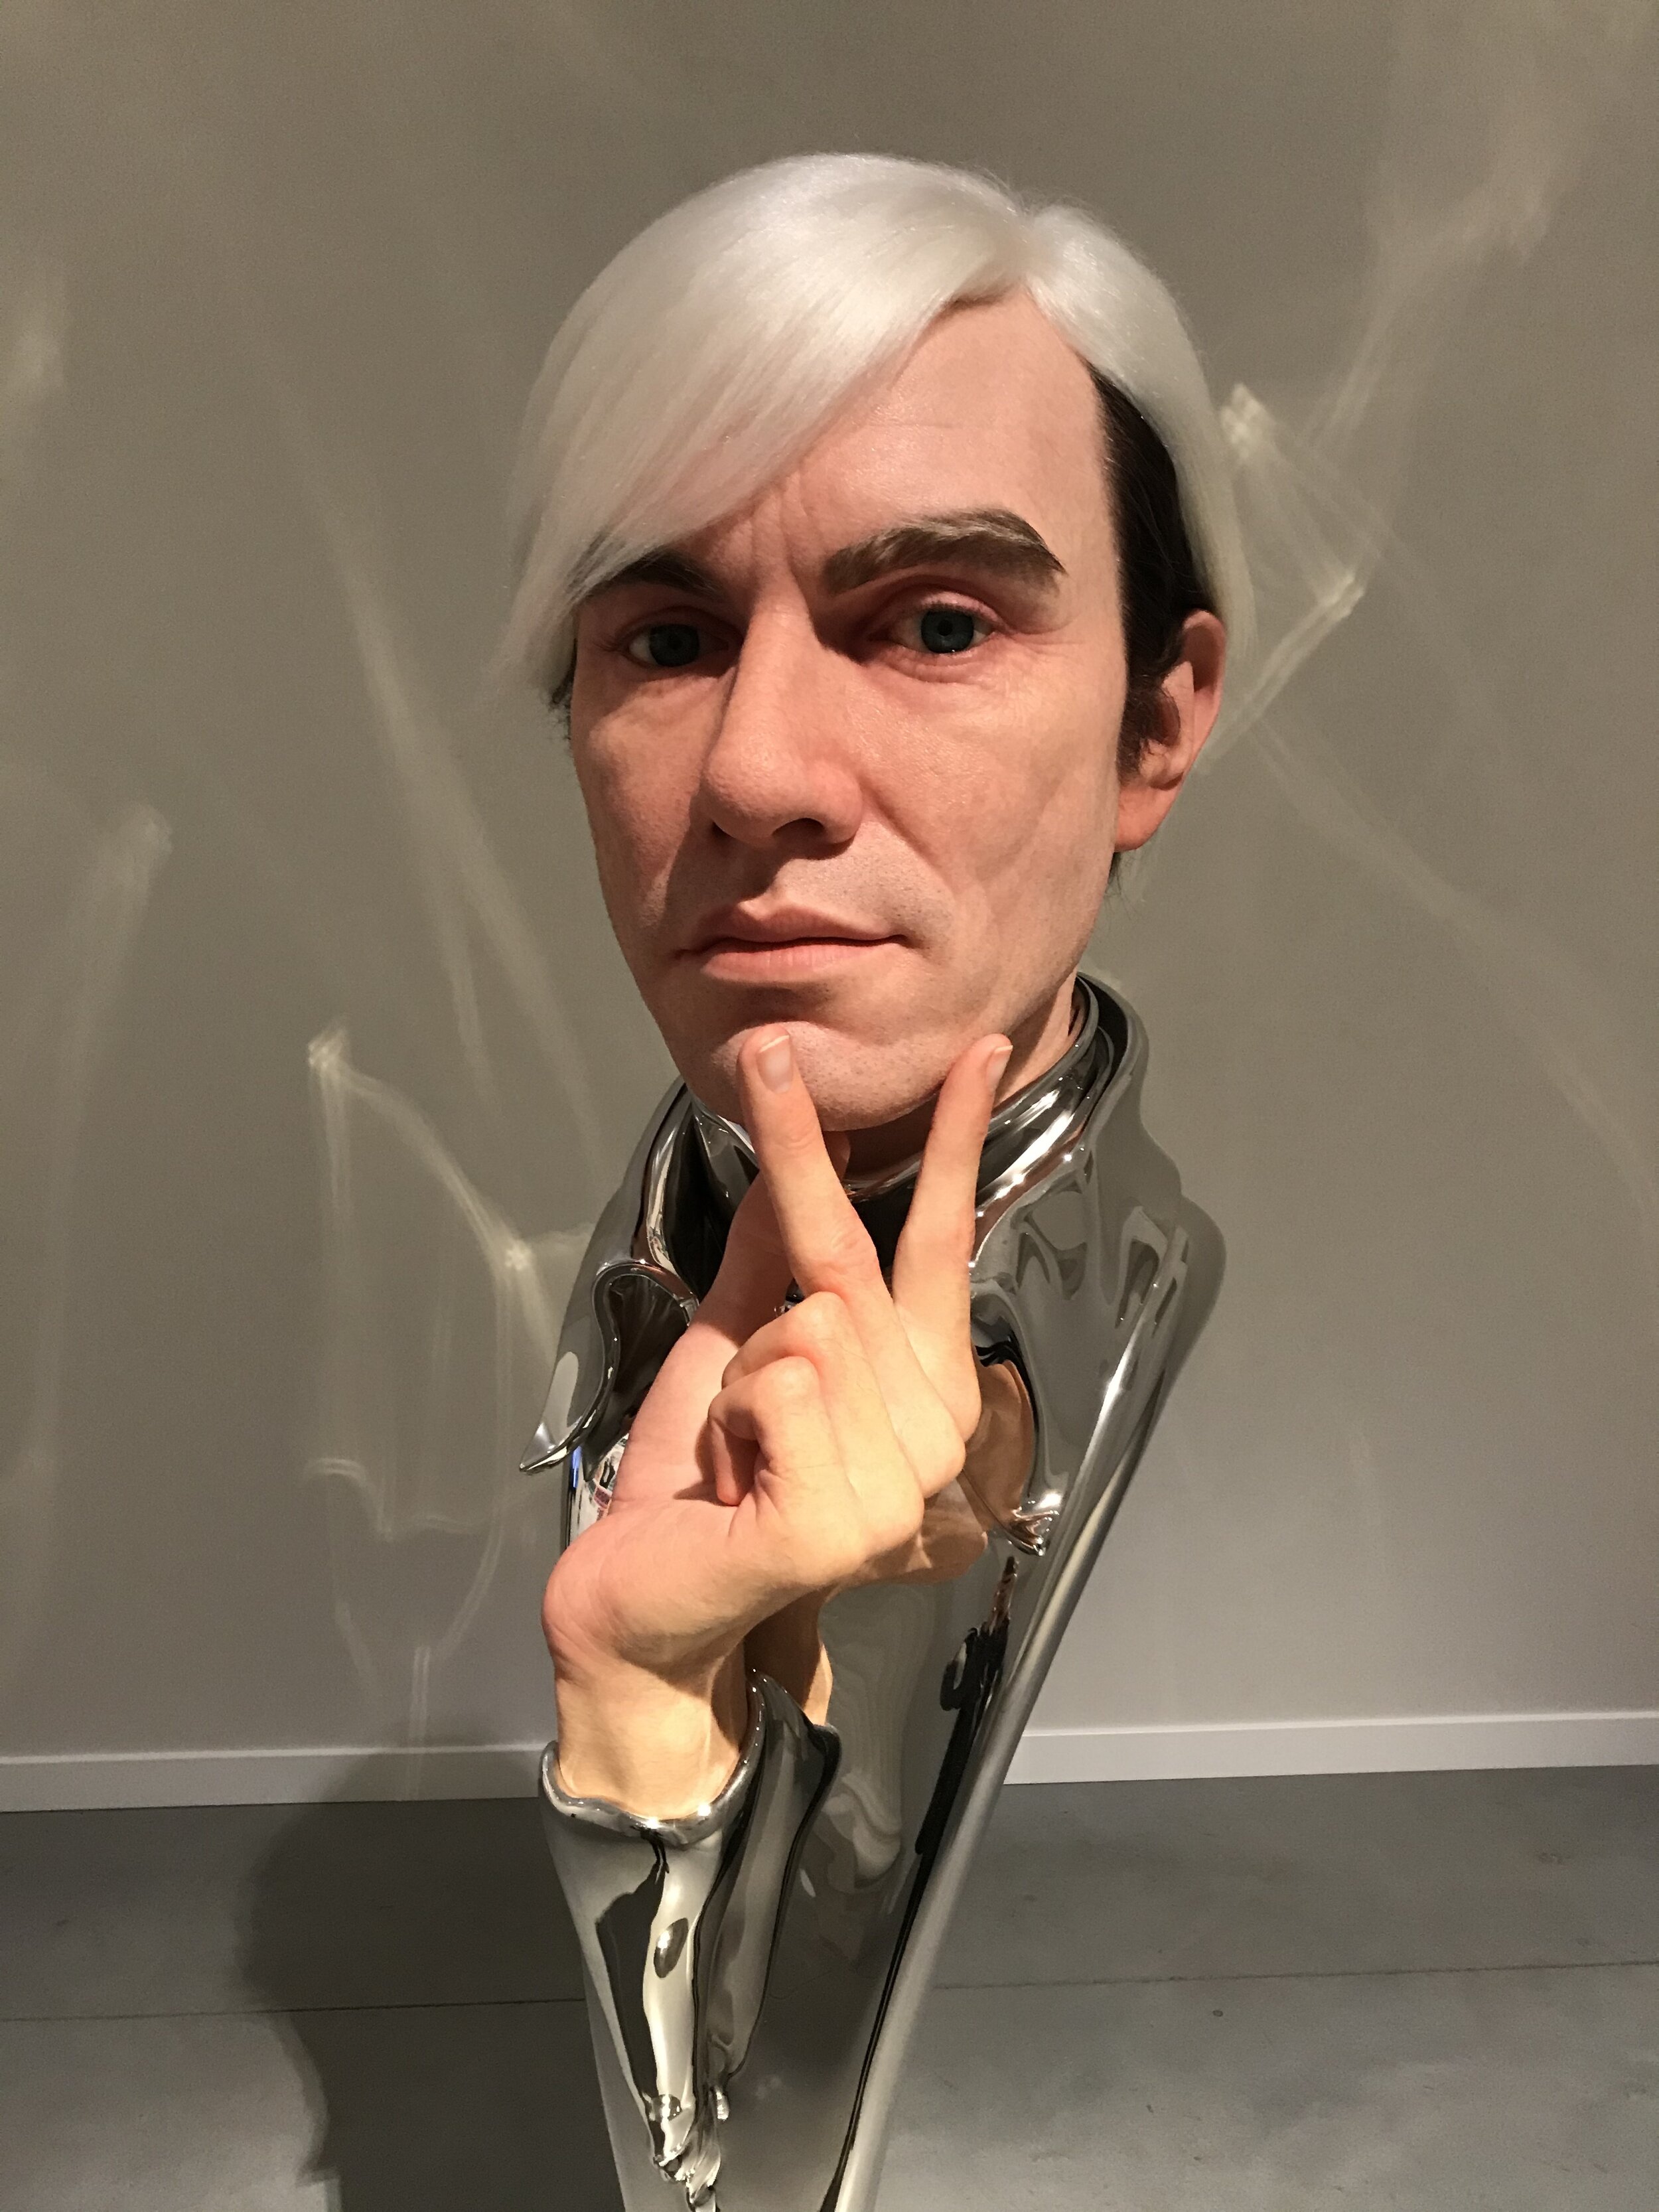
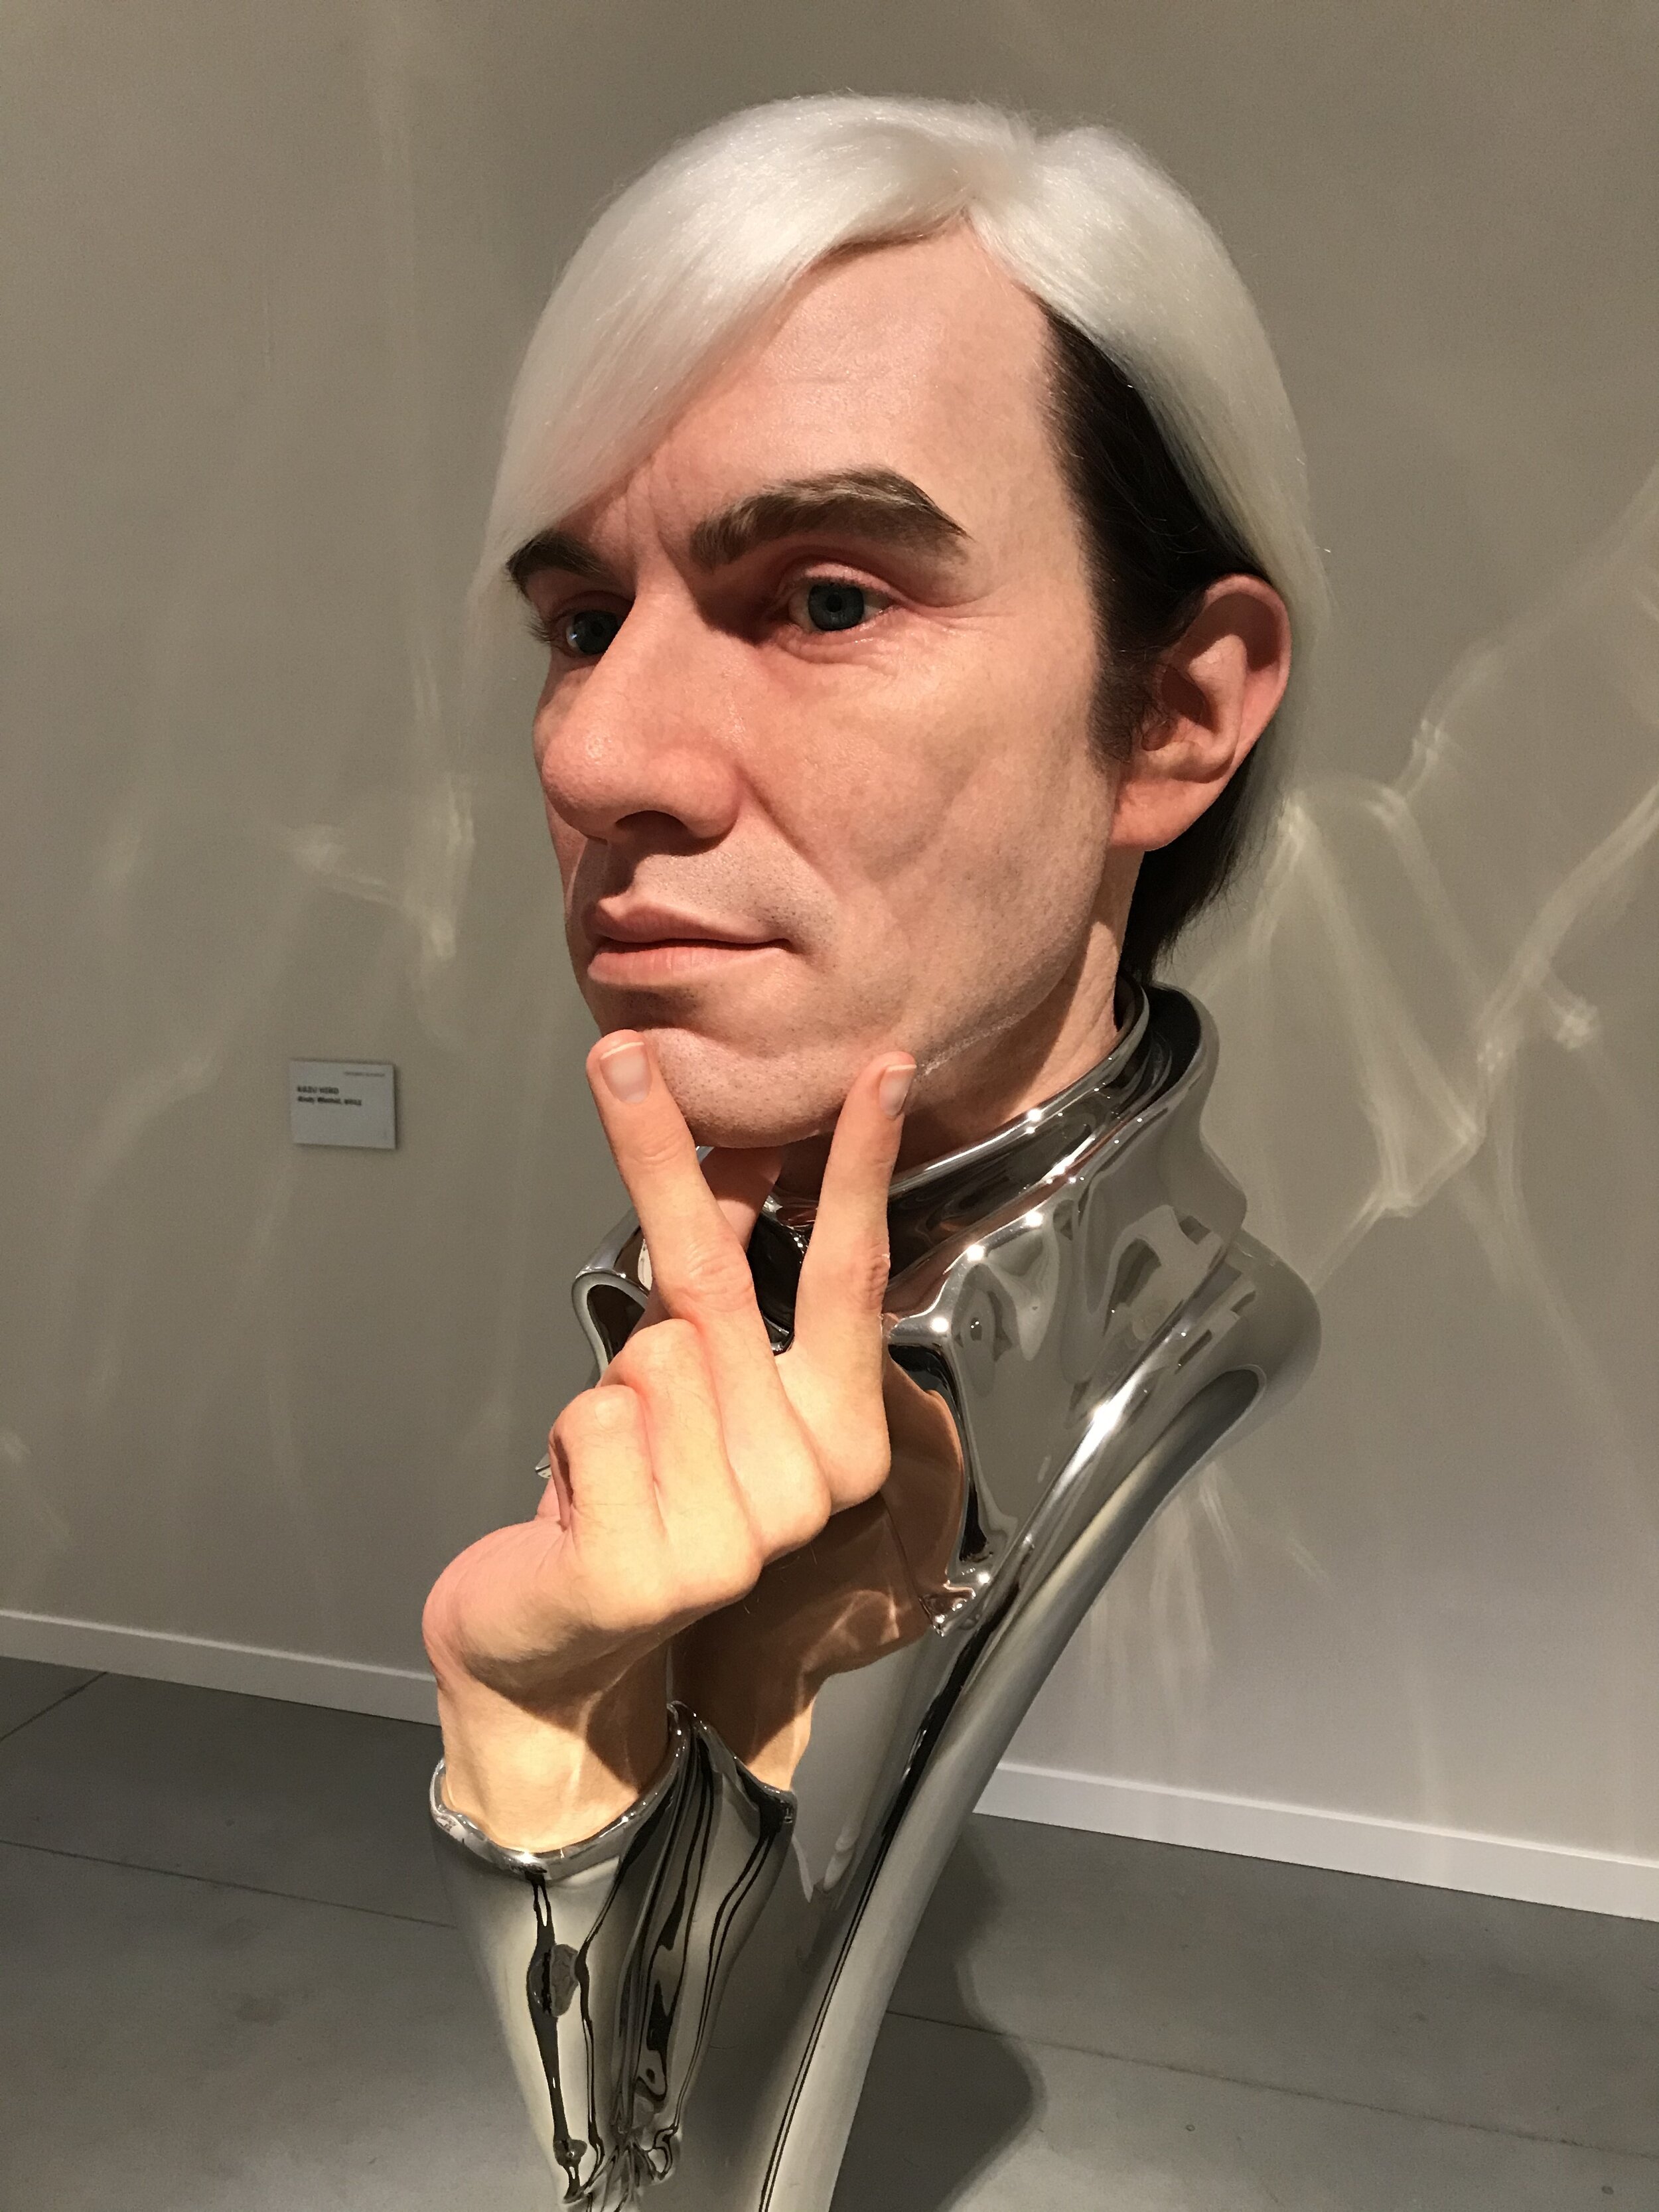
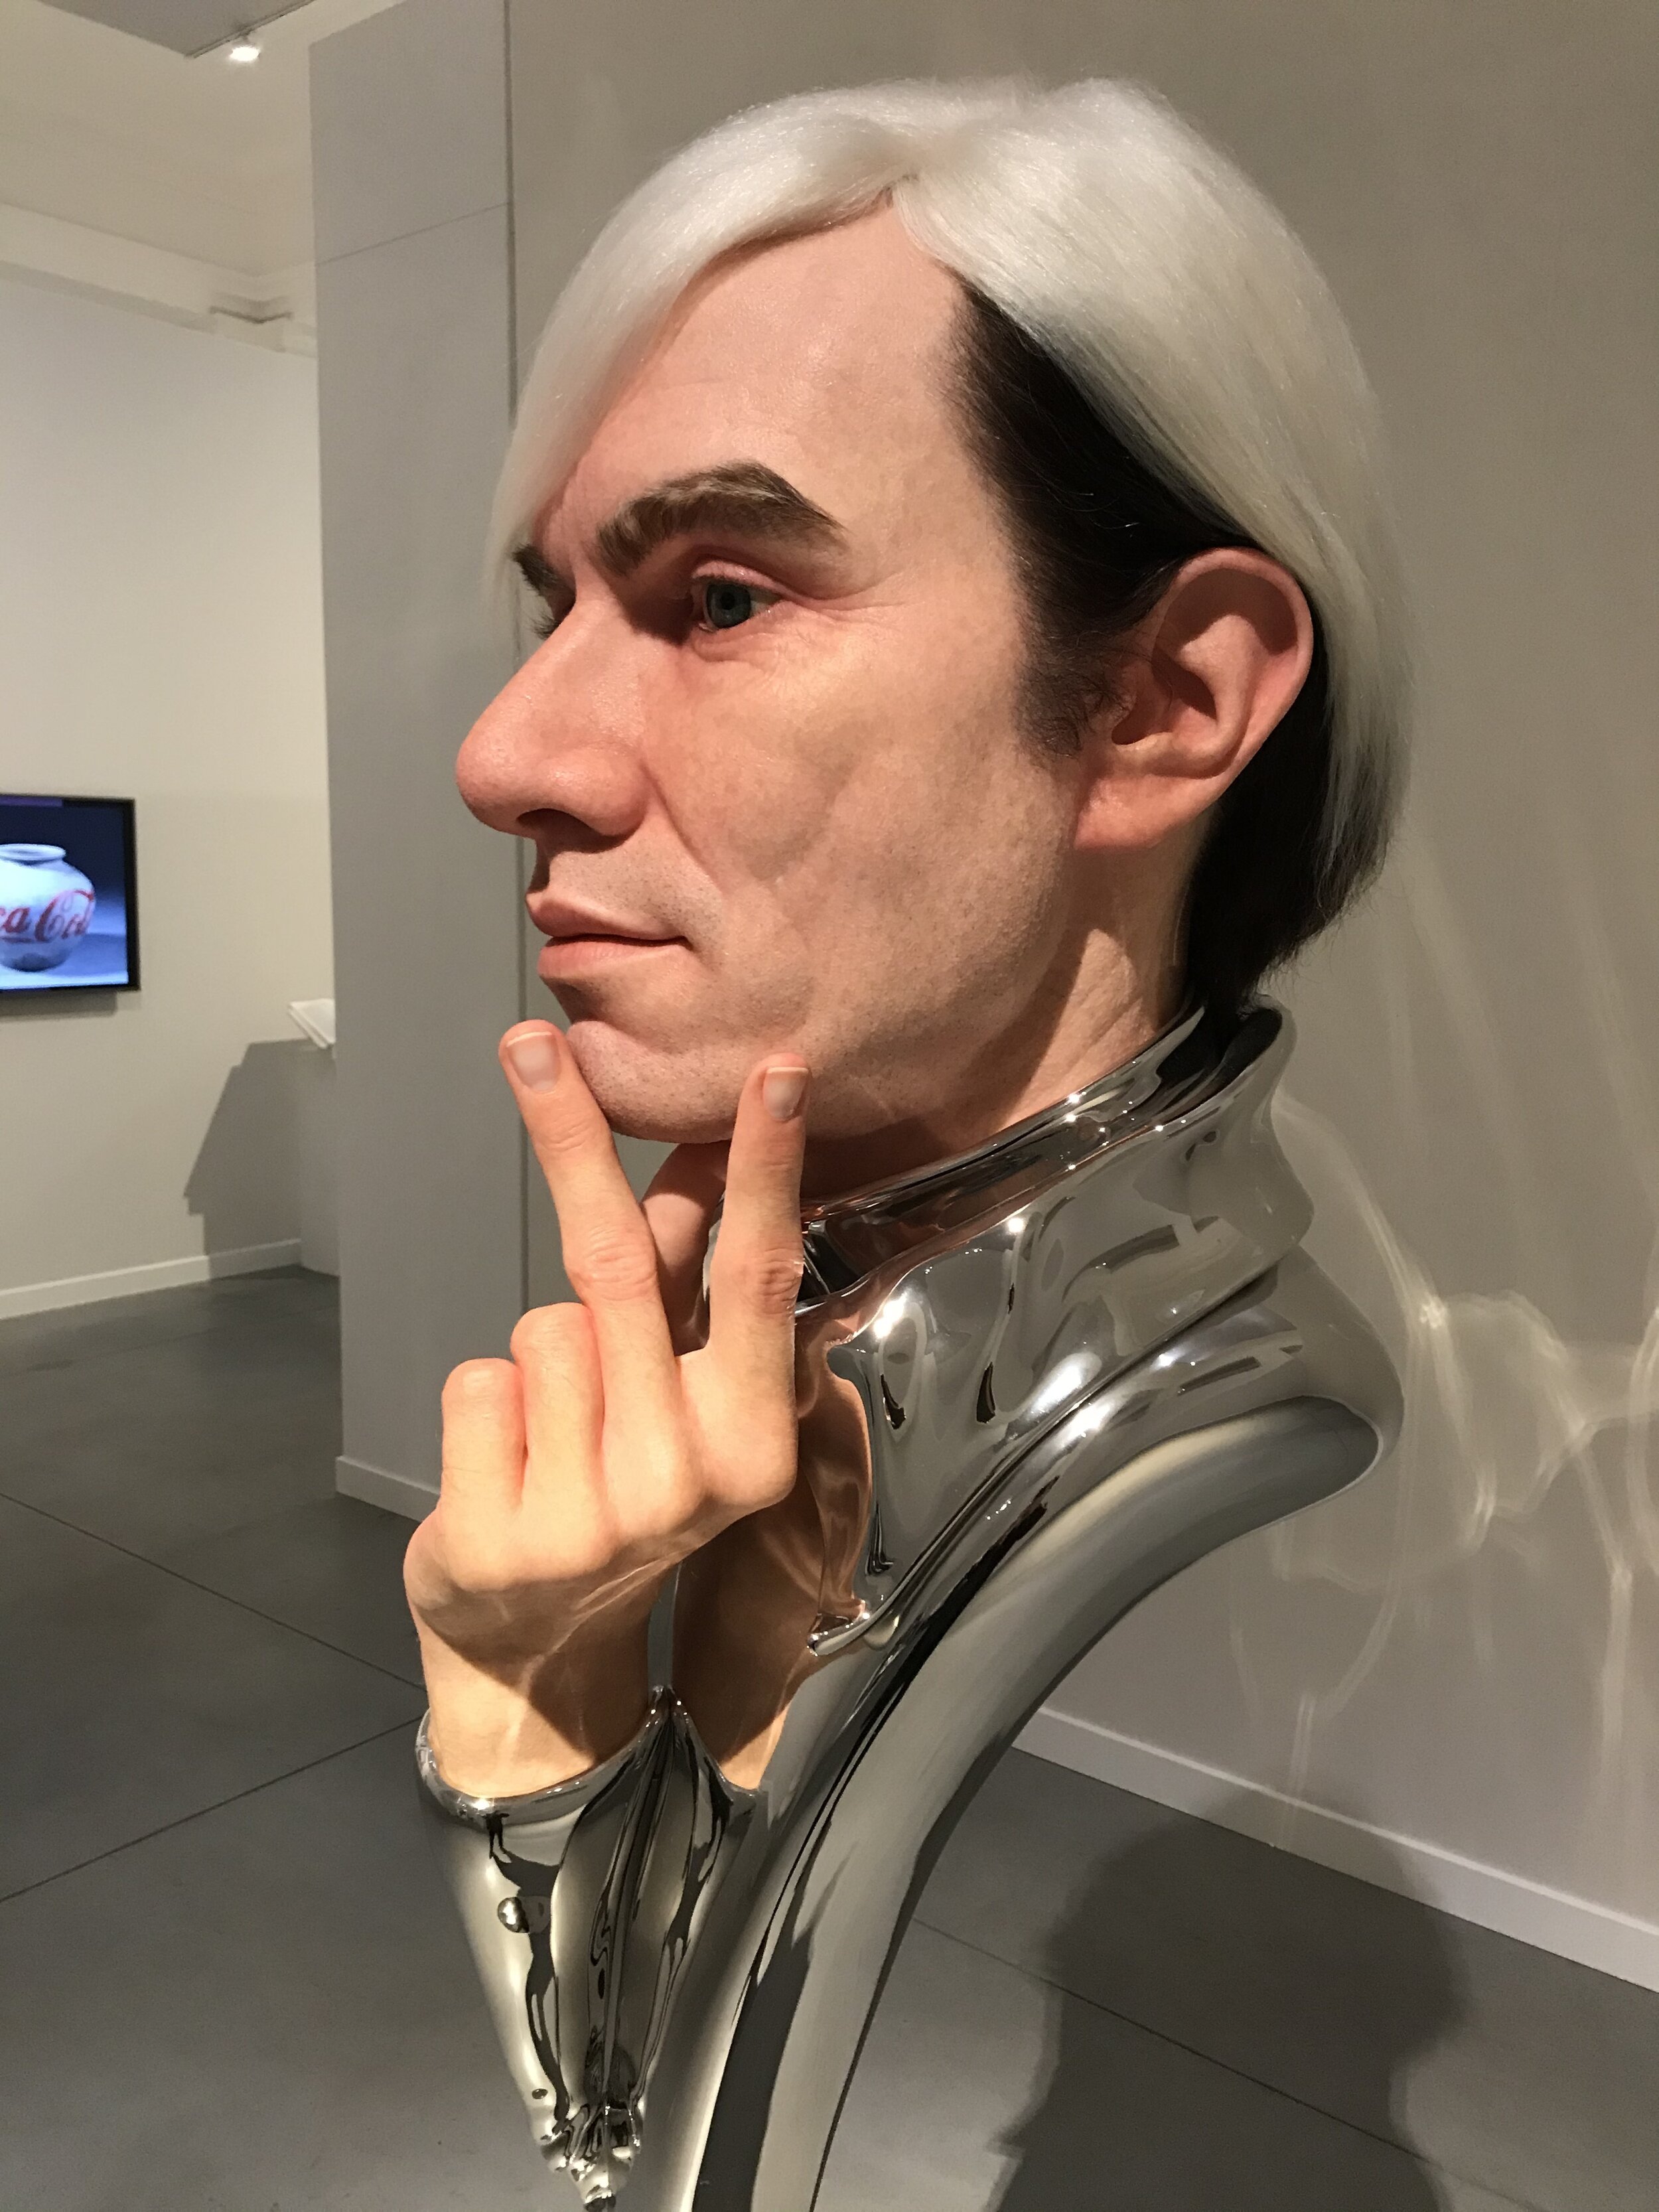
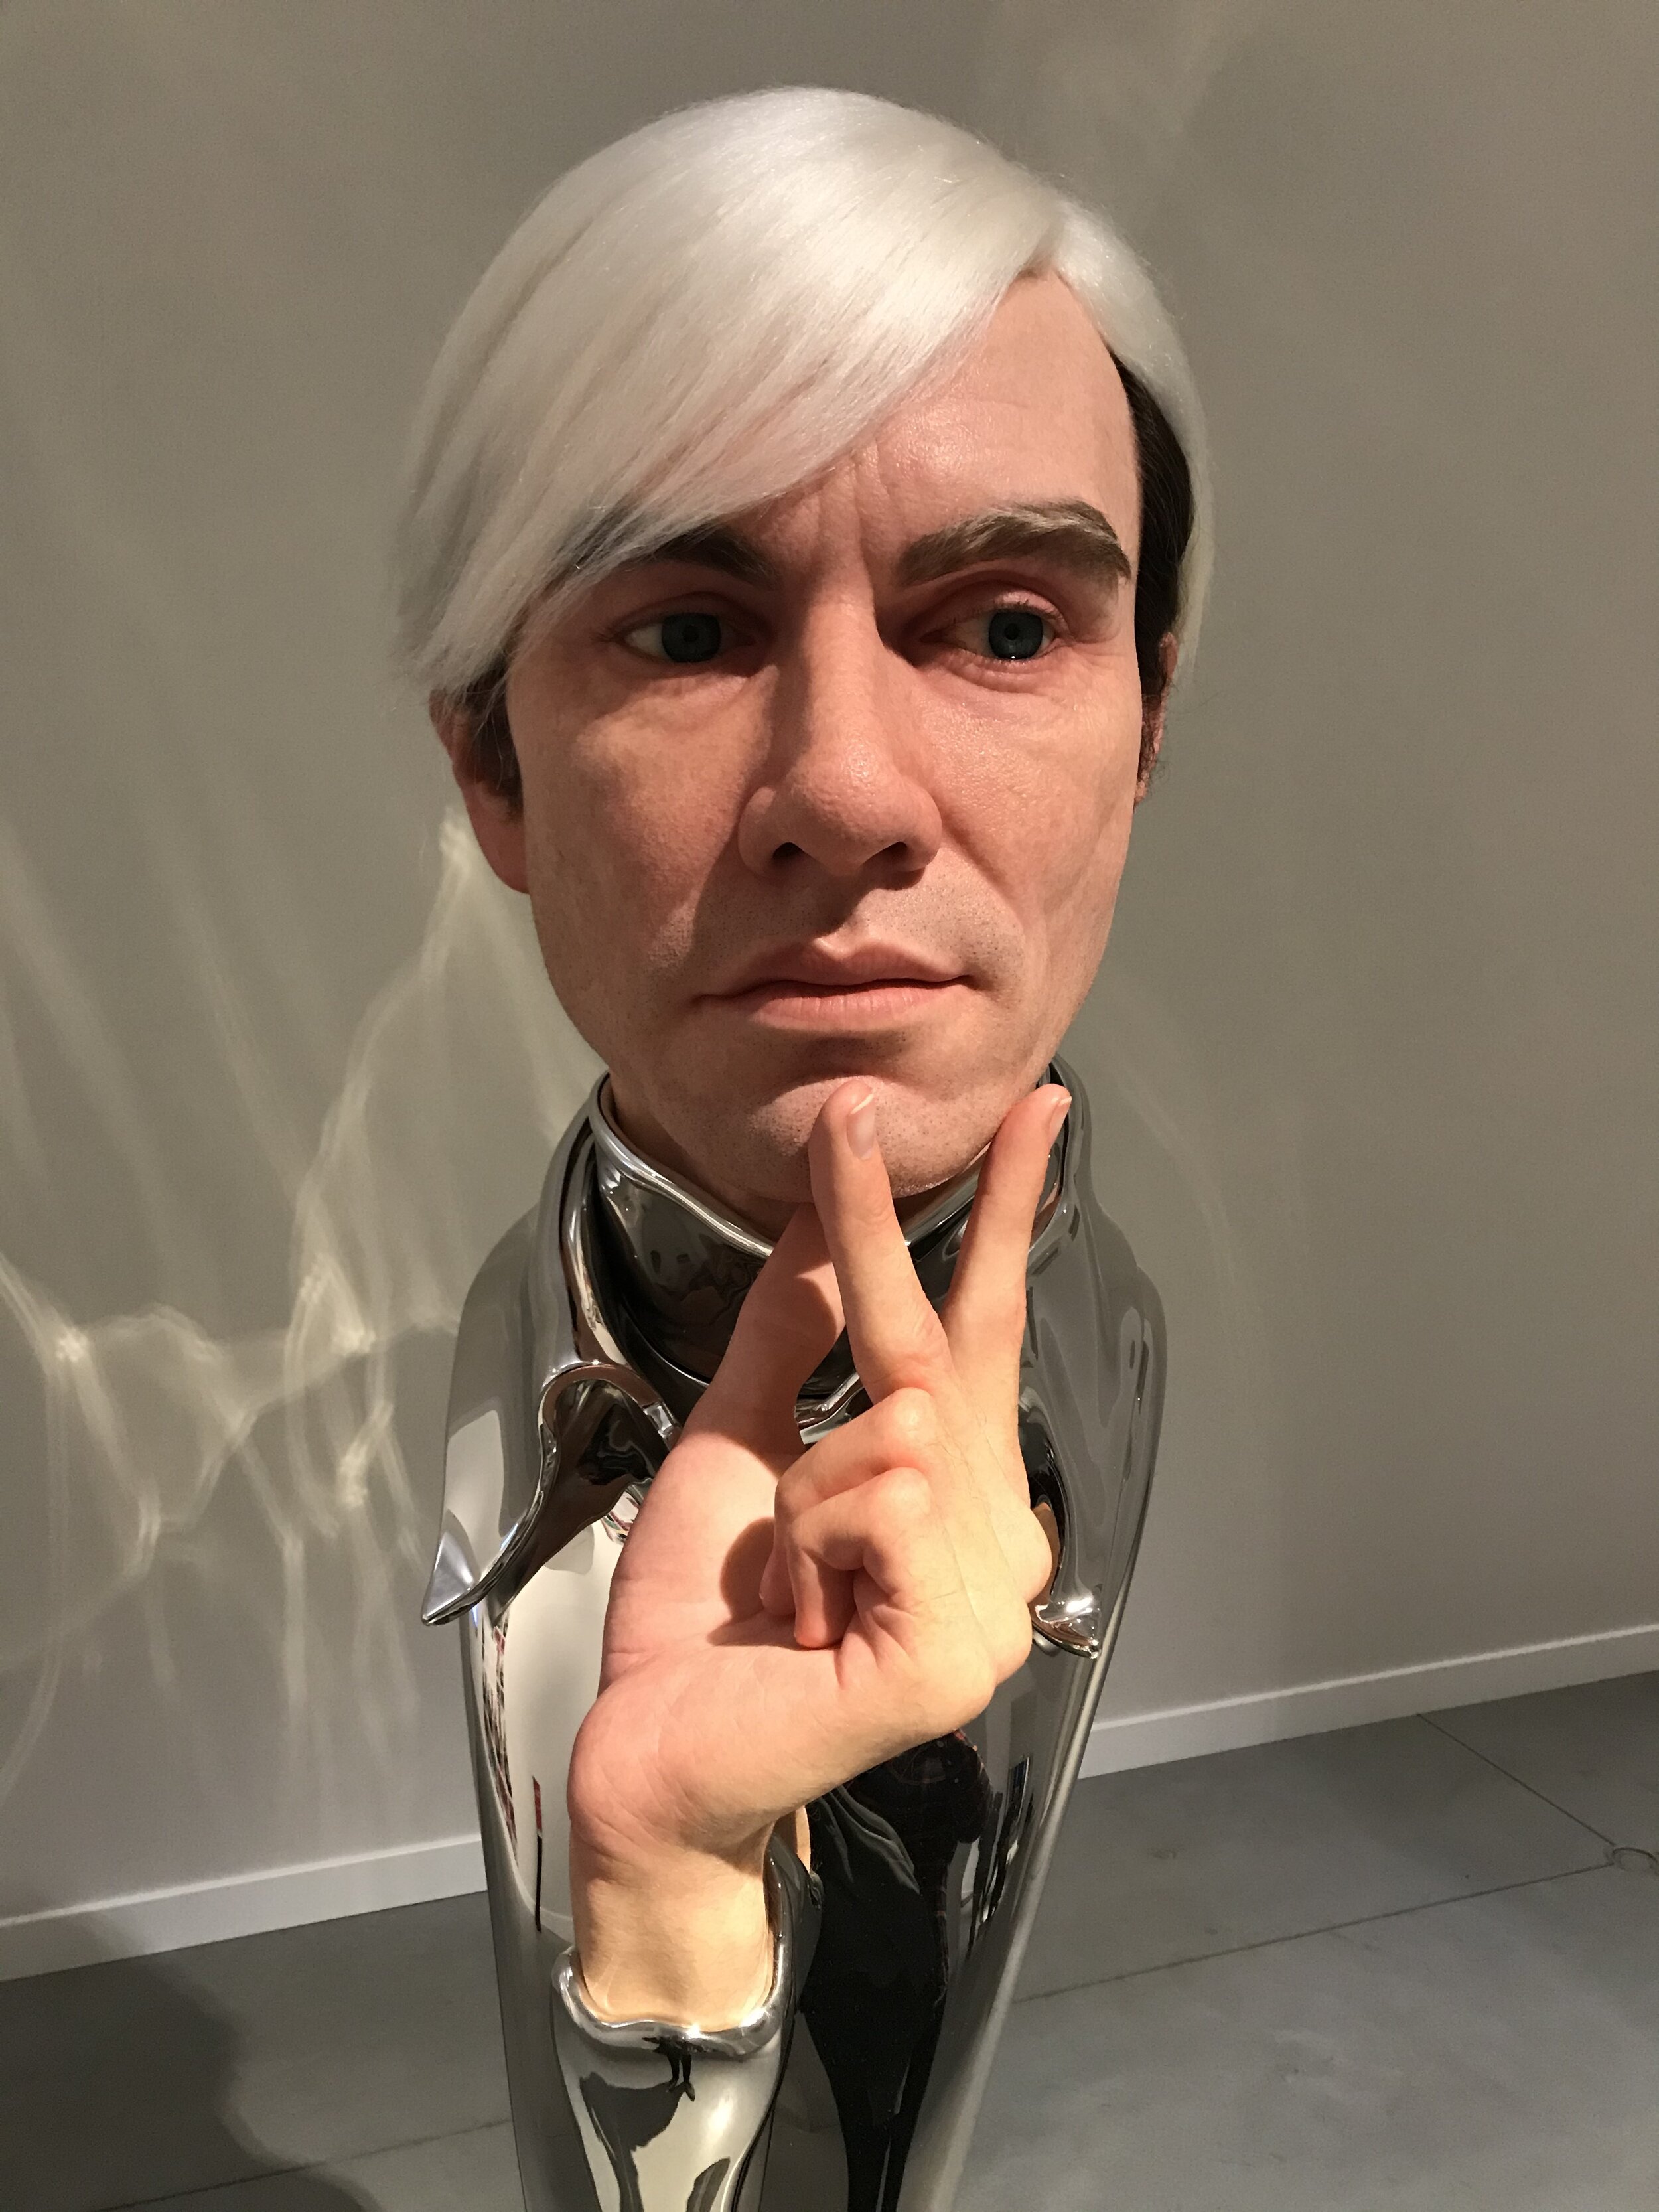
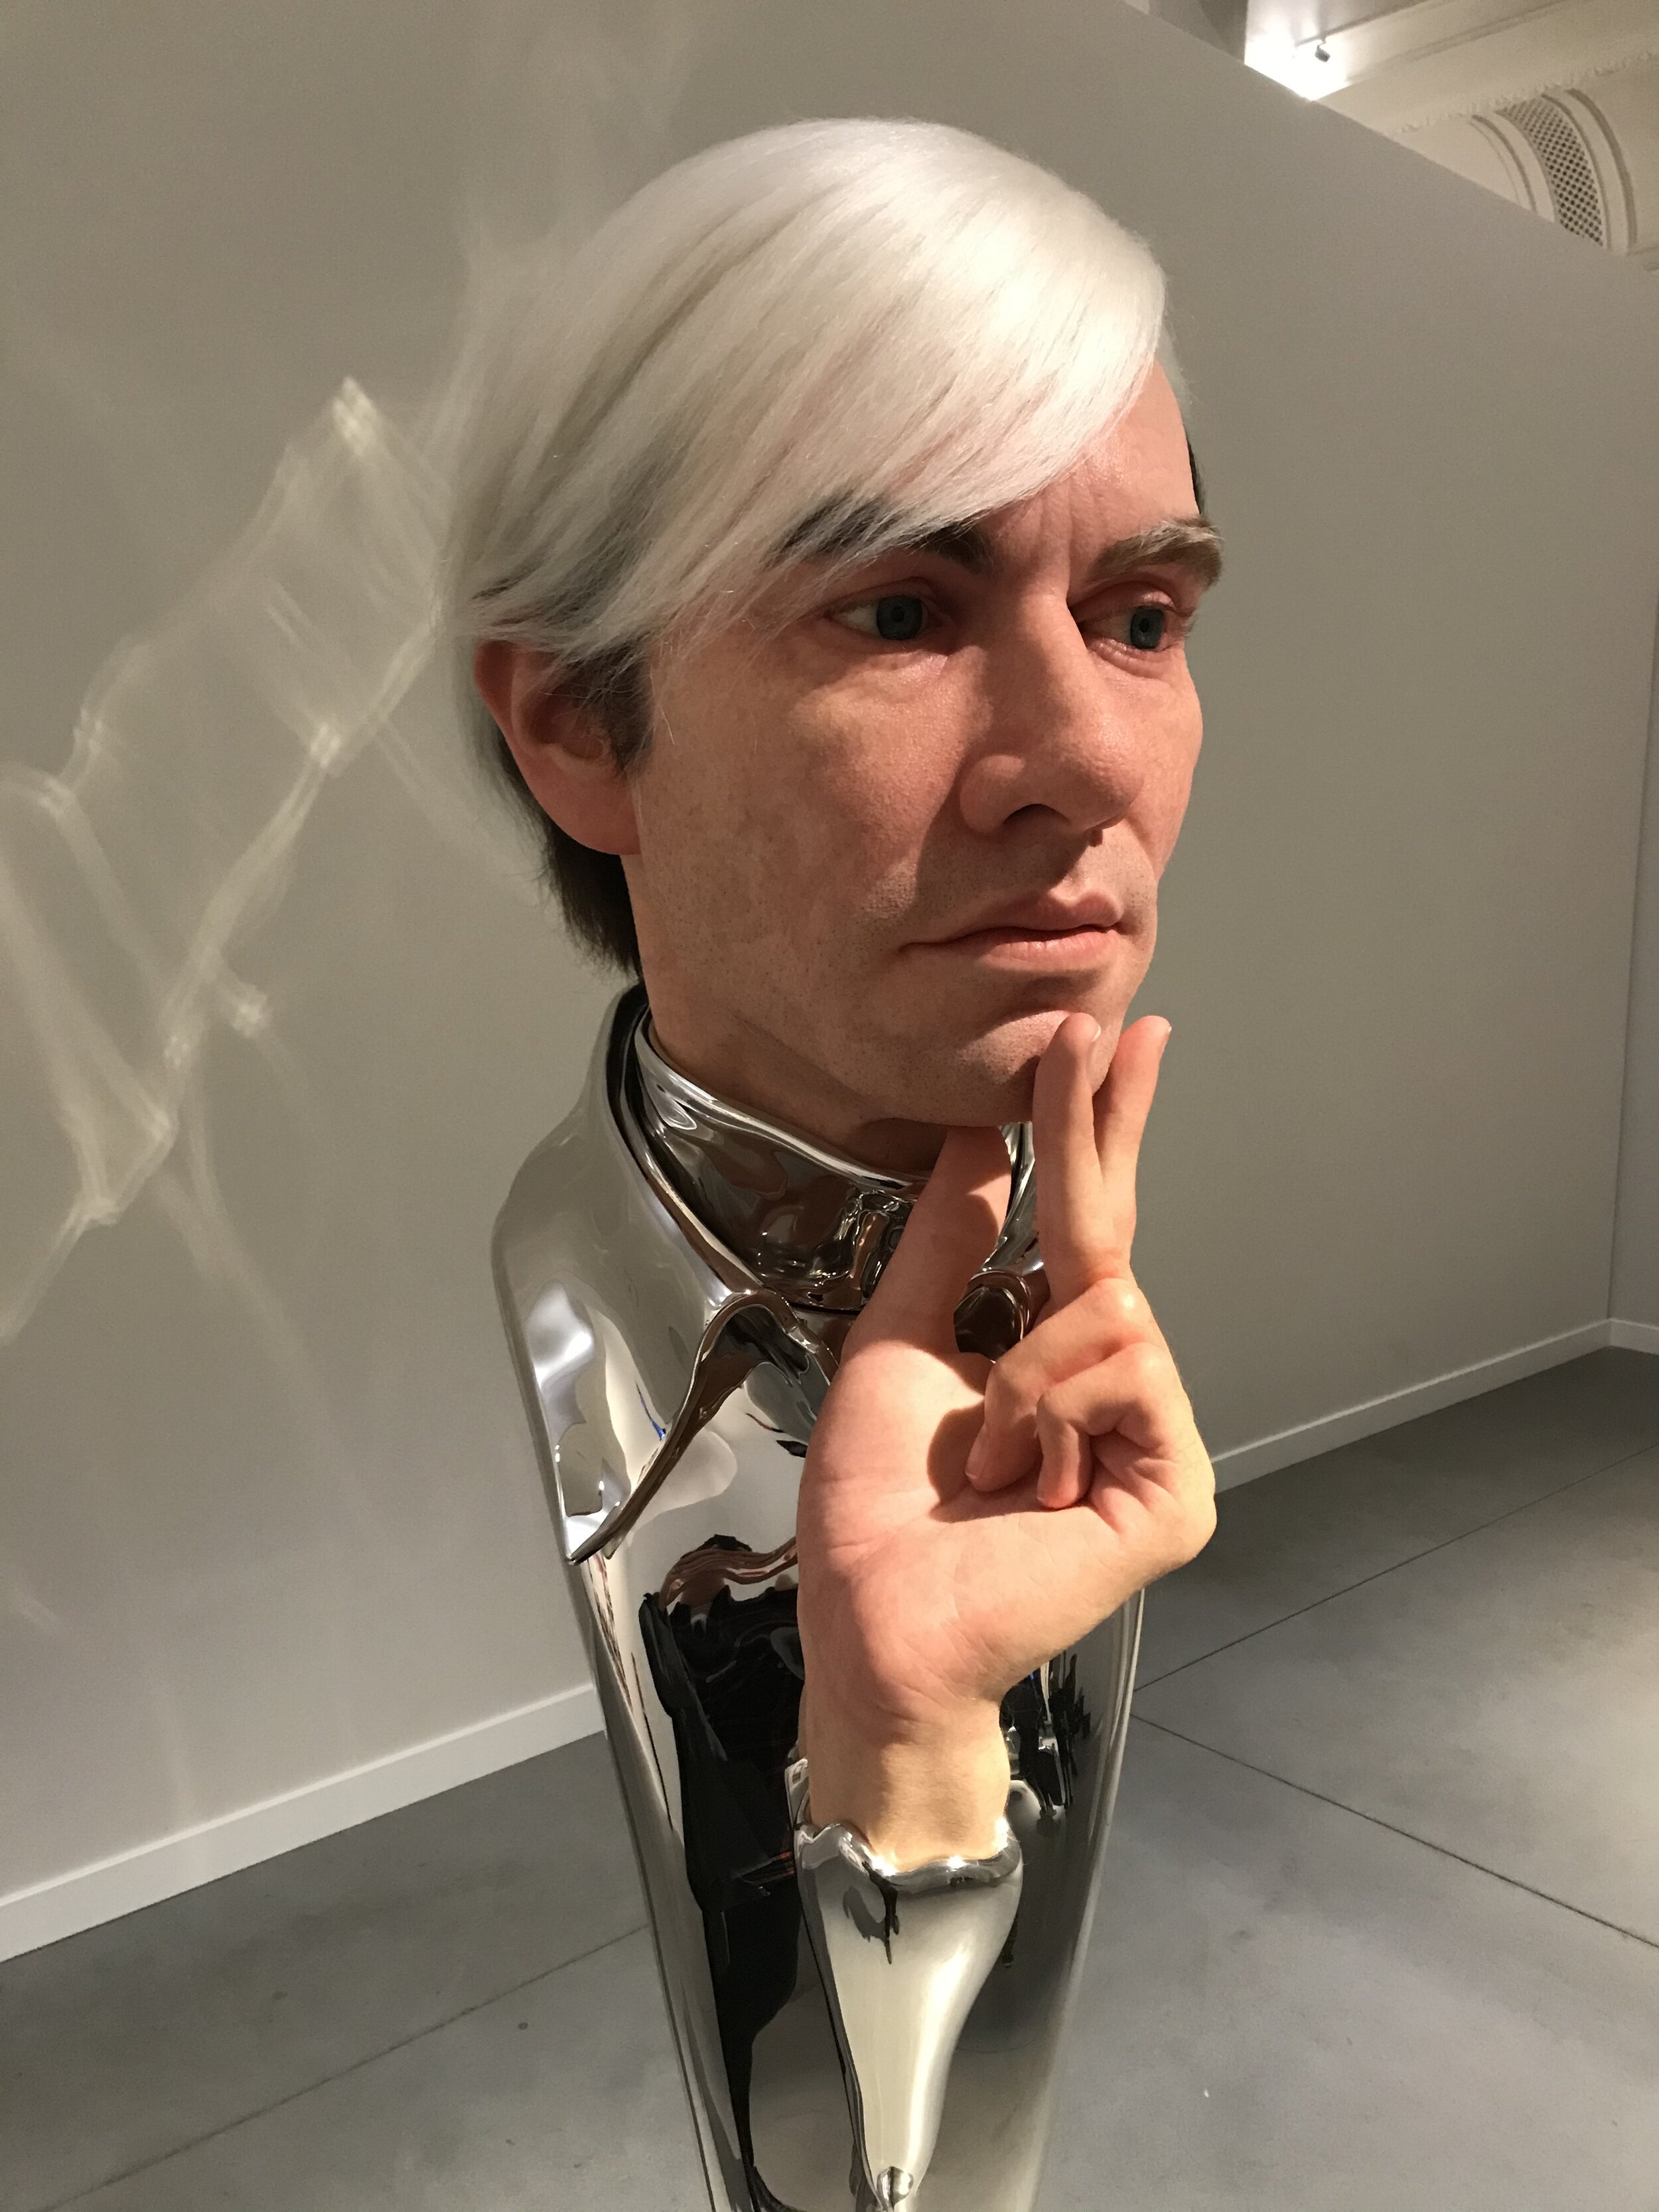

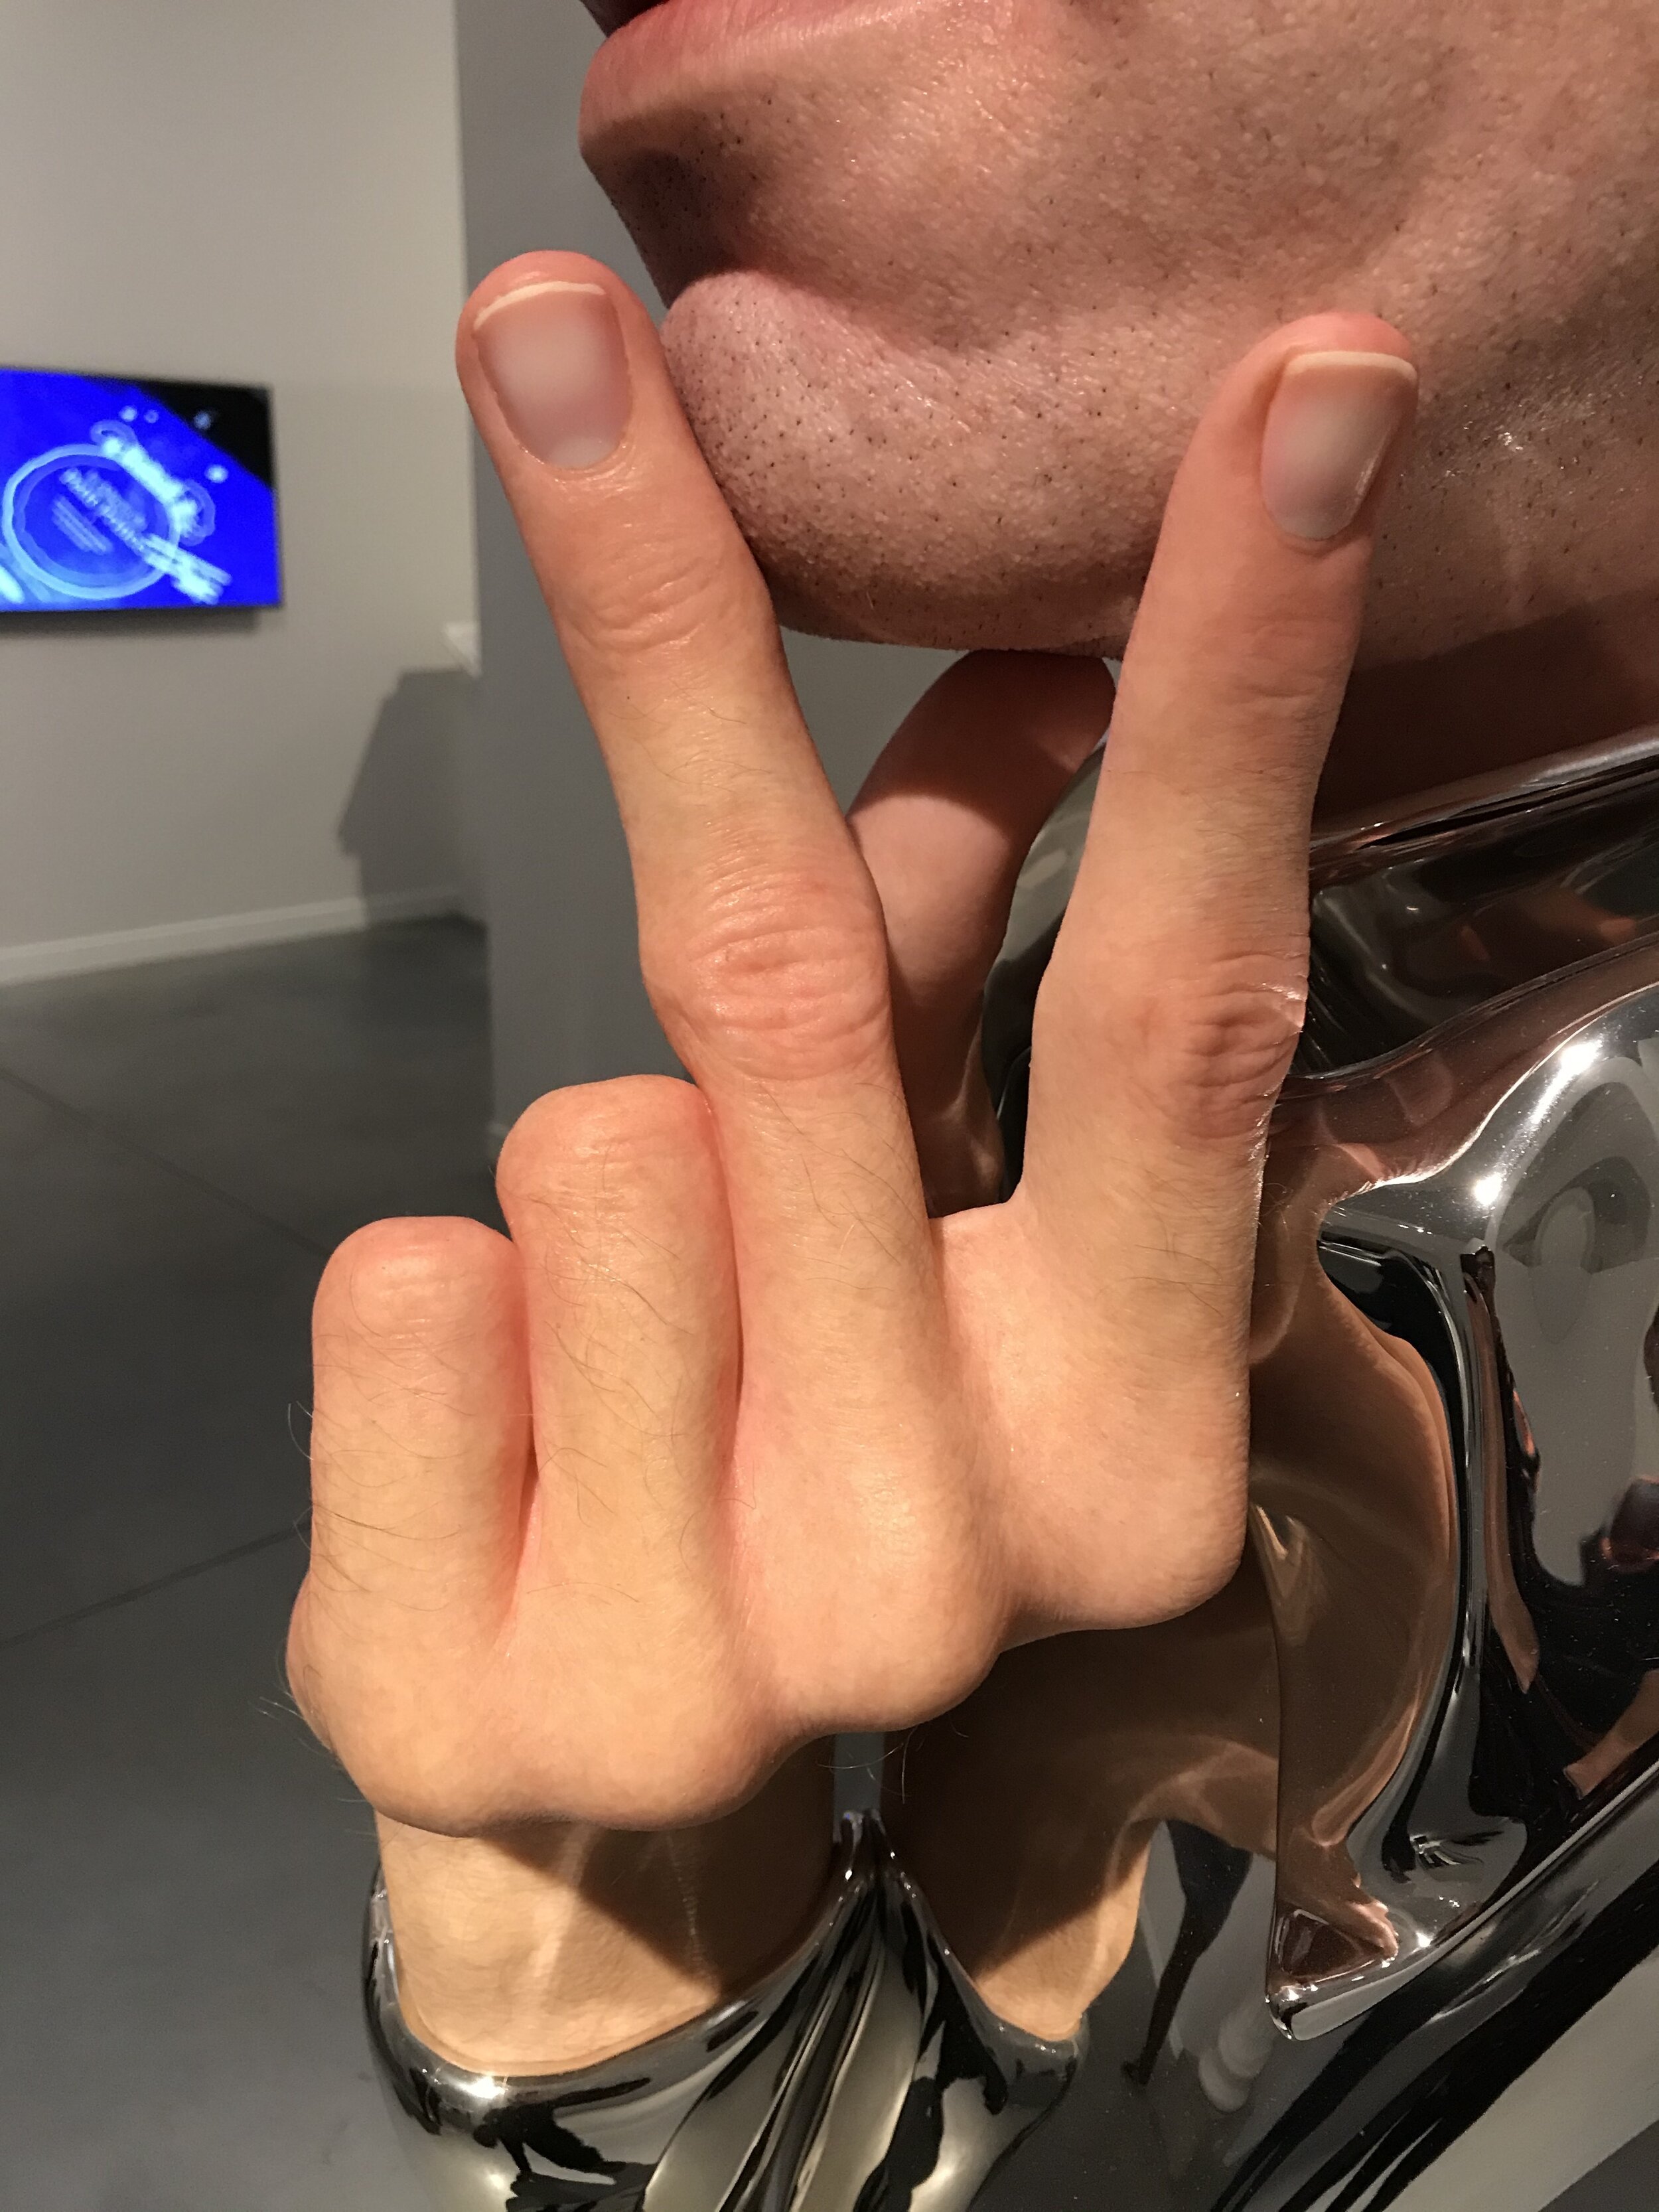
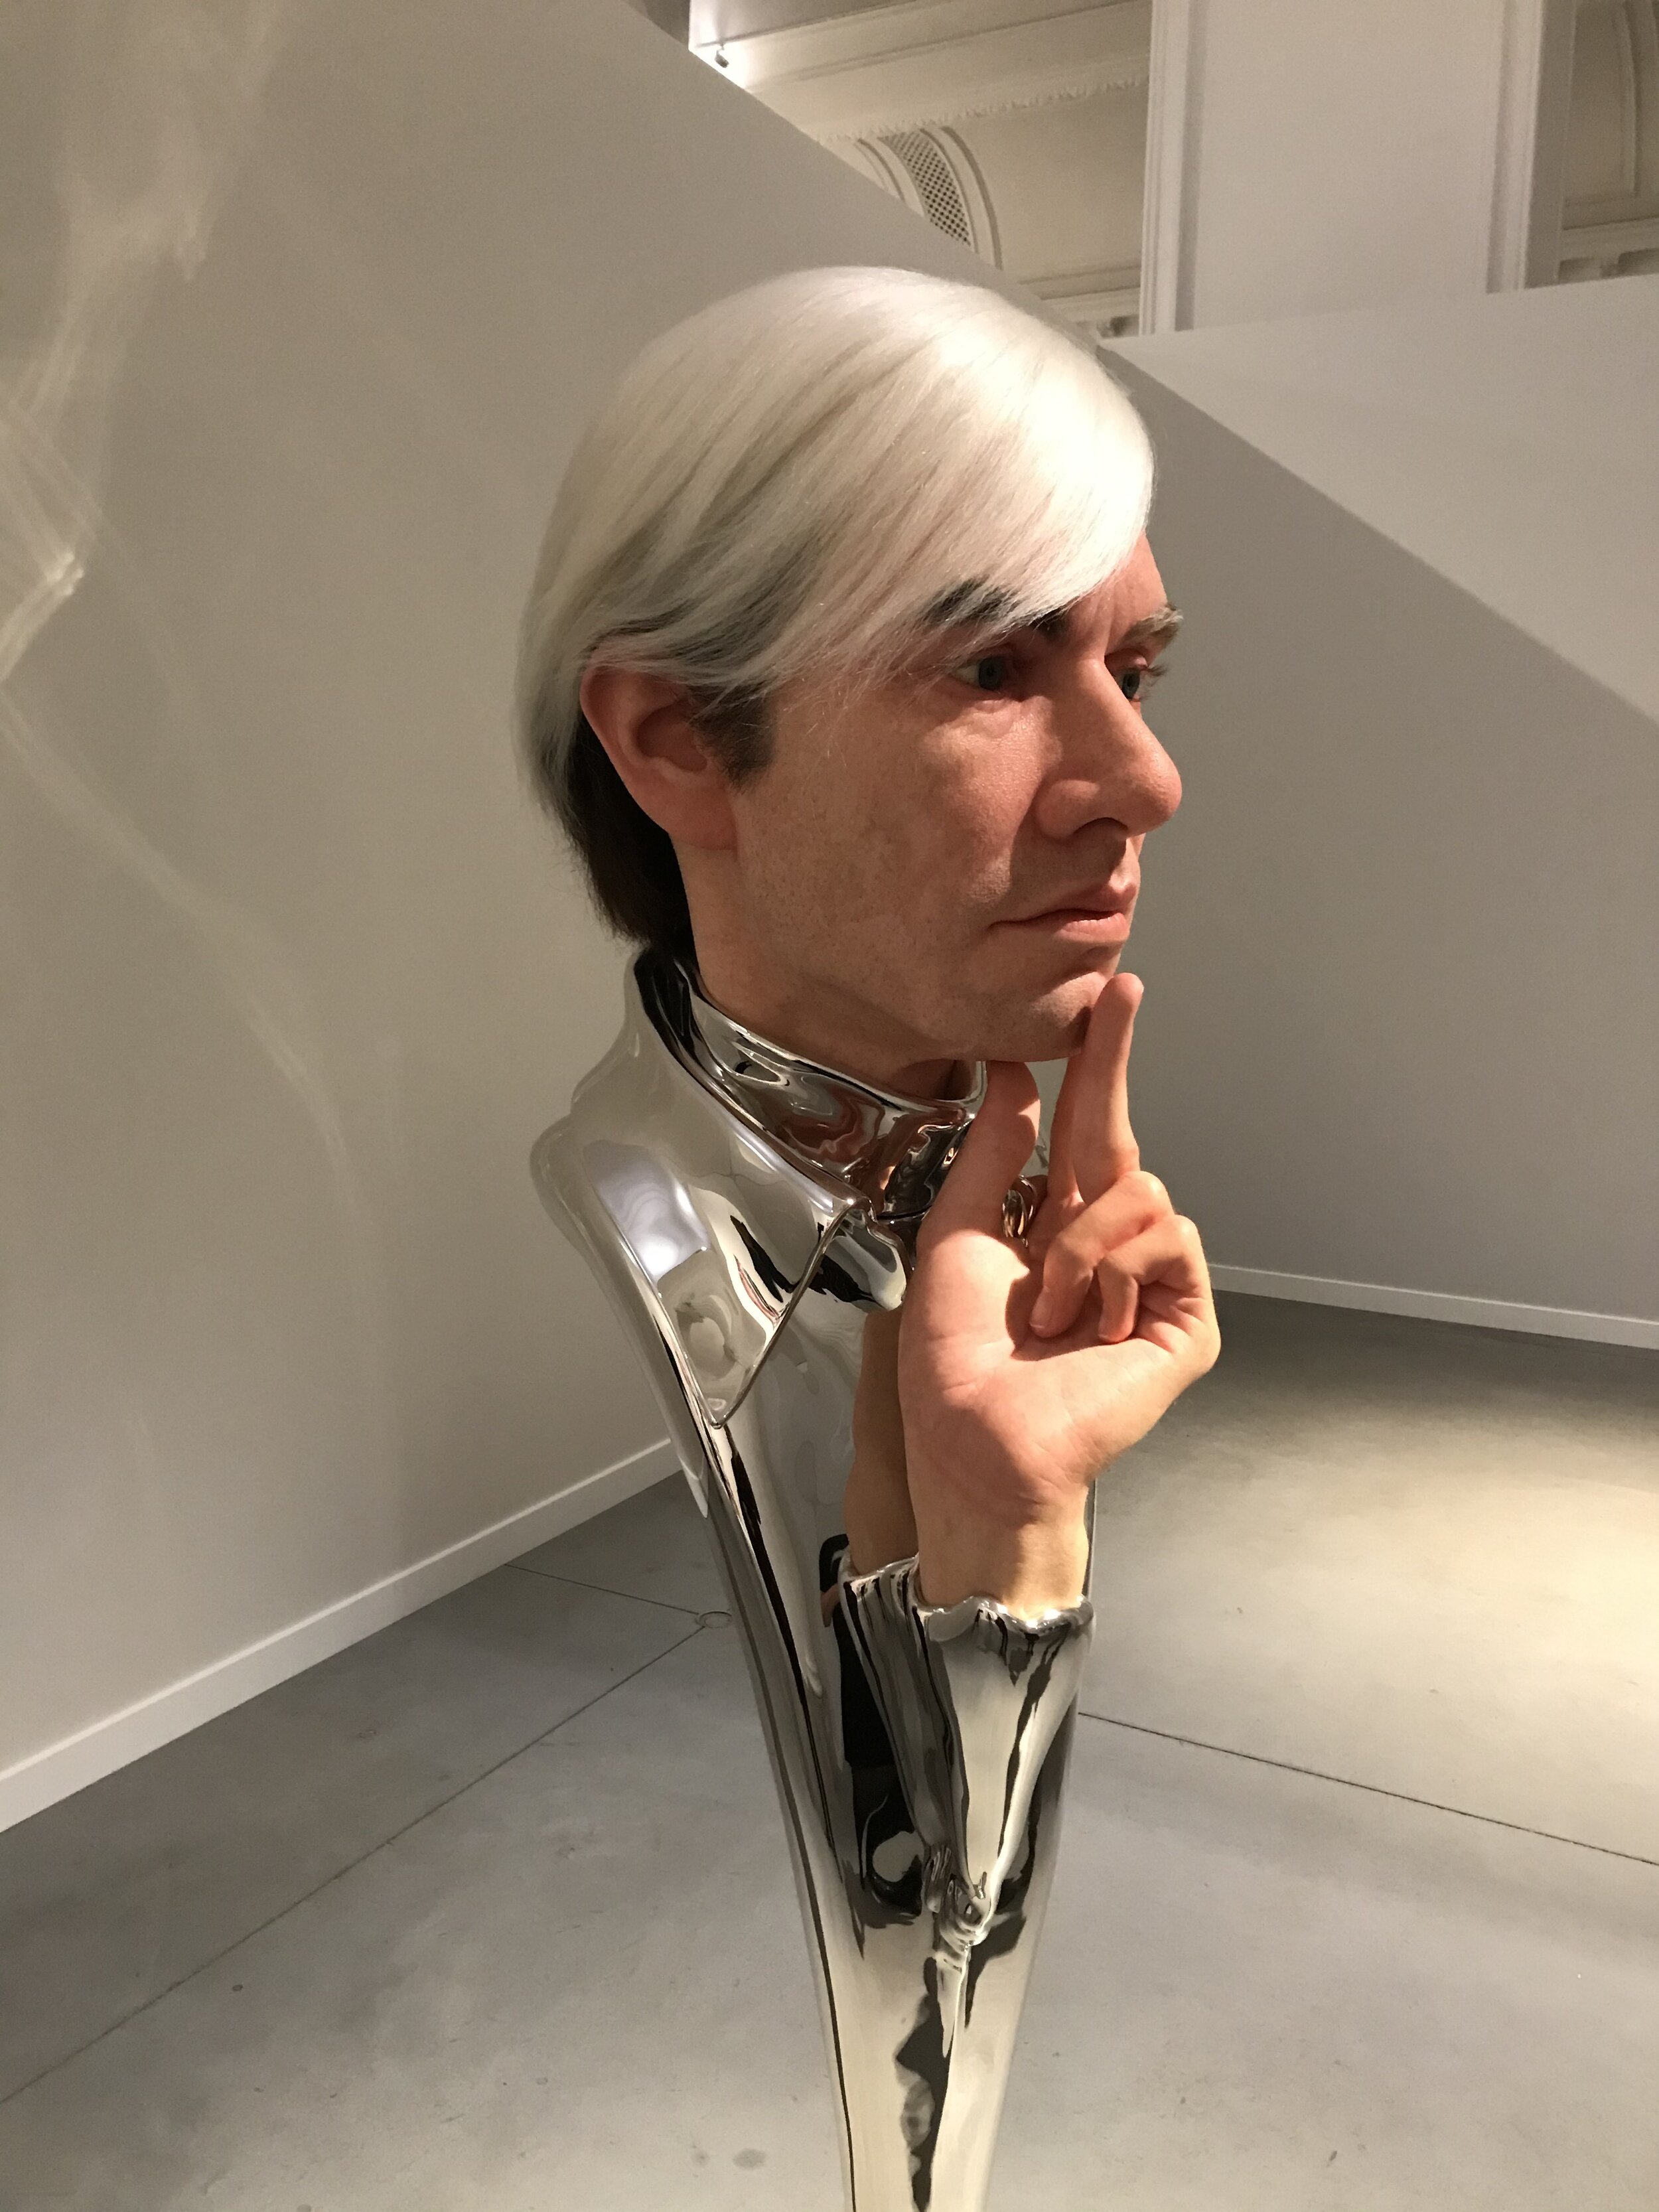
Kazu Hiro - “Andy Warhol”
Opacity / Transparency
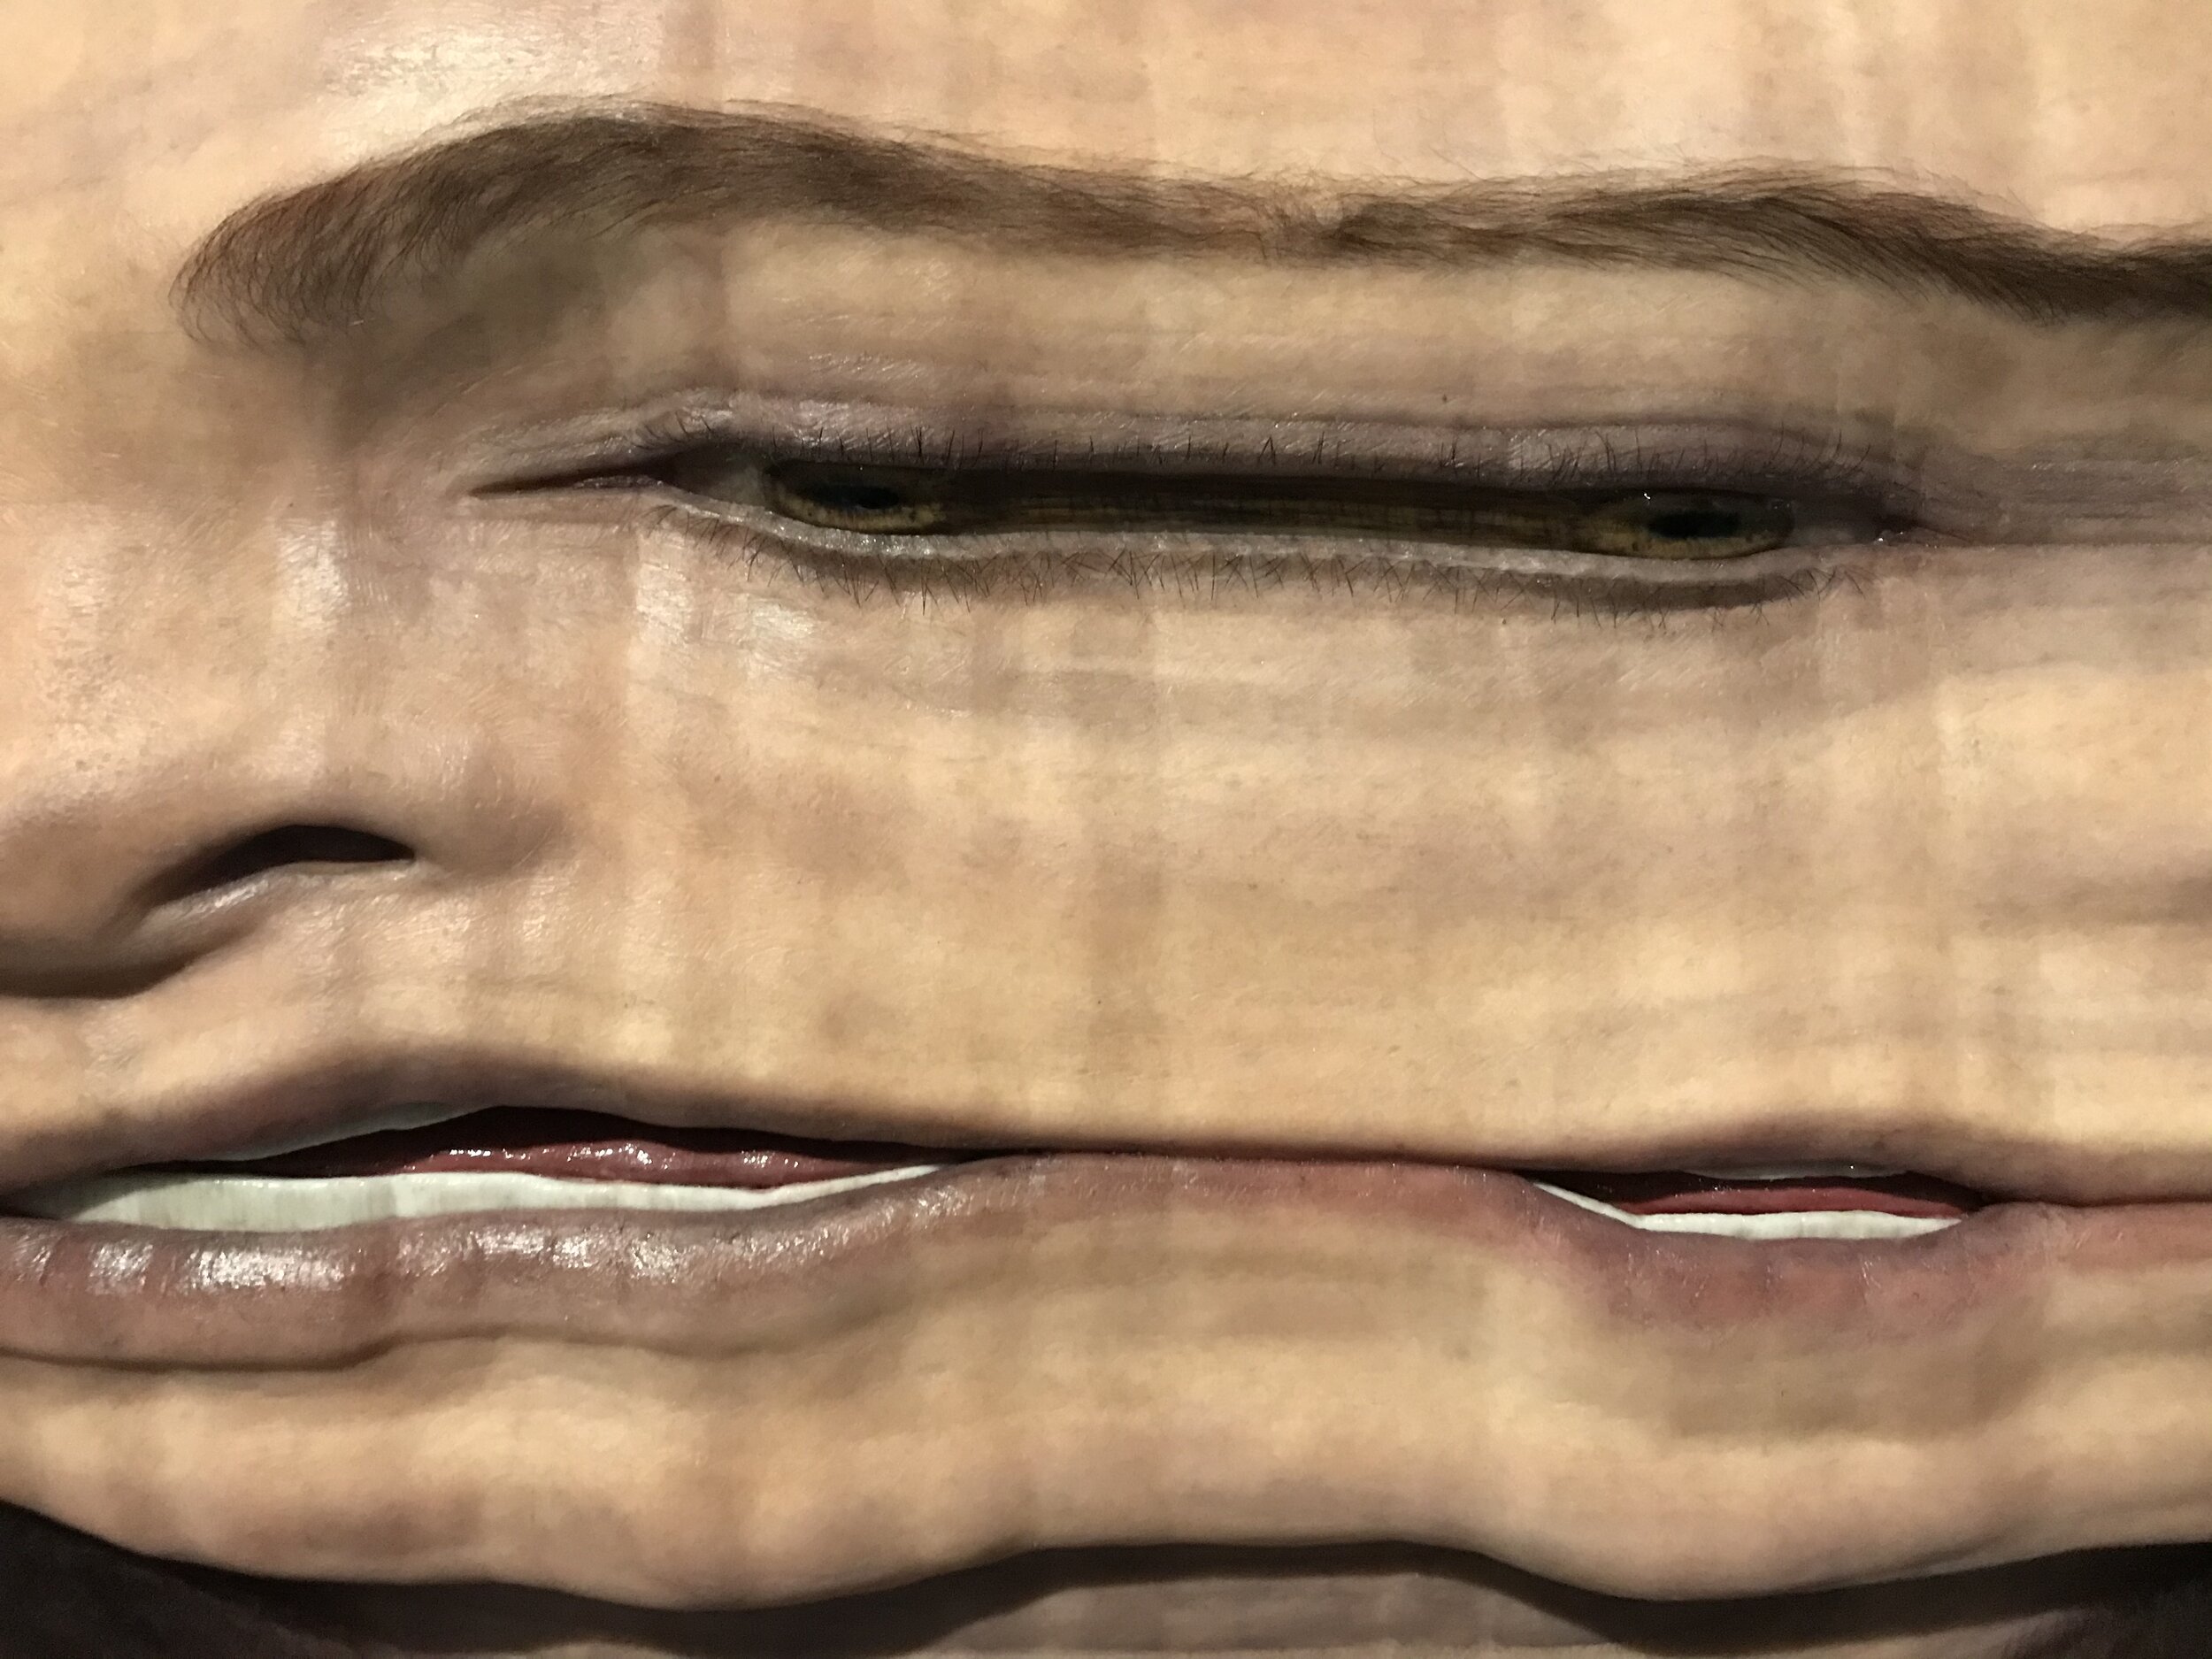
Which brings us to my second point about silicone properties: the balance between opacity and transparency. When light hits real human skin, it scatters differently depending on the type of tissue, tissue density, underlying structures, etc. This can be easily observed if there is a bright light source behind someone’s ear, which will cause the helix to appear illuminated, due to the transparency of that particular tissue. Similarly, If you hold a flashlight up against your fingertip, the tip will “glow” red as the light passes through the tissues. To describe this in other terms, this is similar to the concept of subsurface scattering in computer-generated 3D models. Anyone who has tried to light and render a realistic 3D model (shout out to my Medical Illustrator colleagues) know the importance and STRUGGLE of finding the balance between material density, transparency, and illumination. This concept extends to two-dimensional media as well, with master painters understanding that realistically capturing this feeling of illumination was essential to bringing their figures to life. These properties are extremely important when mimicking human flesh, regardless of what material you are using.
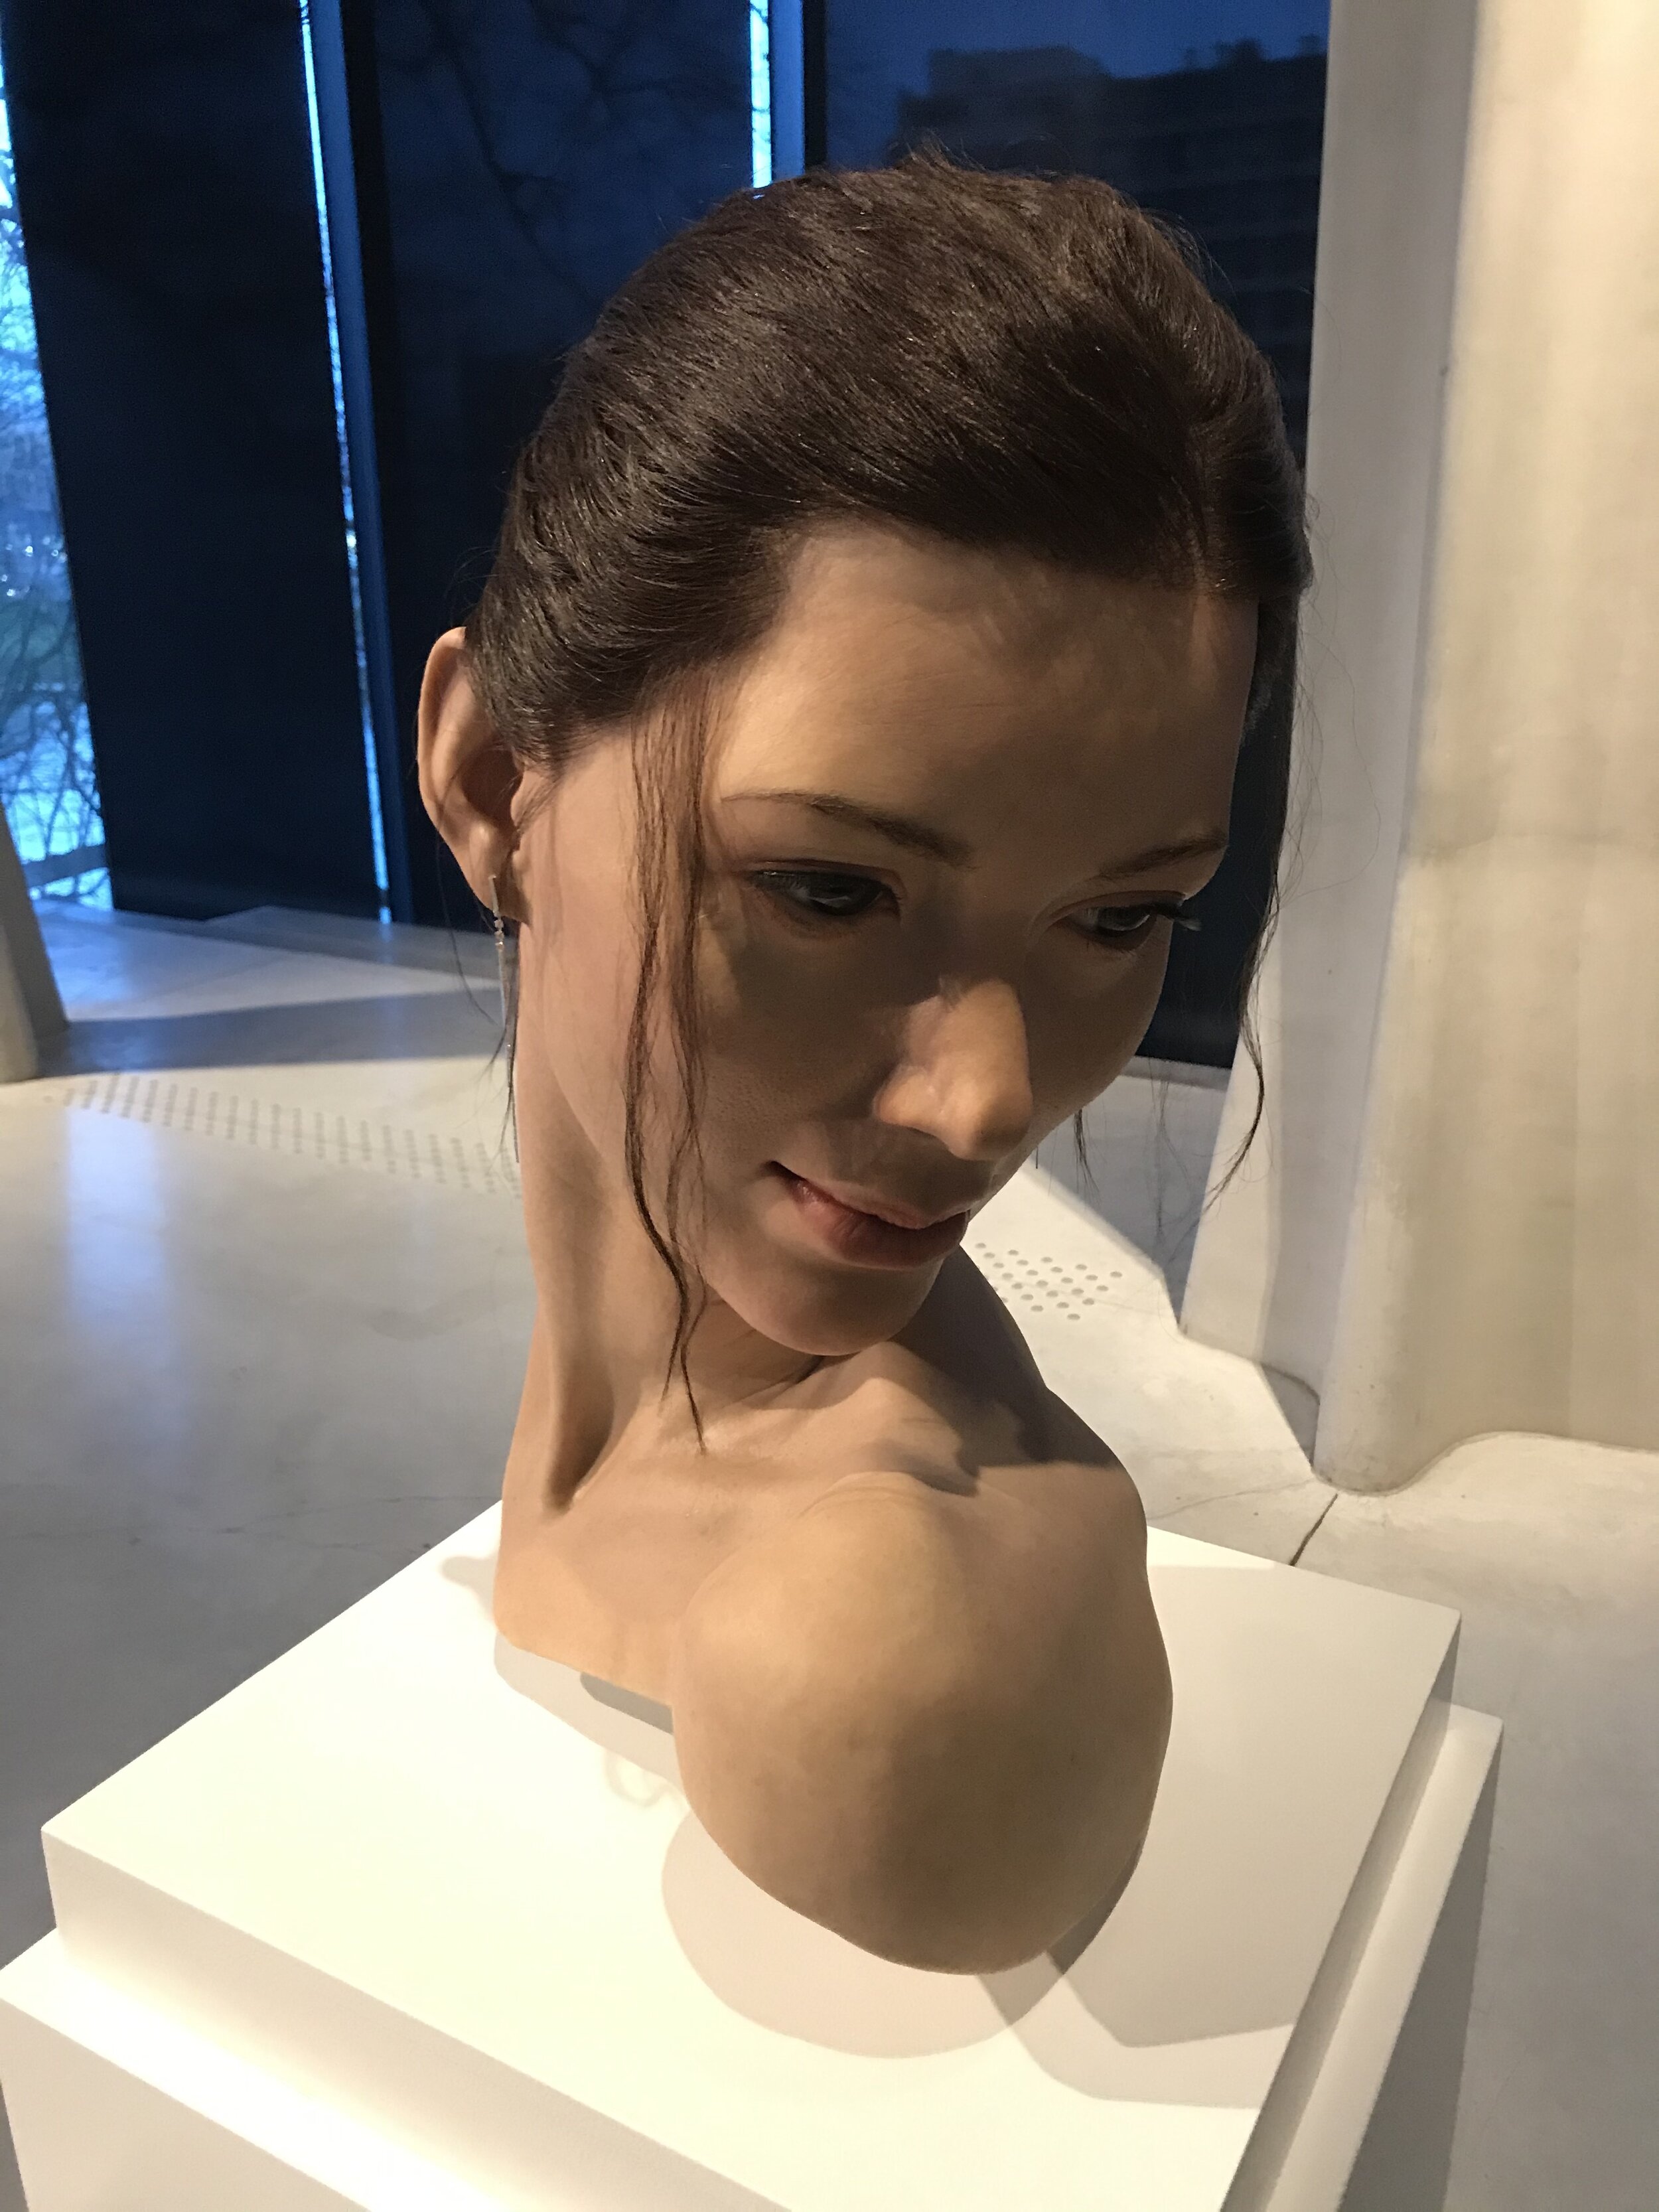
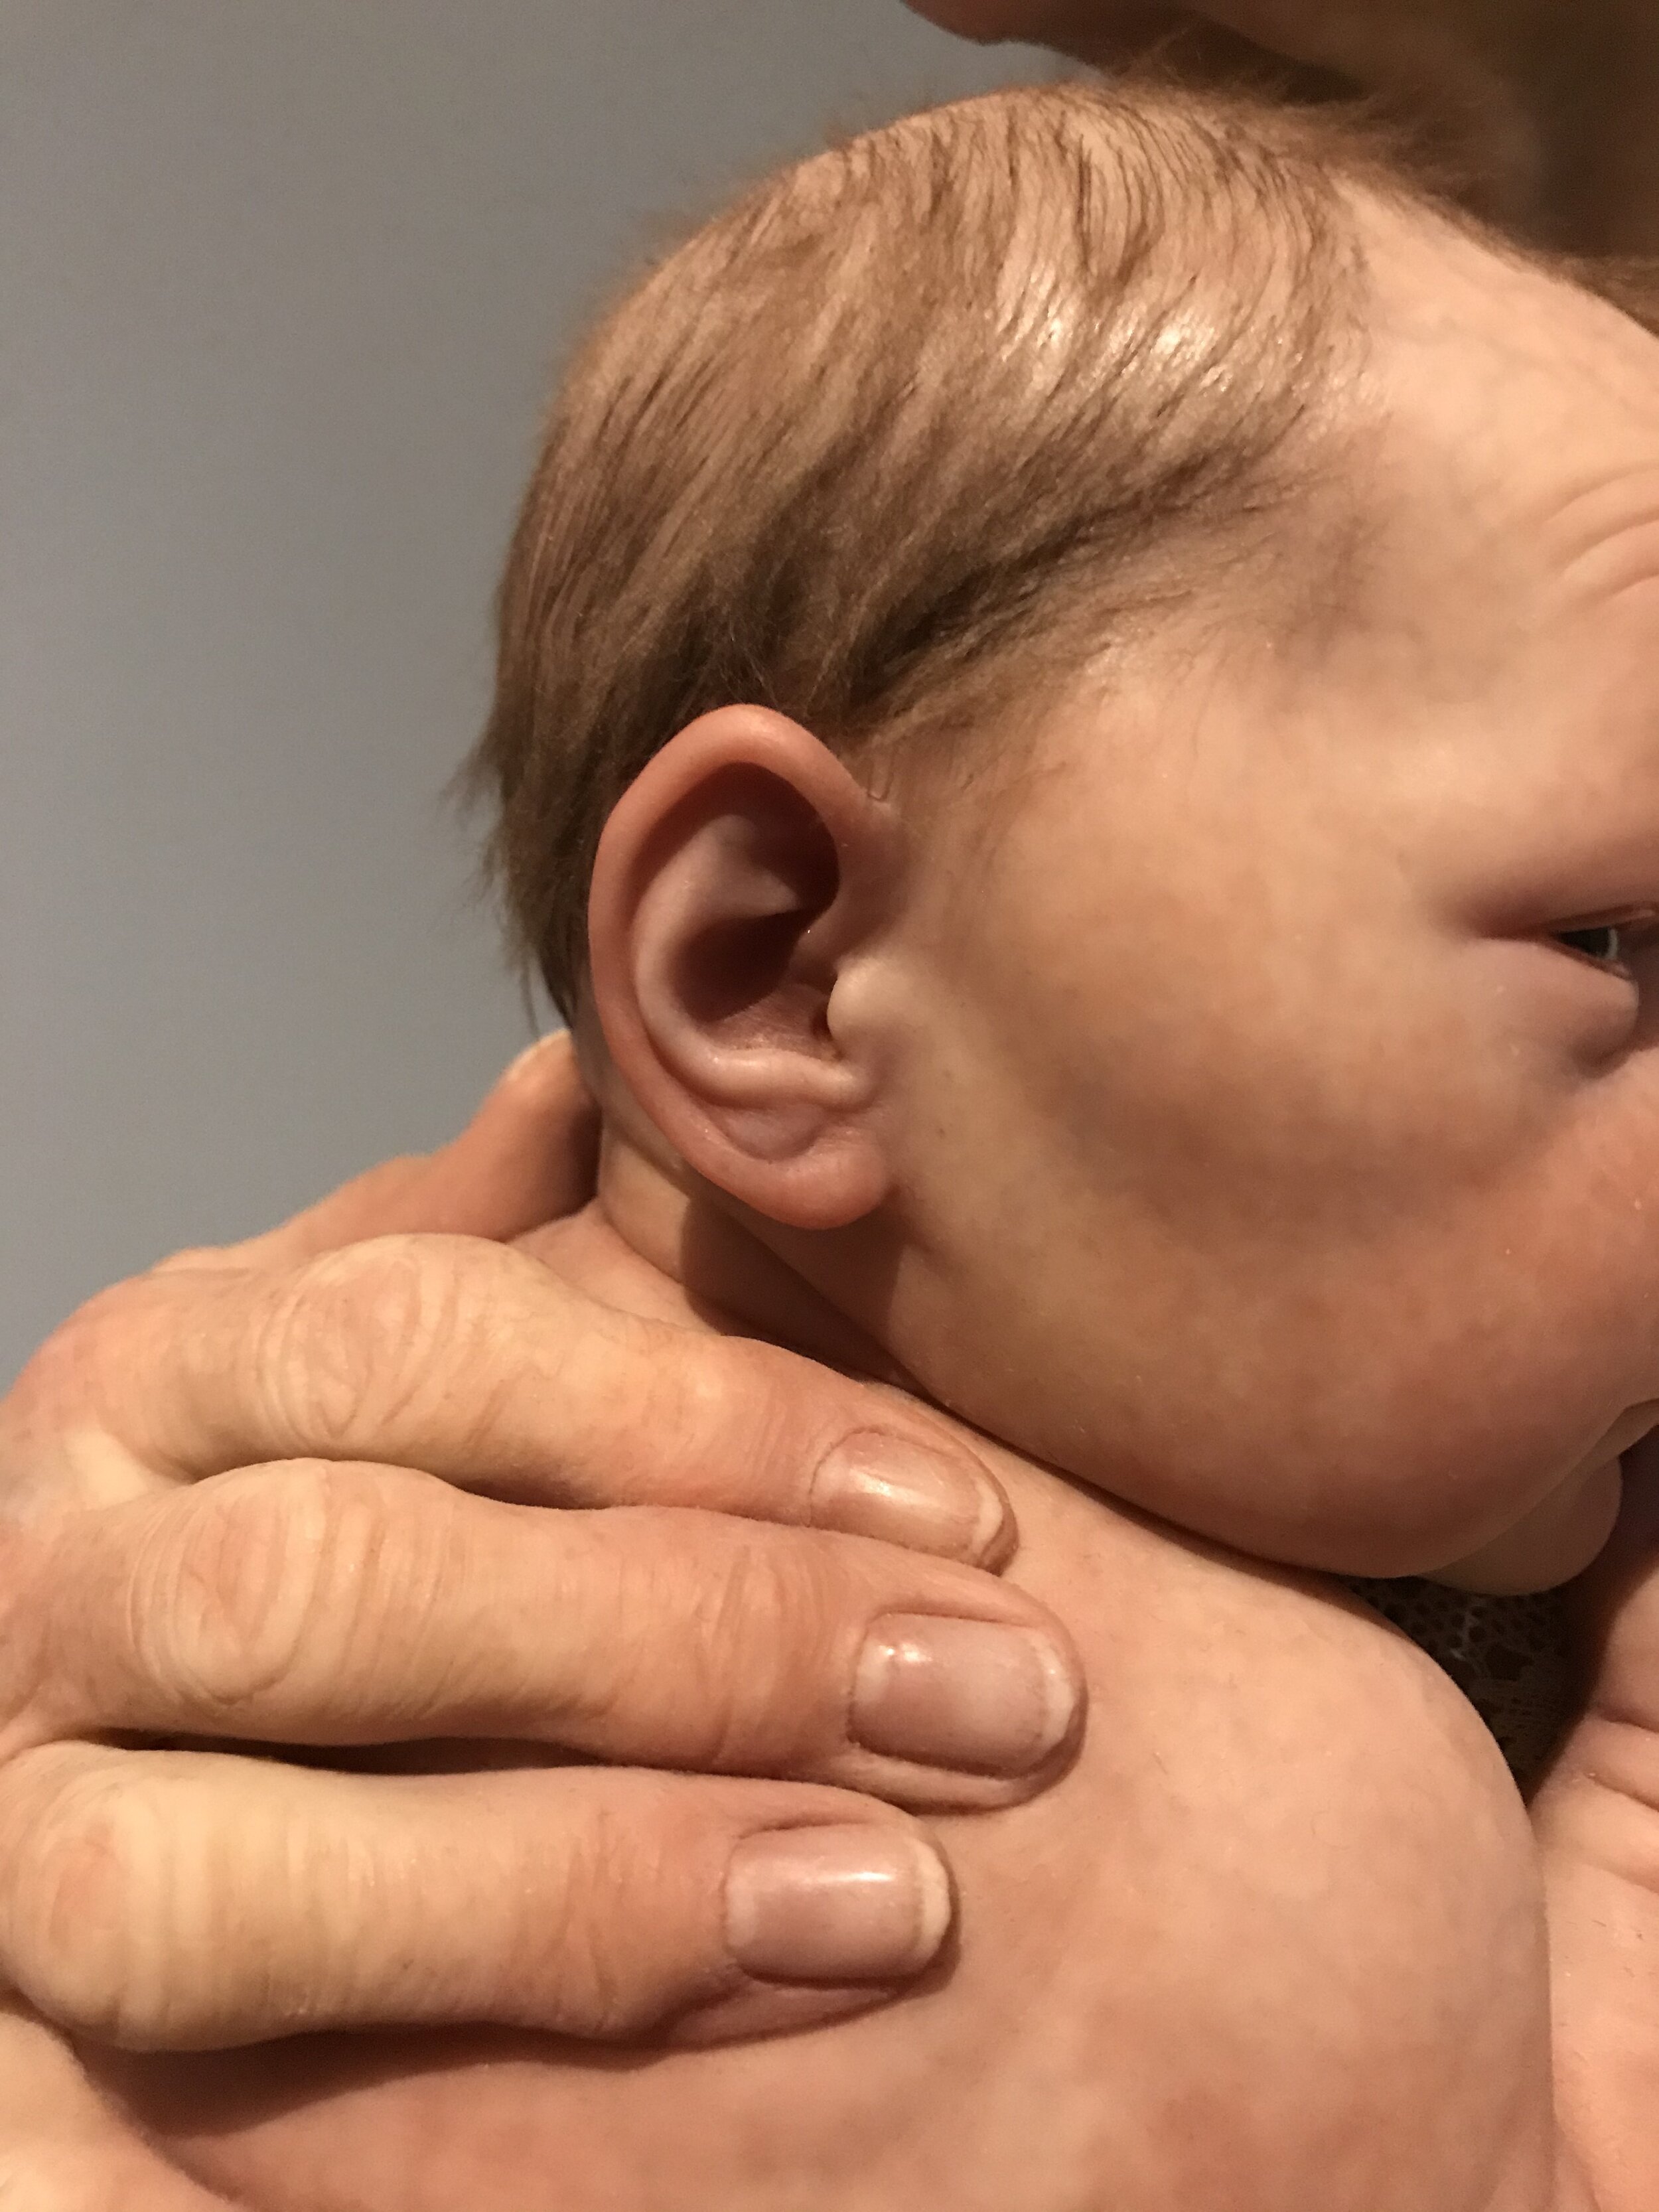
With regard to silicone, If your material is too opaque, light will have a hard time passing through it and the color will feel flat, solid, and heavy. If the silicone is too transparent, too much light will filter through and the material will have a rubbery, “gummy bear” quality to it. When making a prosthesis for a patient, finding the proper balance of opacity and transparency can vary from ear to nose to orbital, and even within a single region of the body there will sometimes be varying opacity in the skin. it’s important to understand these, and the success of a prosthesis will rely in part on how well these properties are mimicked by the silicone. the balance of these properties can be seen in Sam Jinks’ “Kneeling Woman”, when comparing the slightly more transparent fingers and toes to the more opaque quality of the arms, back, etc.
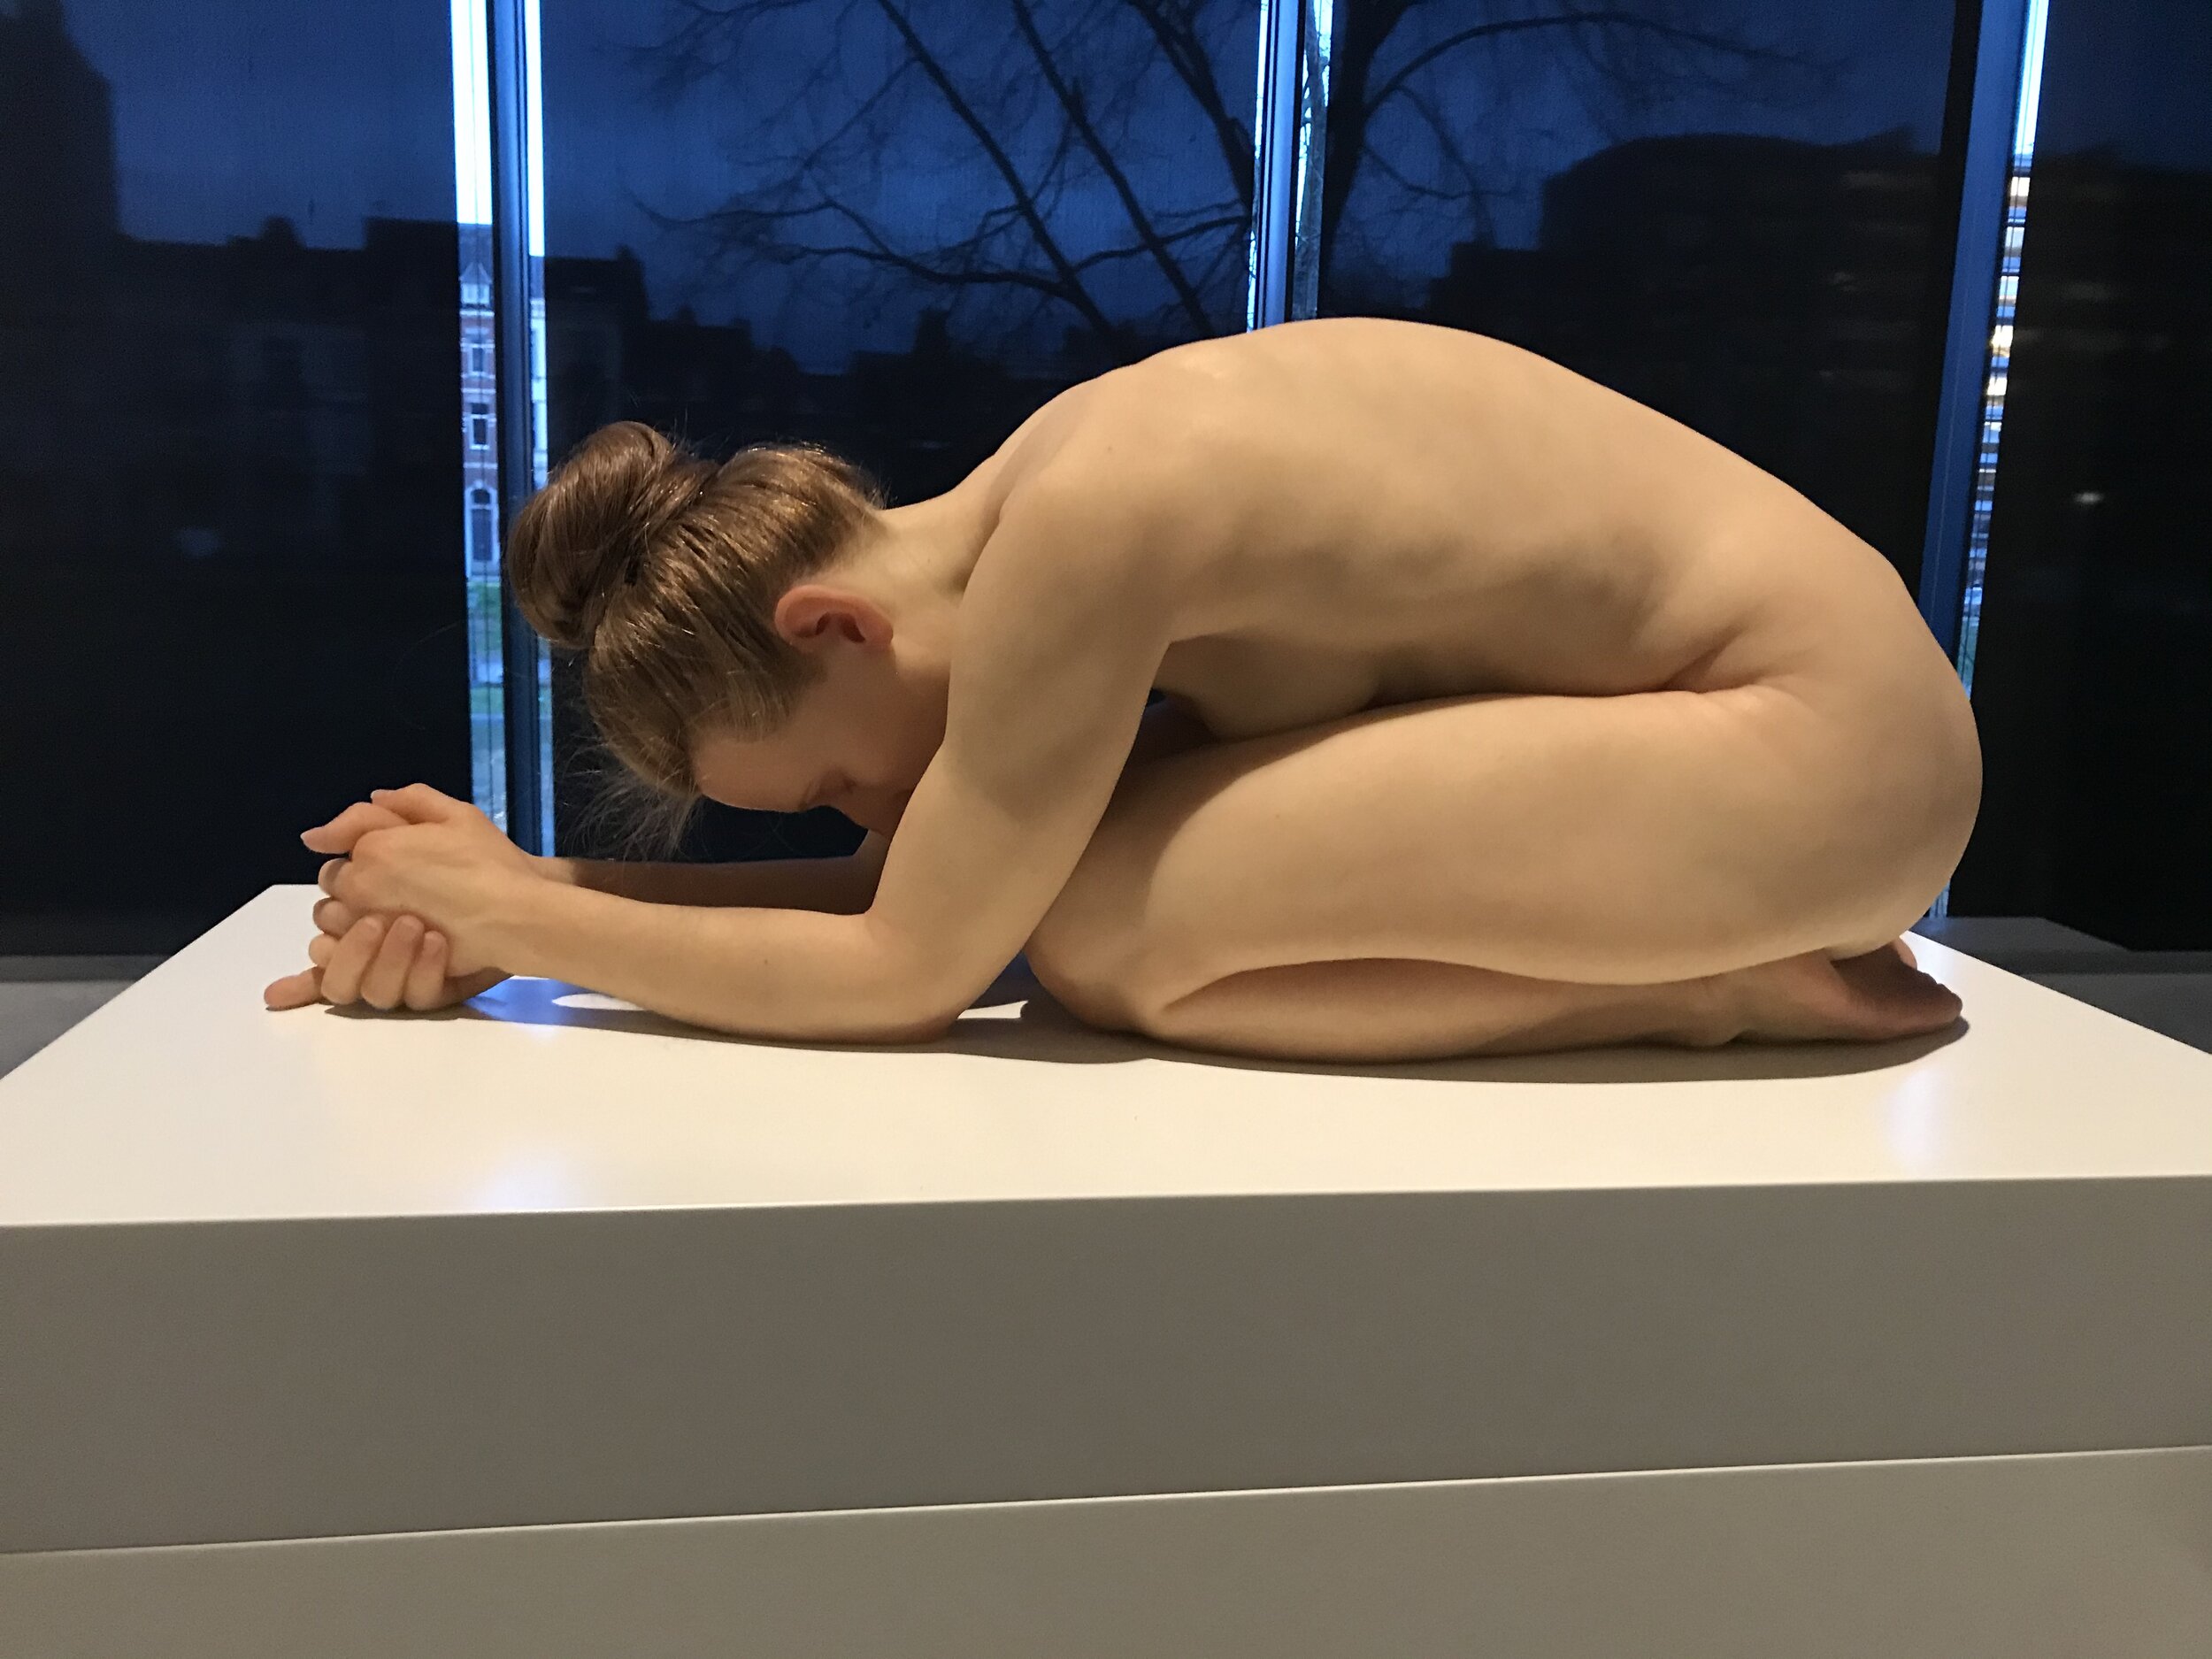
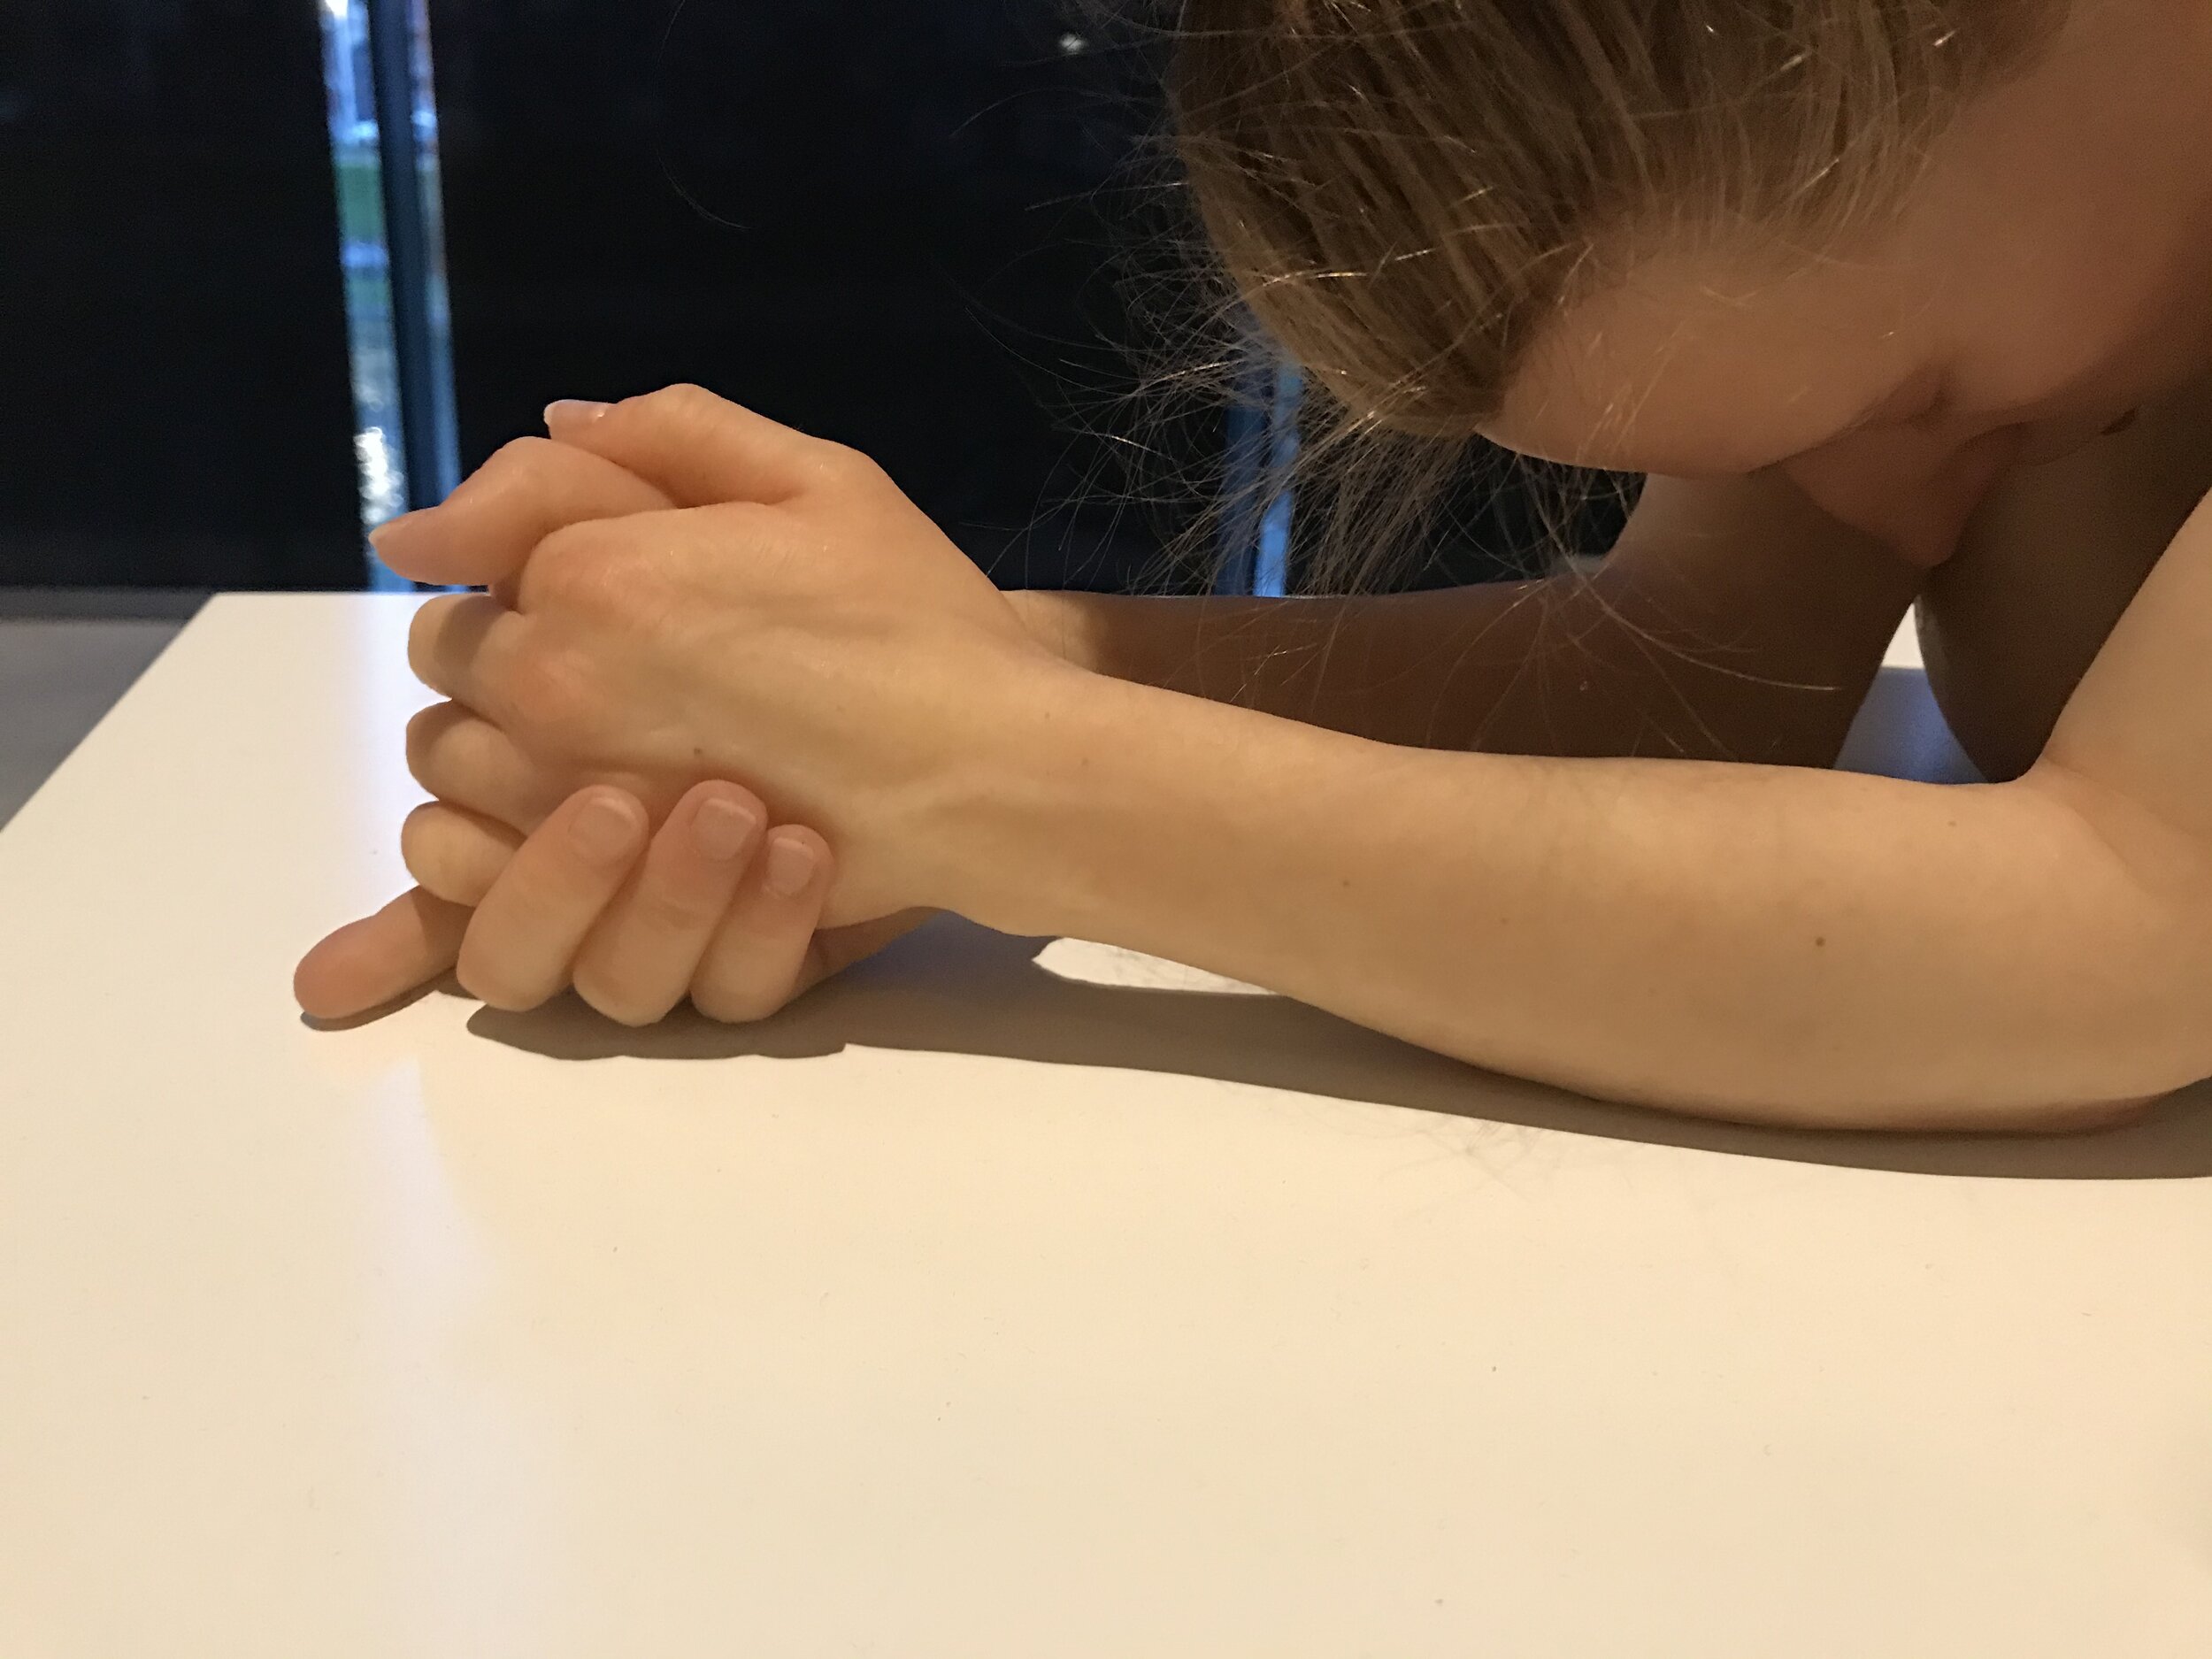
Sam Jinks - “Kneeling Woman”
Hair Quality
Another technical aspect, running parallel to the previously mentioned silicone properties, is the quality and implementation of the hair used in this type of work. Using the correct type of hair, in the appropriate density, and grooming it properly, goes a long way in achieving a realistic visual aesthetic. On a living, breathing human, each individual hair naturally tapers at the end, unless it has been cut. Using hairs that have been cut can result in a blunt, “bristly” look, which can also be a distraction from the illusion of realism. After putting all that time and effort into the silicone work, the last thing you want is to have your hair resemble a party wig! The quality of the hair on many of these sculptures was incredibly well done, and integral to the overall level of realism. In Peter Land’s “Back to Square One”, the variety of hair (head, eyebrows, beard), the punching technique, and the grooming all add to the overall success of the piece.
Peter Land - “Back to Square One”
Hair punching is an entire industry unto itself, and there are some incredibly talented people working in the film industry who focus solely on wigs, eyebrows, and facial hair. We had a few people working in the special effects industry attend the IAA this past year, and this topic was discussed quite a bit. Using higher quality hair is something that can bump up the level of detail in a facial prosthesis, which is something that I’m definitely interested in exploring and implementing as I move forward with my own work.
Conclusions - Pitfalls to Avoid
When silicone is too opaque and / or the paint is applied too heavily on the surface of the silicone, this can result in a sculpture or prosthesis taking on a somewhat mannequin-like appearance. Similarly, a silicone prosthesis that is too transparent can also be off-putting, in an almost cartoon-like way. Lastly, when the shape of individual hairs is unnatural, or the hair is applied in an unrealistic way (too thick, too thin, no color variation, etc.), a sculpture runs the risk of looking doll-like. These pitfalls can often lead to Uncanny Valley territory, where something looks almost human…but not quite. These factors are especially important when making a facial prosthesis because it can be VERY distracting if the silicone doesn’t blend with the skin, or the hairs stand out, which can draw unwanted attention to the patient. The goal when creating a prosthesis is to balance these properties in a way that properly camouflages the prosthesis on the patient. In an ideal situation, the best prosthesis is an undetectable prosthesis.
Additional Musings
…And that’s my two cents! Aside from the technical aspects of working with silicone, I just wanted to add a few final remarks on the beautiful pieces on display:
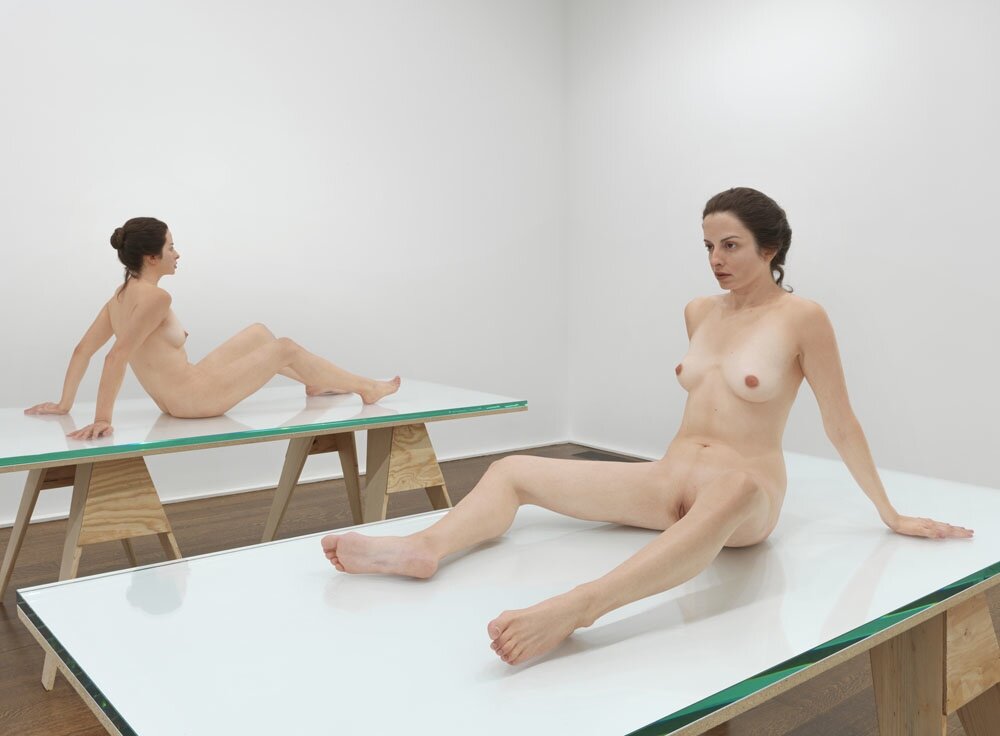
Many of the pieces on display had an accompanying video of the processes used by the artists to create their works. While some of the pieces were sculpted and textured by hand (Kazu Hiro’s Andy Warhol sculpture, being one example), some pieces were created by taking a series of highly-detailed silicone impressions of live models in the desired position. Due to the difficulty of taking a mold of an entire body in one shot, multiple molds of the same model were sometimes taken and flawlessly seamed together. One of the most impressive likenesses in the exhibition was created by Paul McCarthy, with his series of three versions of the same model - “That Girl T.G. Awake”. The variegated flesh tones, subtlety in texture, and meticulous attention to detail was amazing, and the fact that there were three full figures in slightly different poses to compare against one another really pushed the level of realism to the limits. These figures, in particular, felt almost as though they would blink at any moment. As one might expect, due to the explicit nature of the pieces, this was the only room where photographs were not allowed. But the work was just too good to omit and it would be silly not to mention it due to “squeamishness”. Luckily, a few photos were available, courtesy of Google Images.
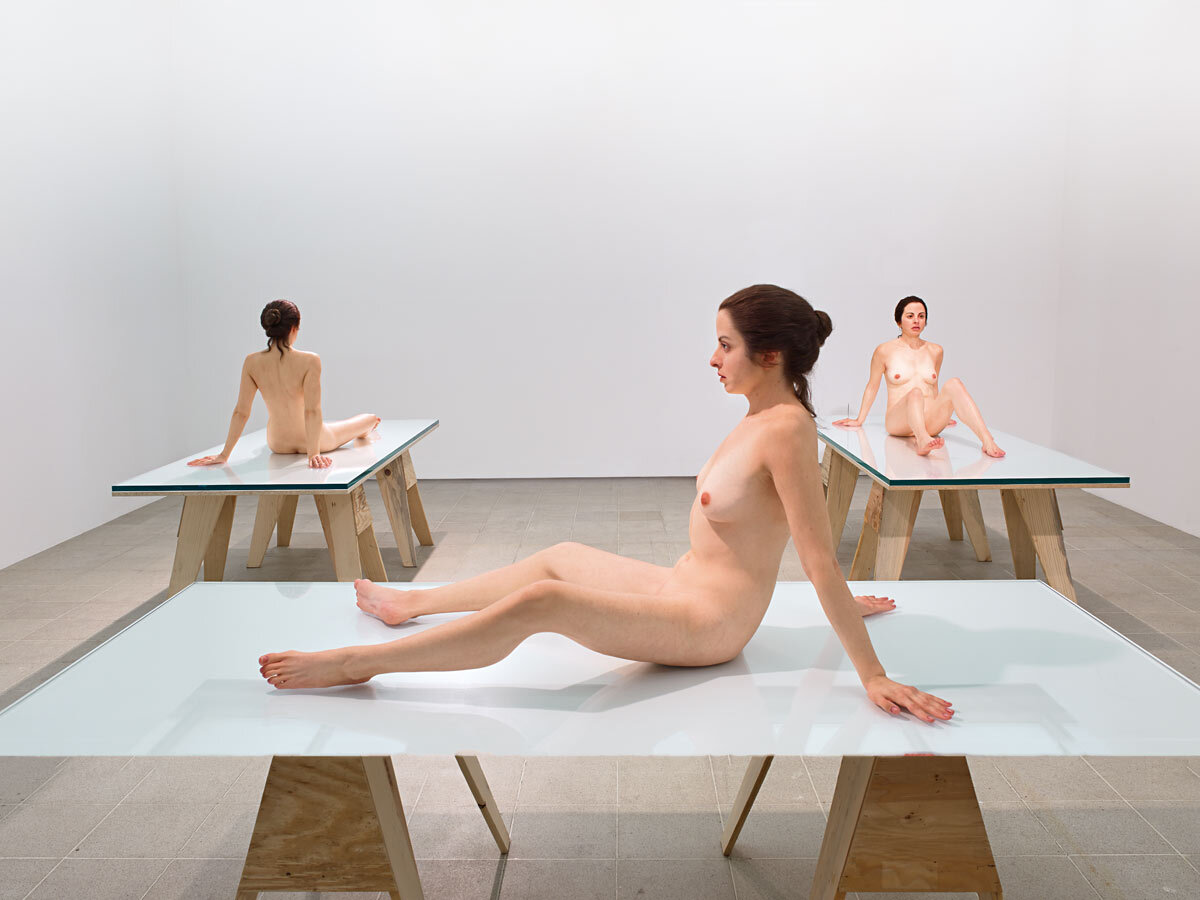
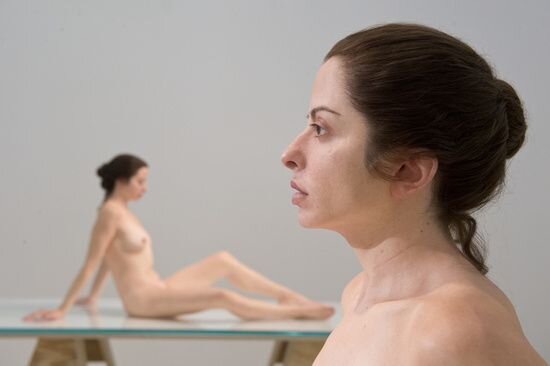
Paul McCarthy - “That Girl T.G. Awake” (courtesy of Google Images)
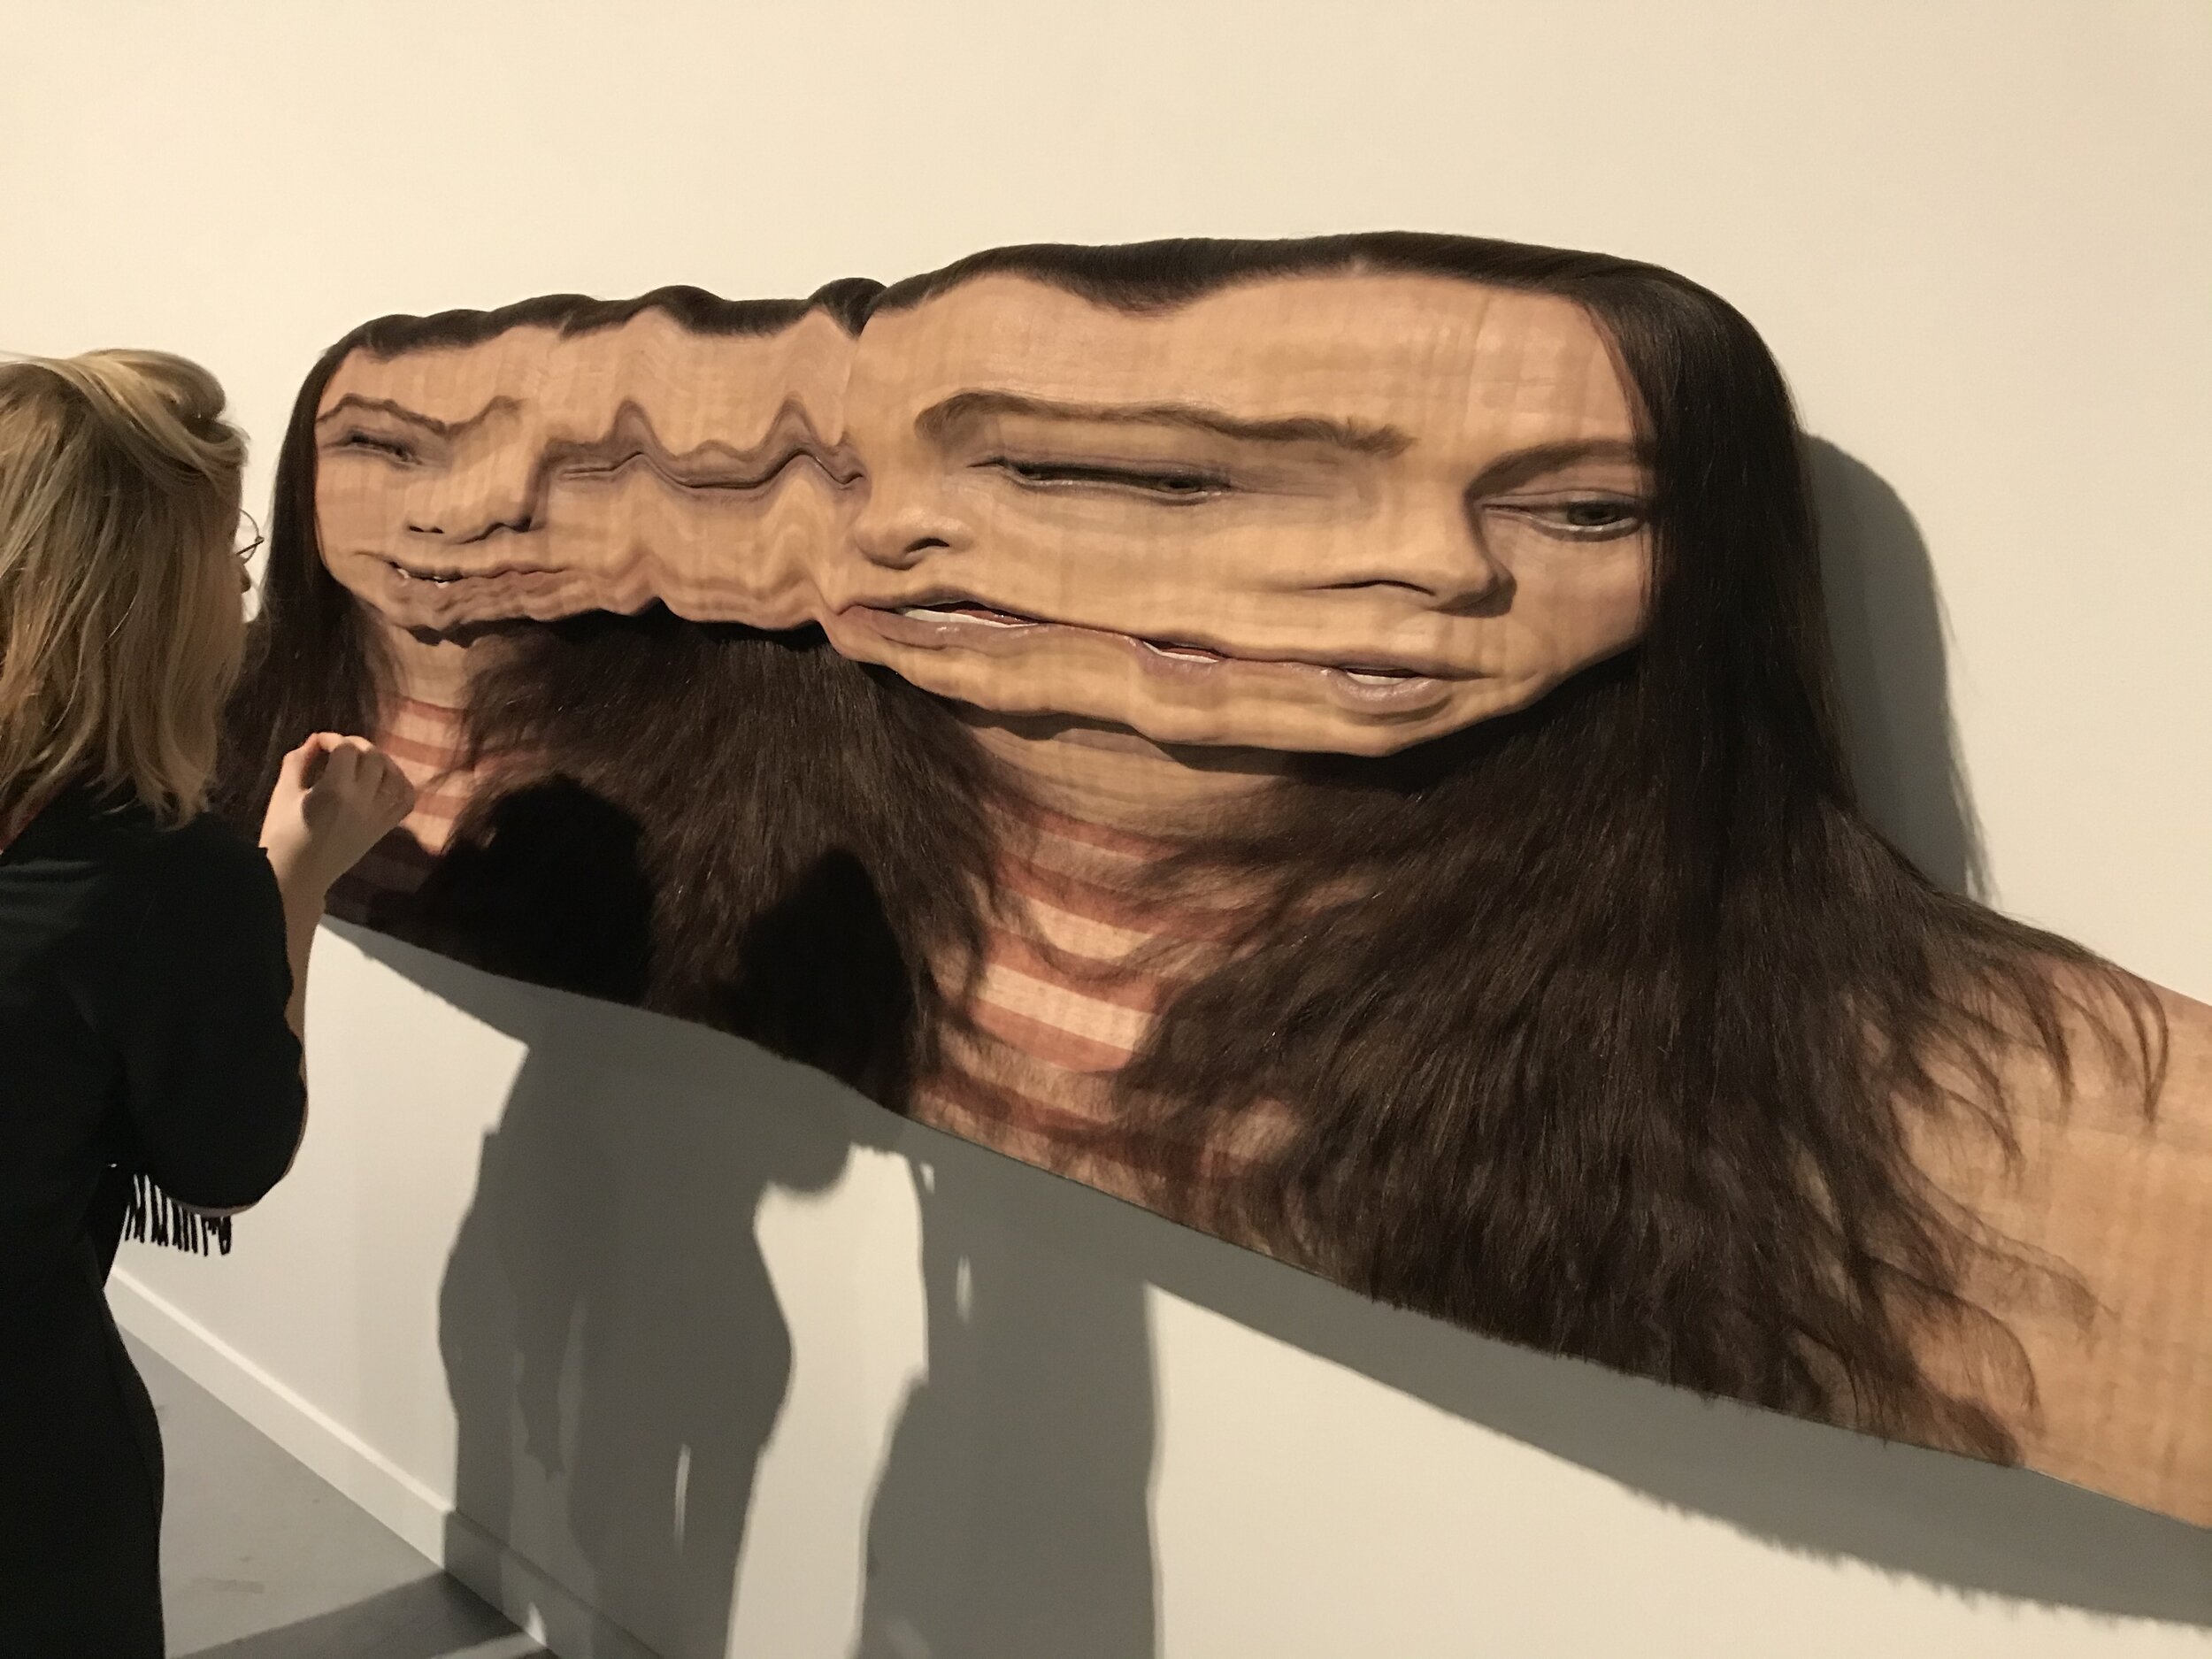
Some artists also employed various techniques (3D scanning and printing, for example) to achieve certain effects in their pieces, such as distortion and size scaling. Evan Penny’s incredible piece “Self Stretch 2012” is so expertly distorted that you feel as though you’re experiencing a glitch in real-time, and your brain has to catch up with what you’re actually seeing. All sculptures are meant to be viewed in-the-round, but this piece, in particular, truly requires a full 360 view to fully wrap your mind around it.
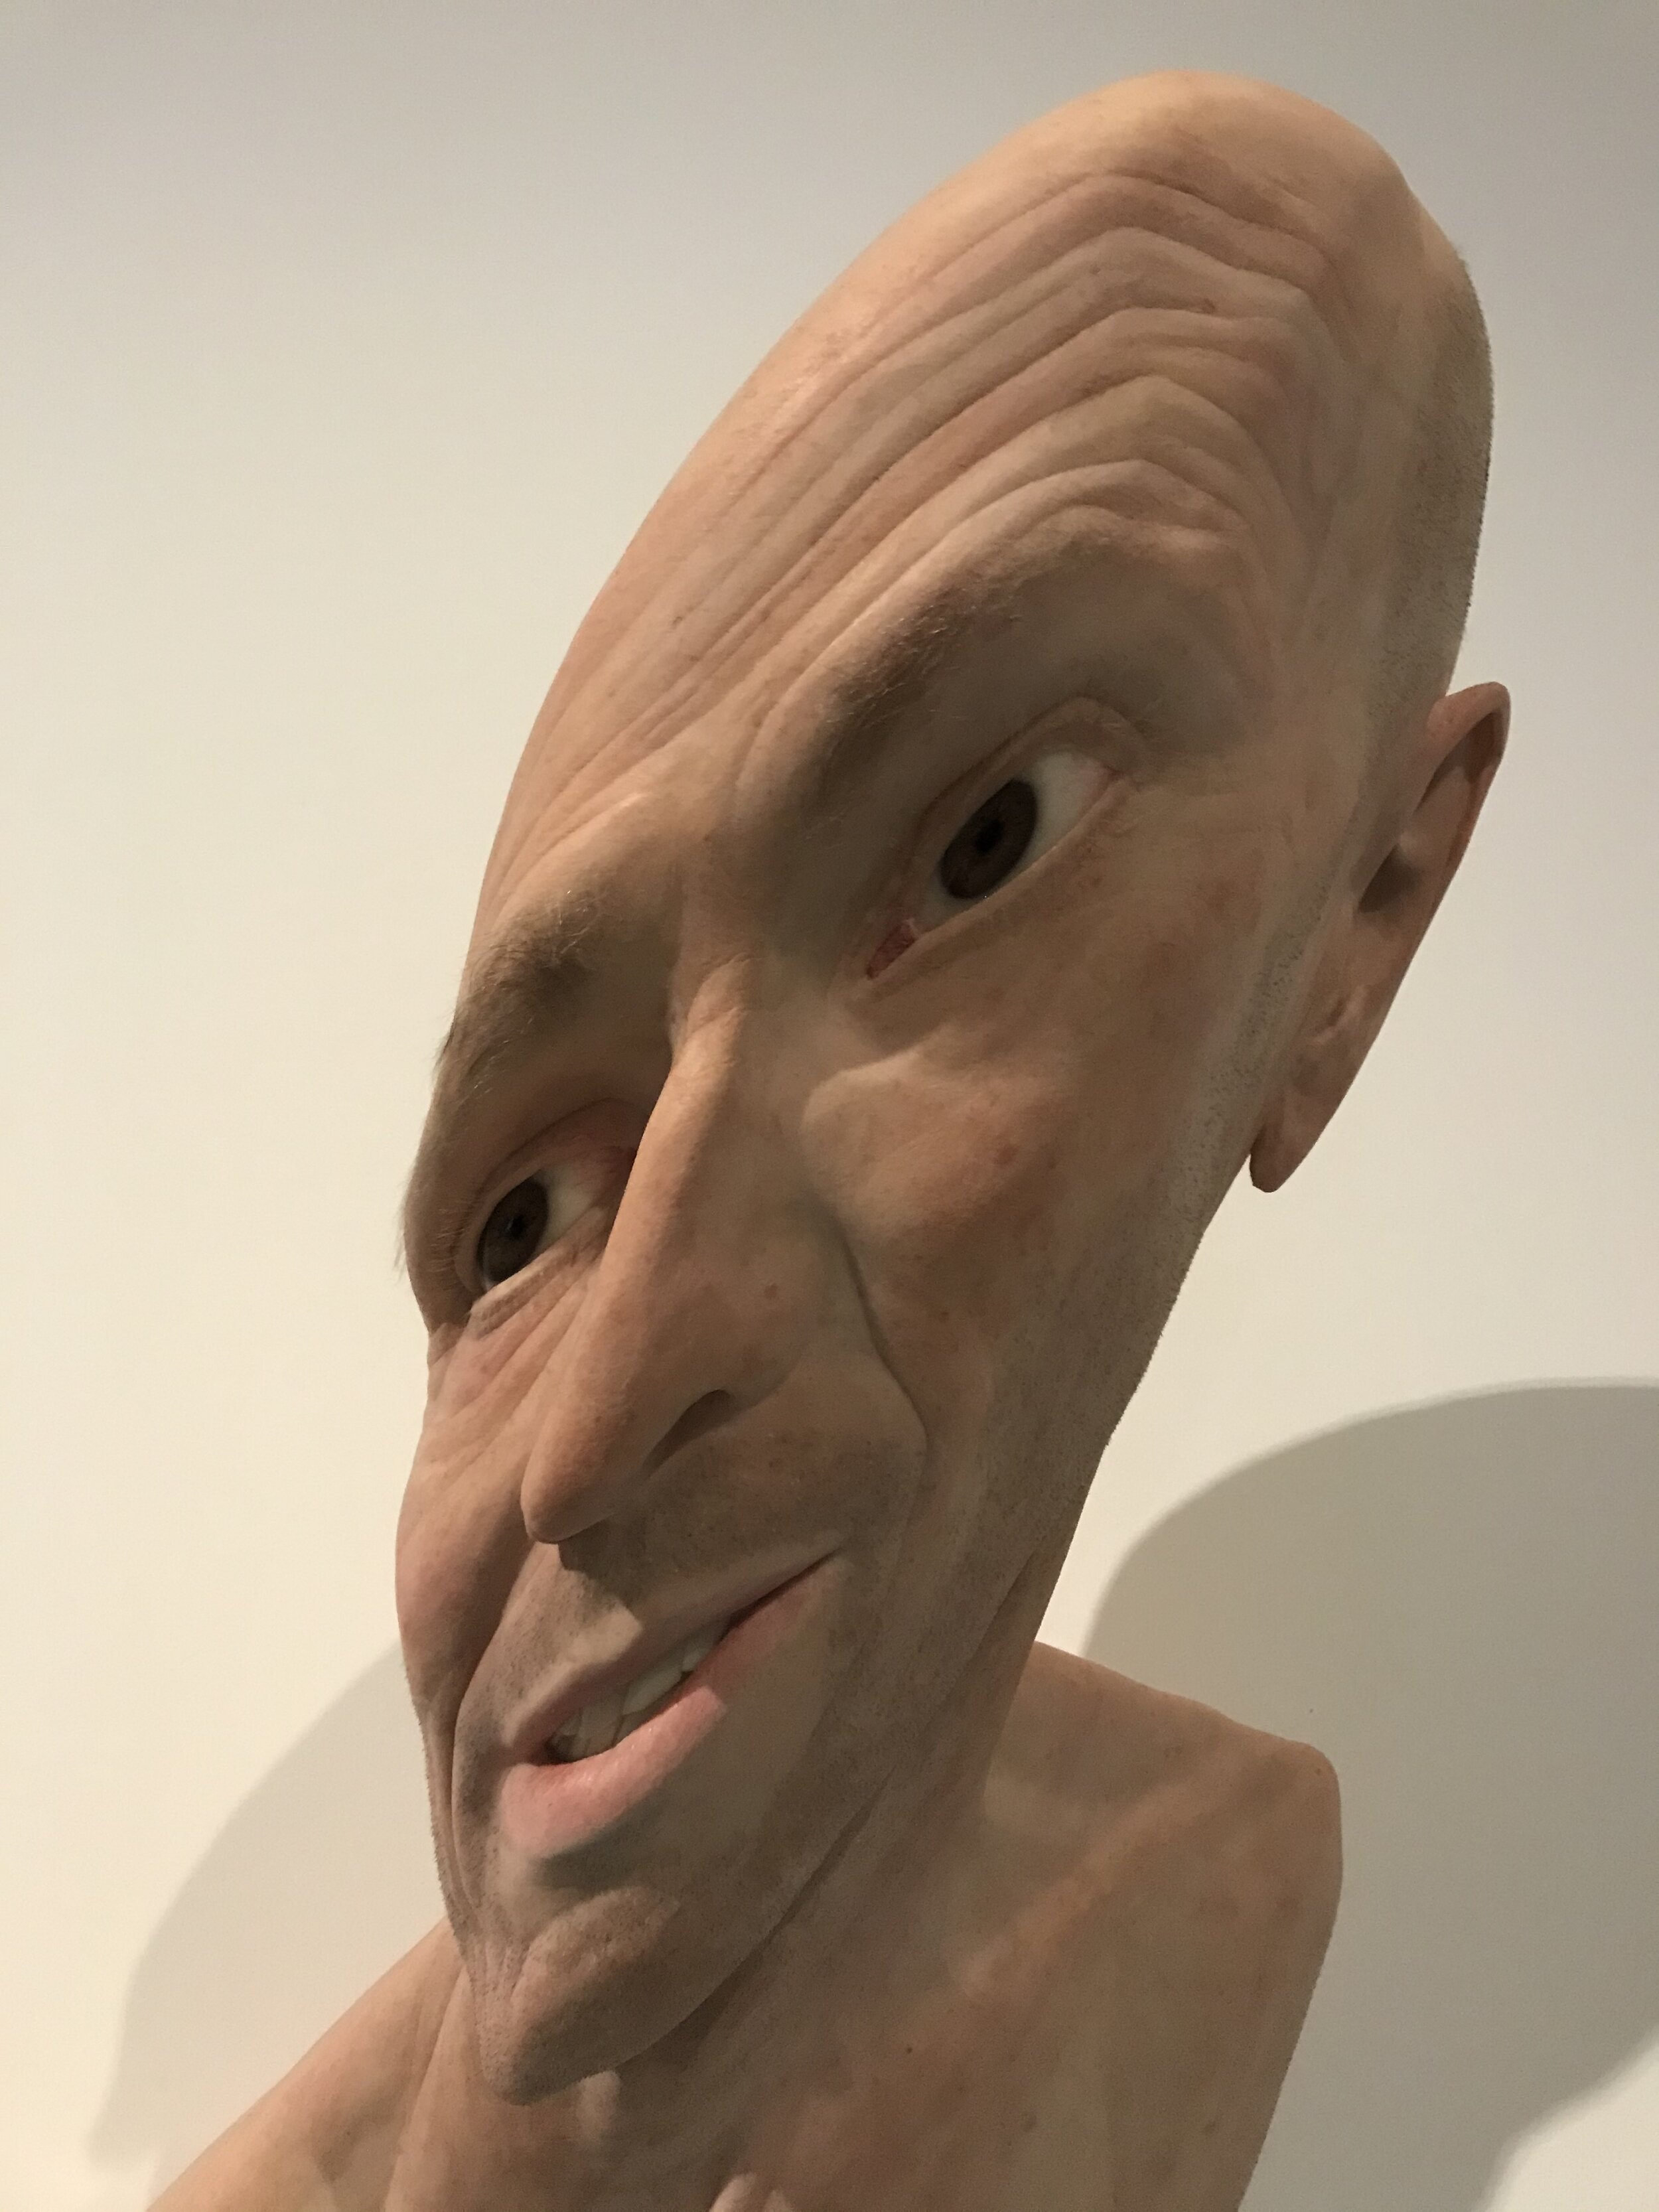
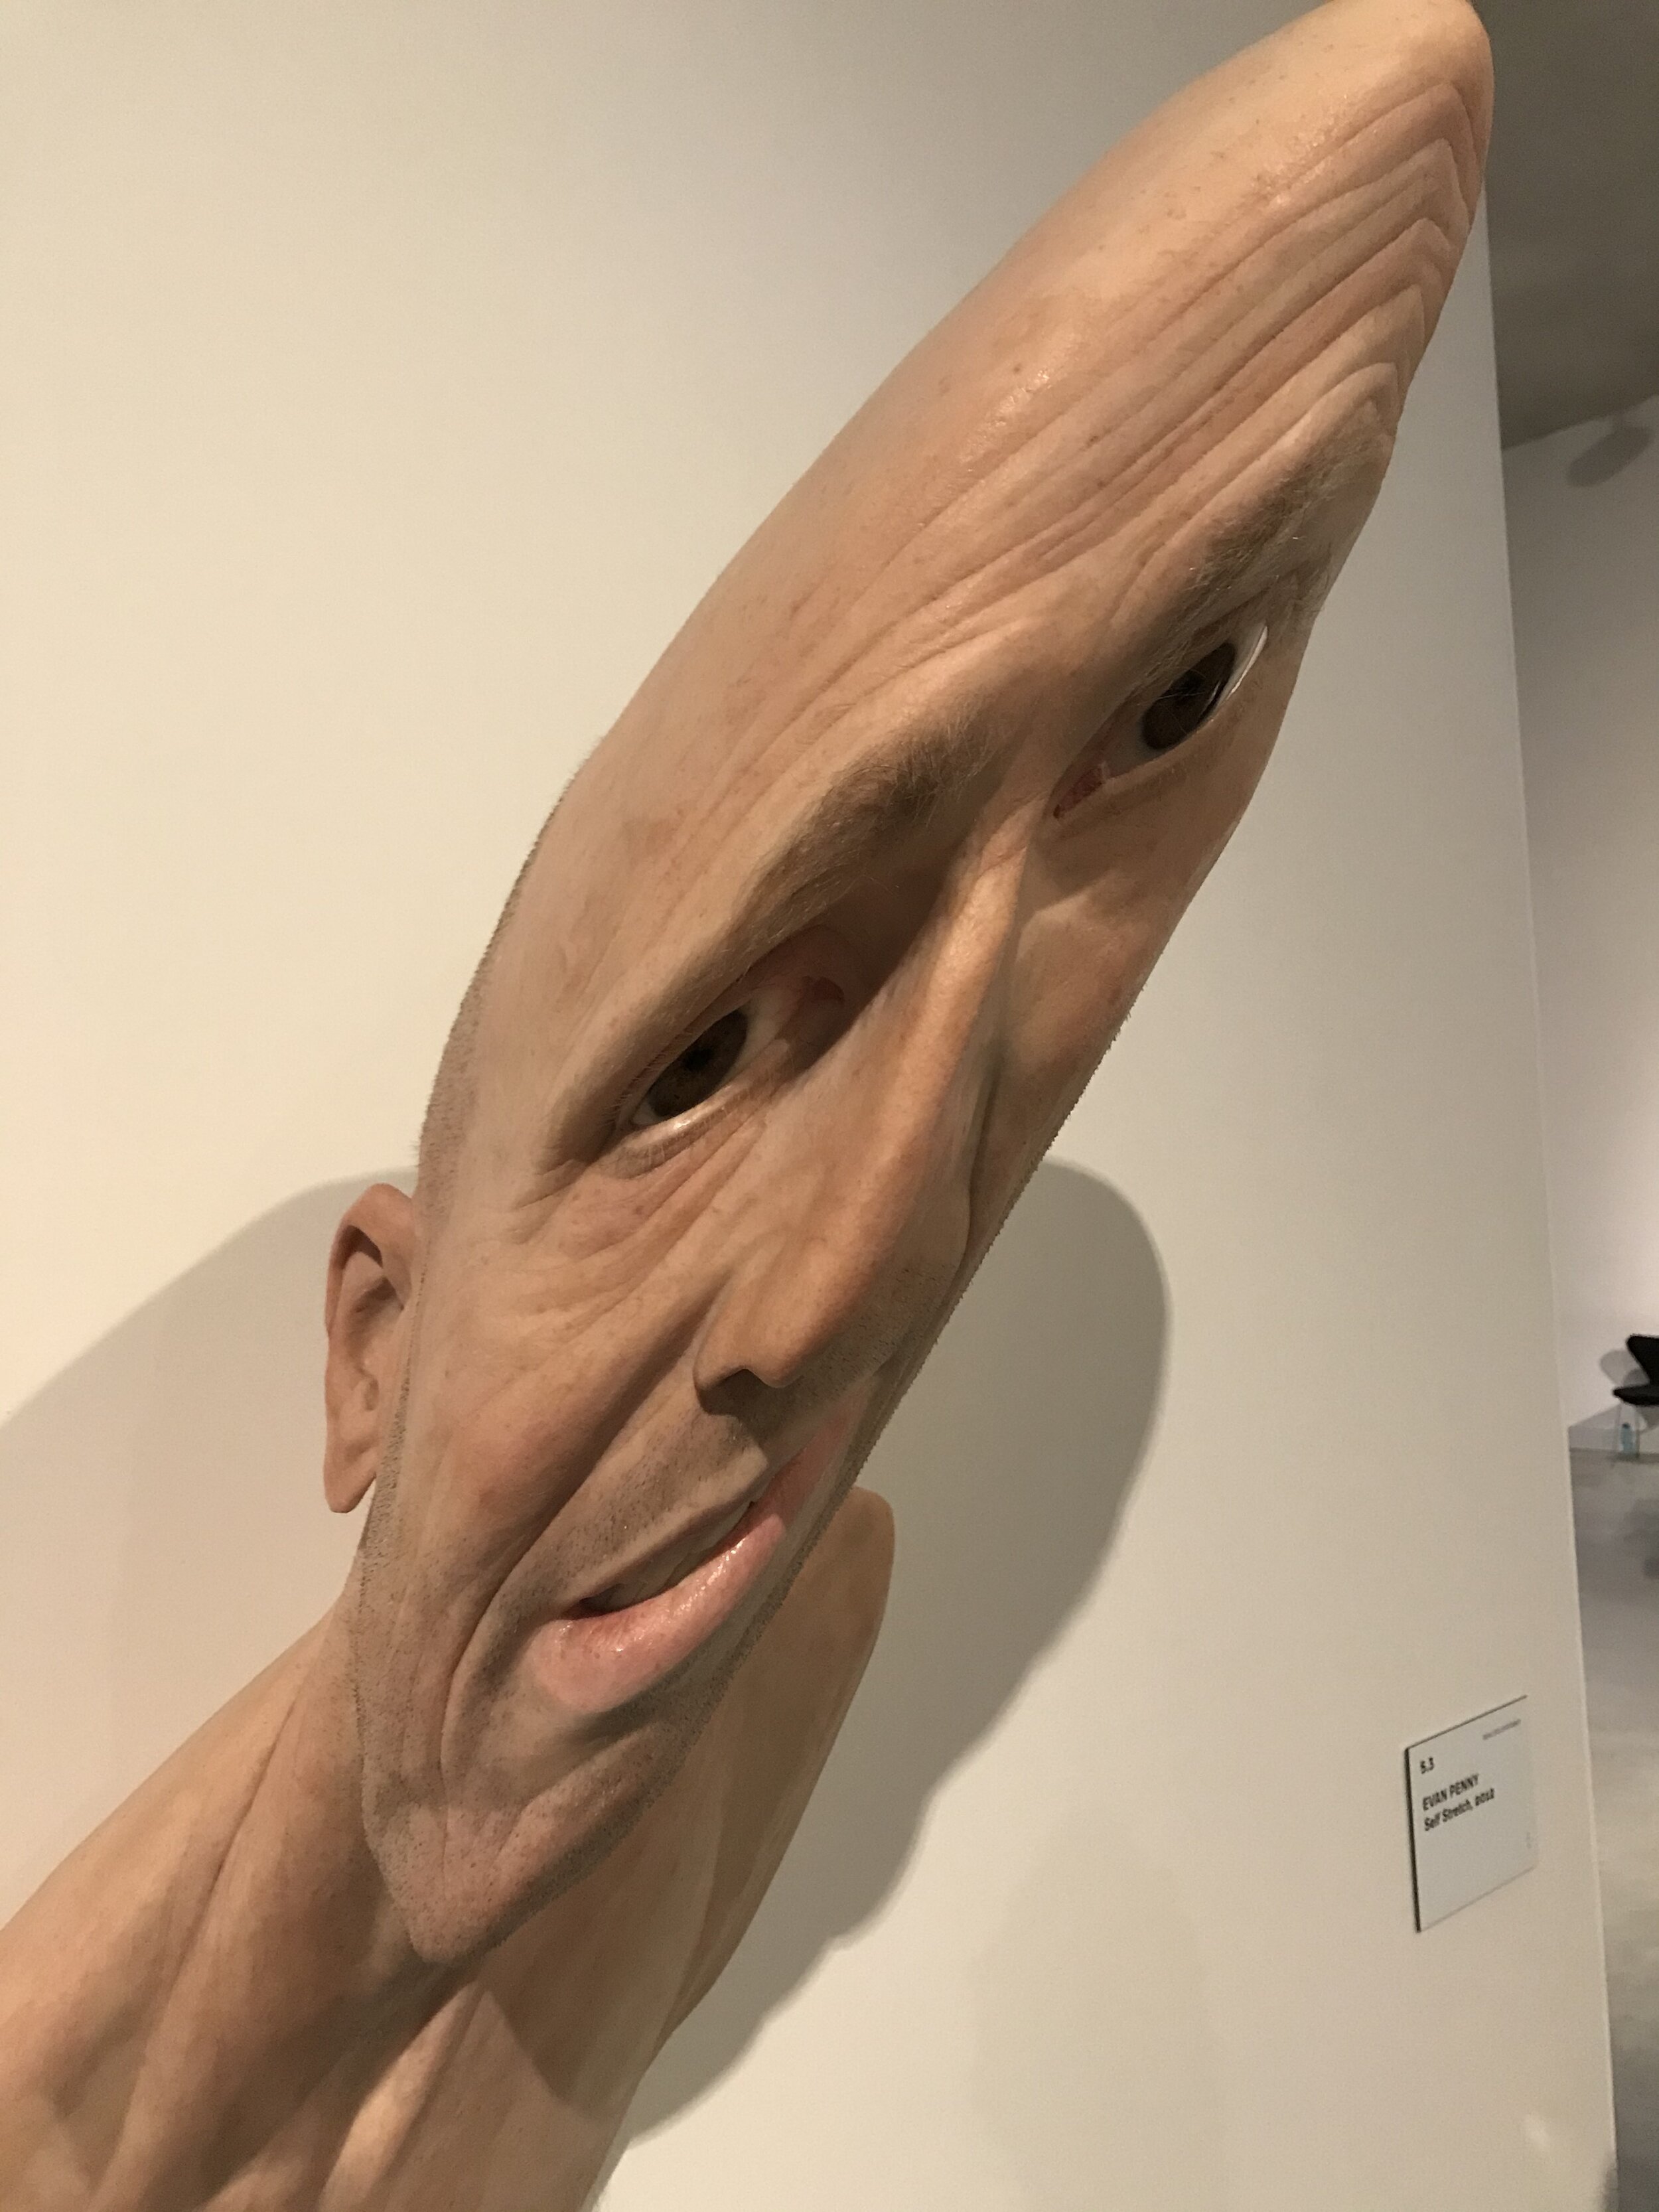
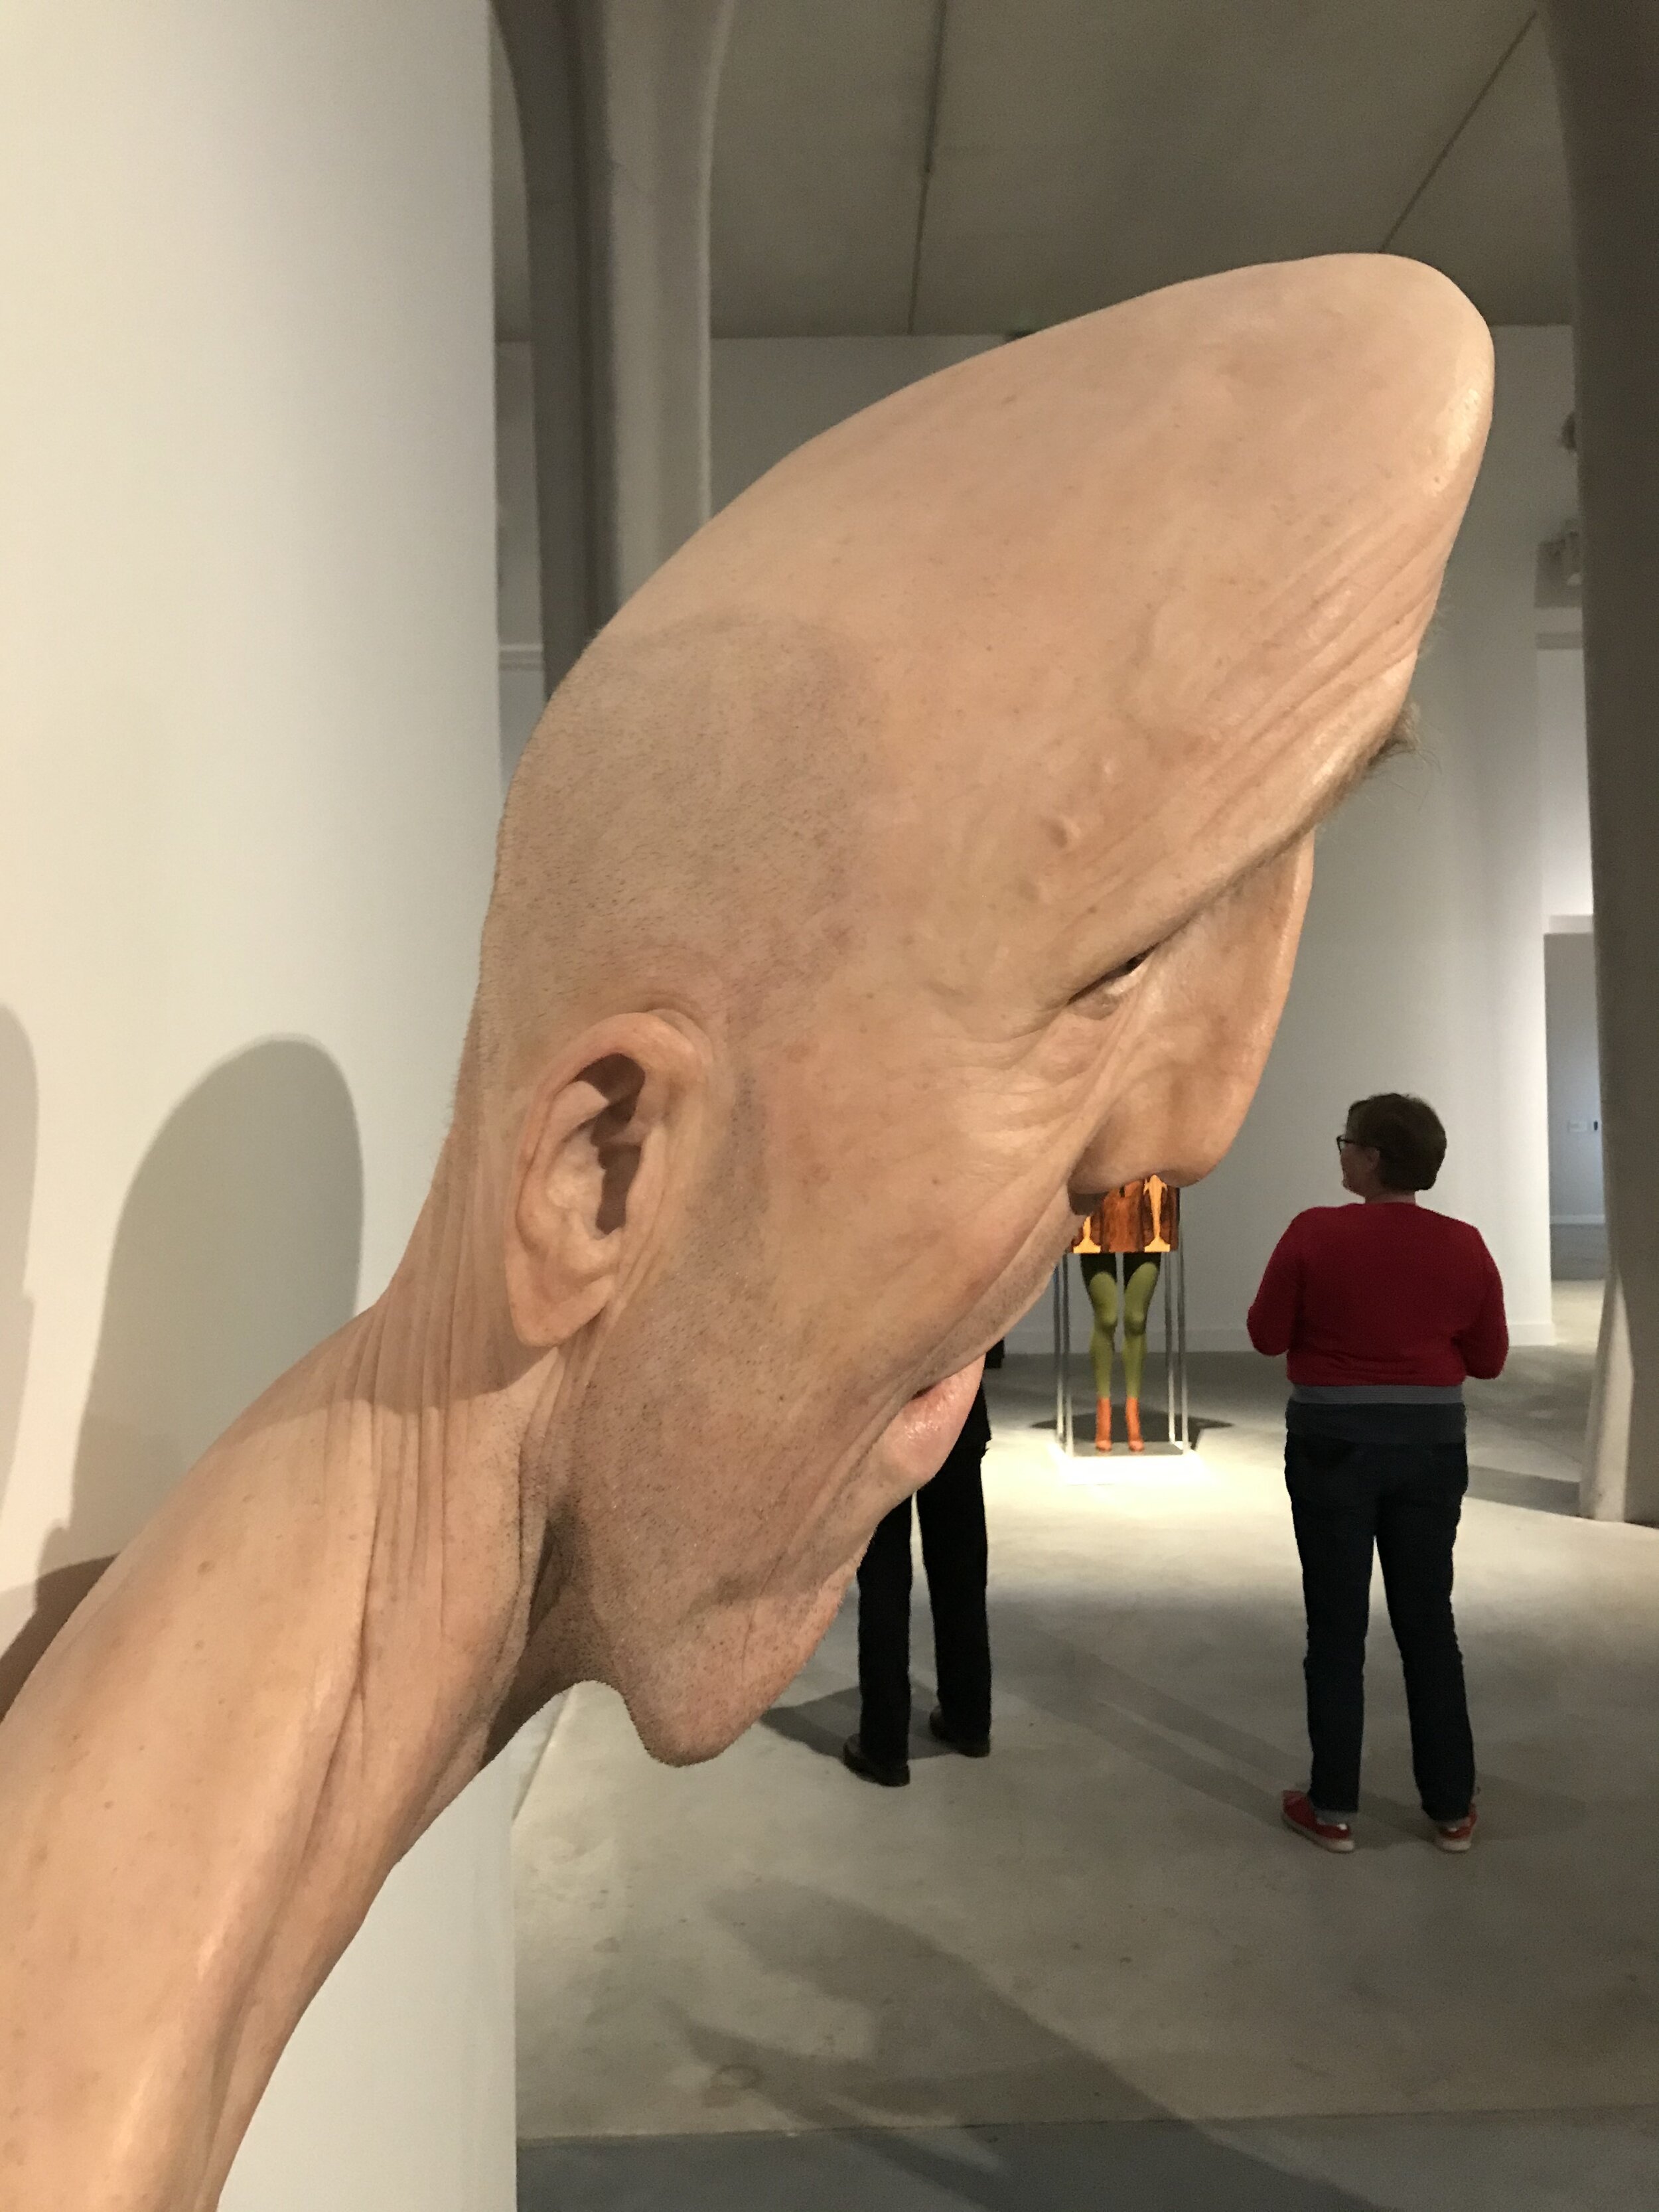
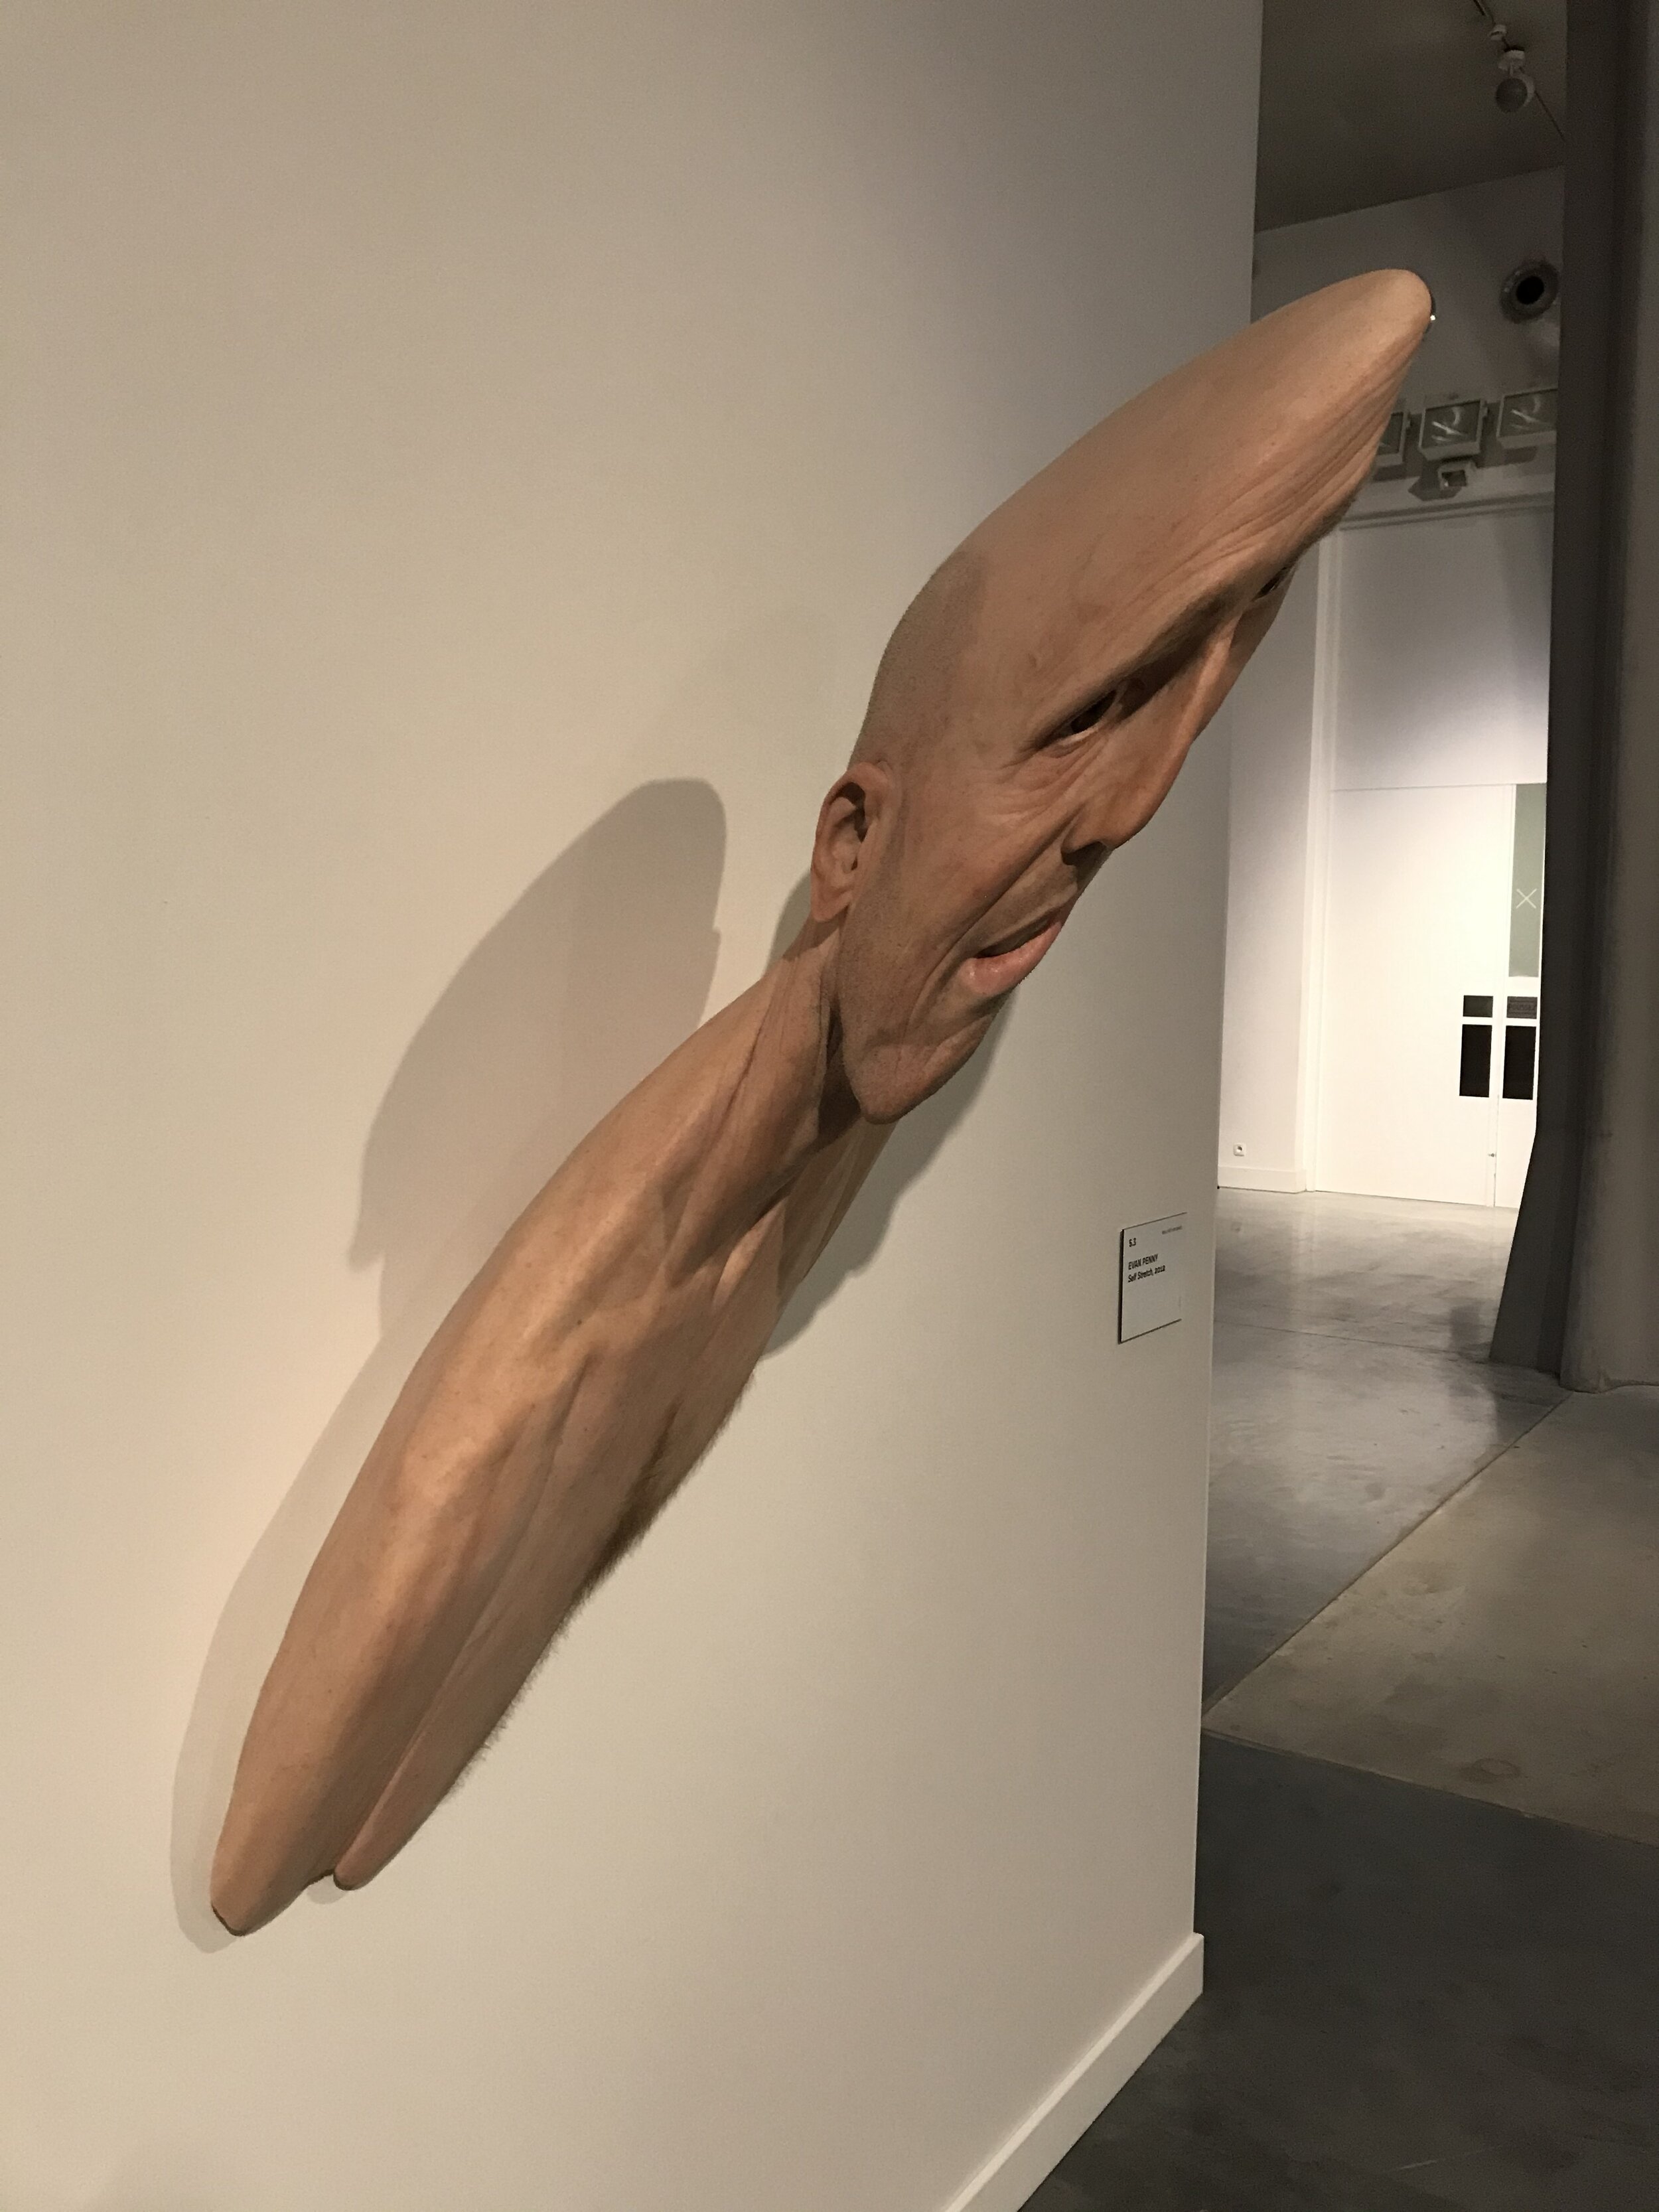
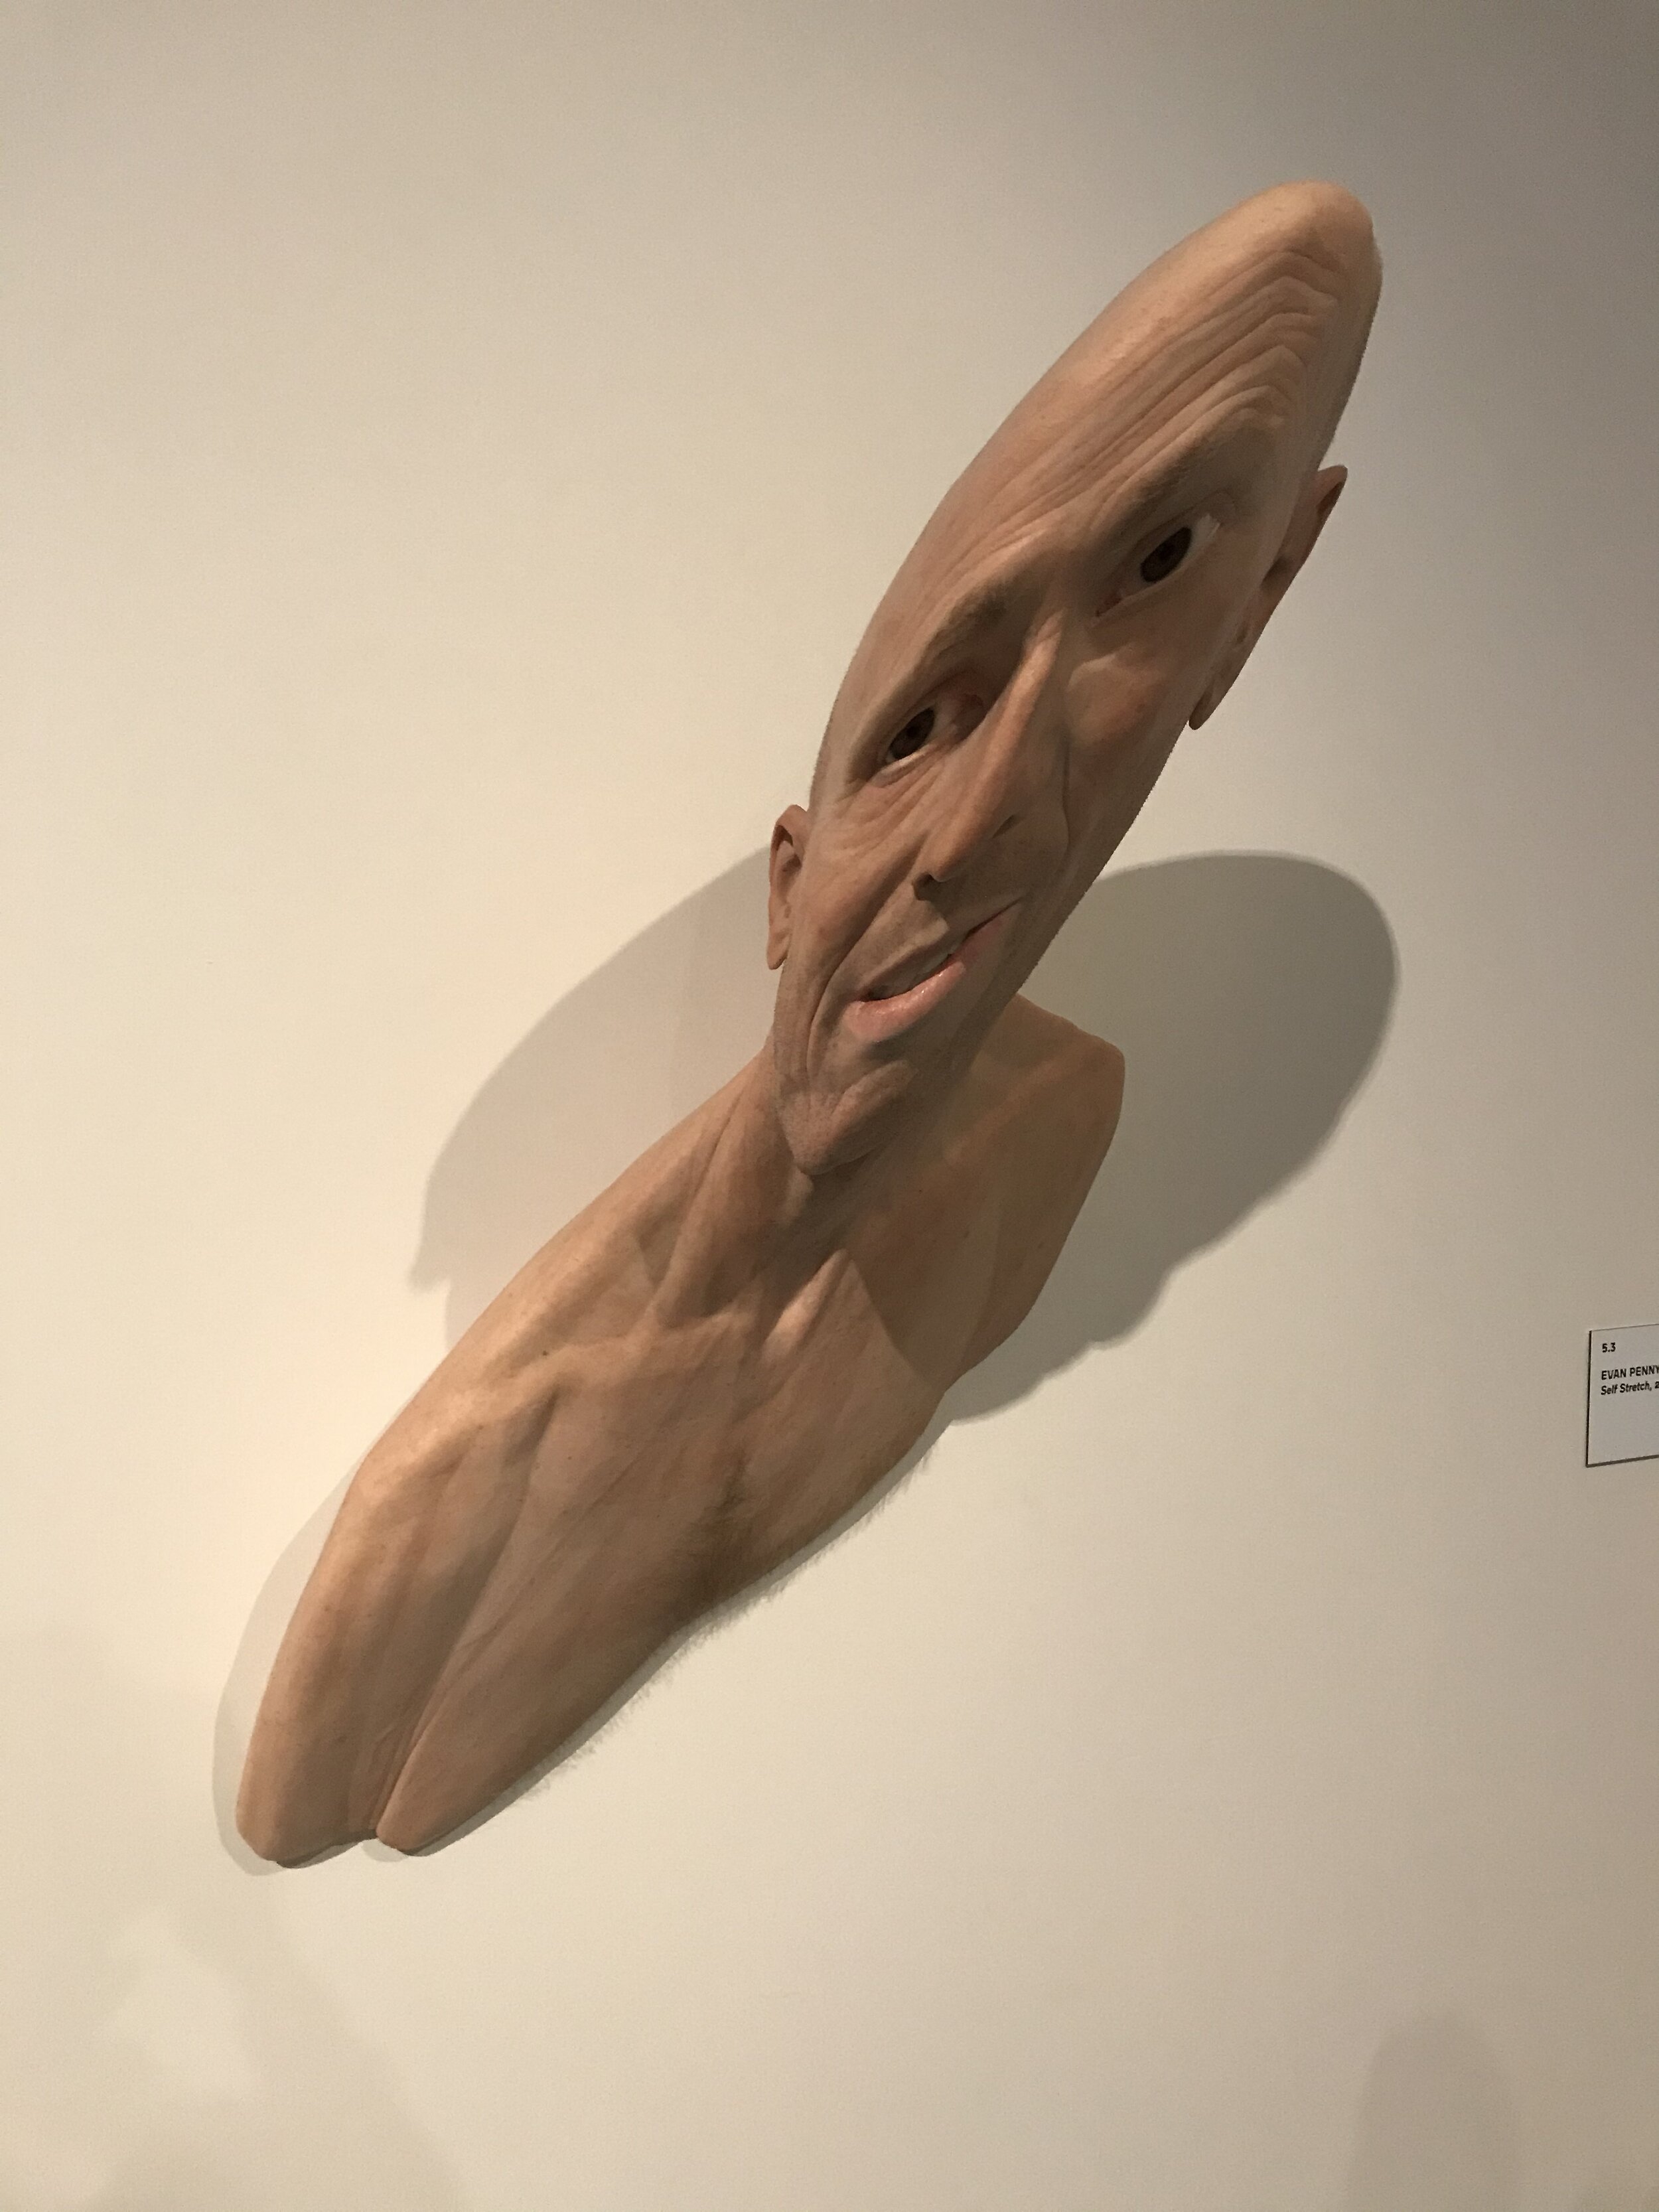
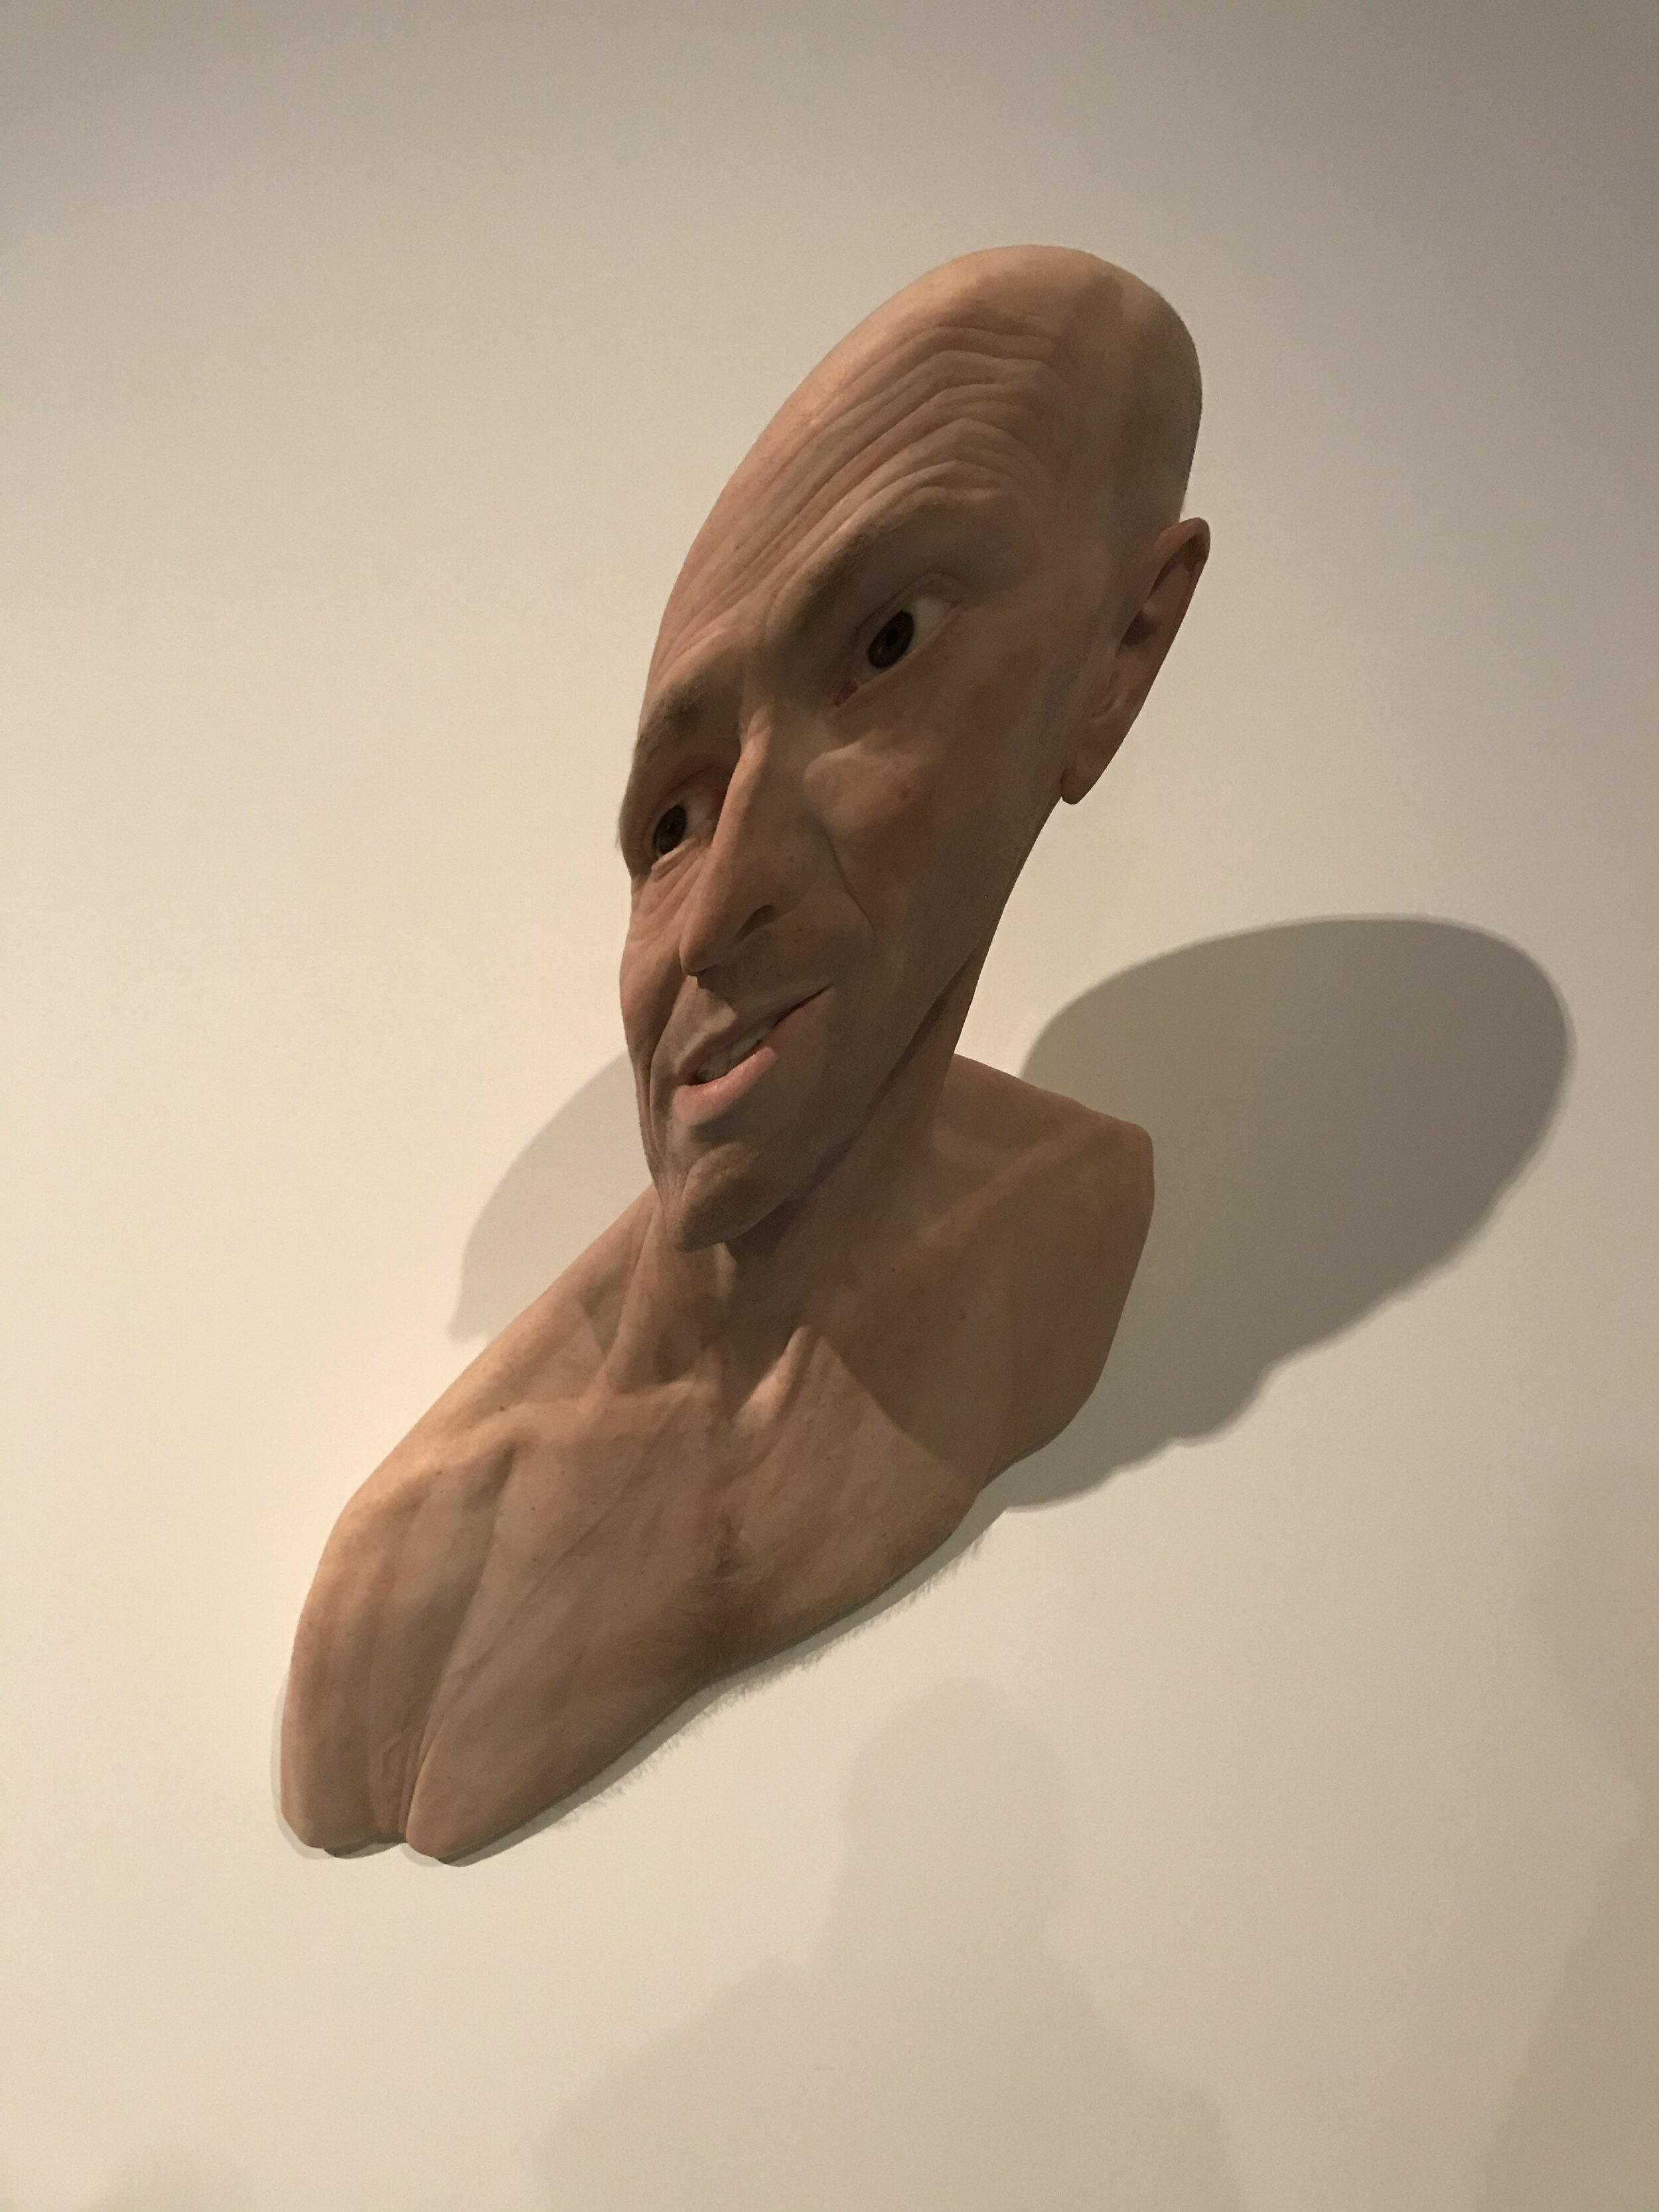
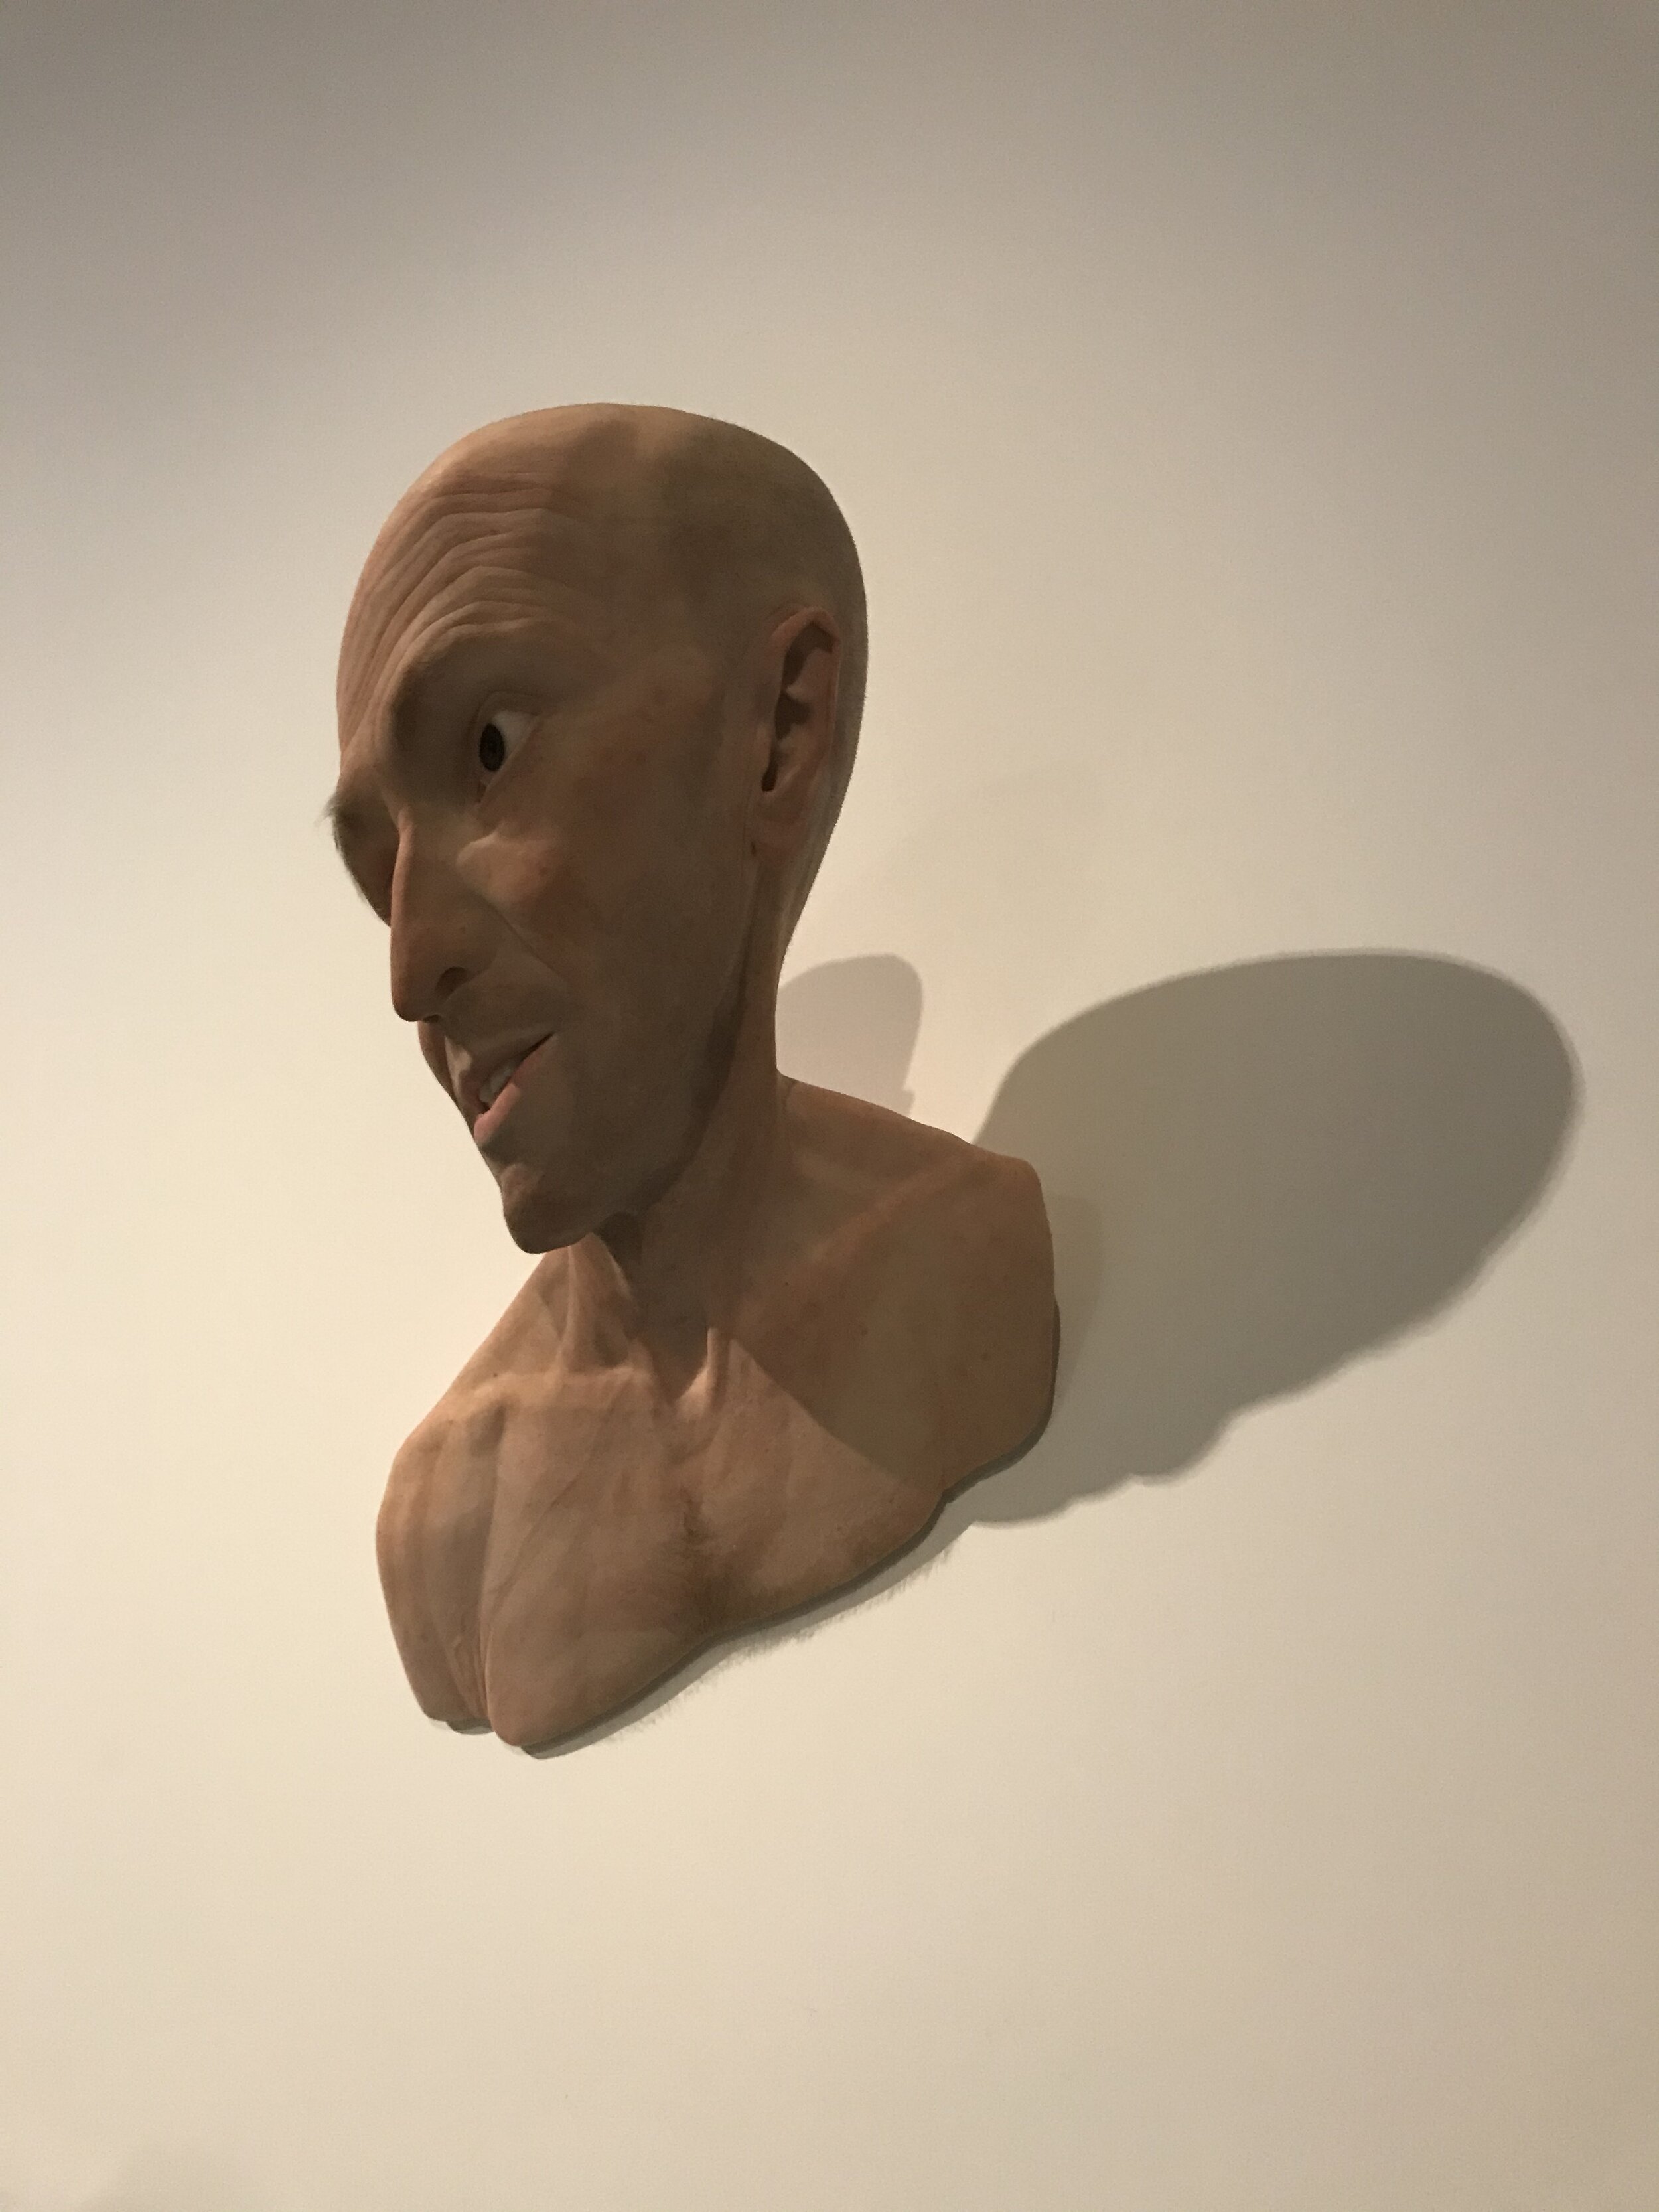
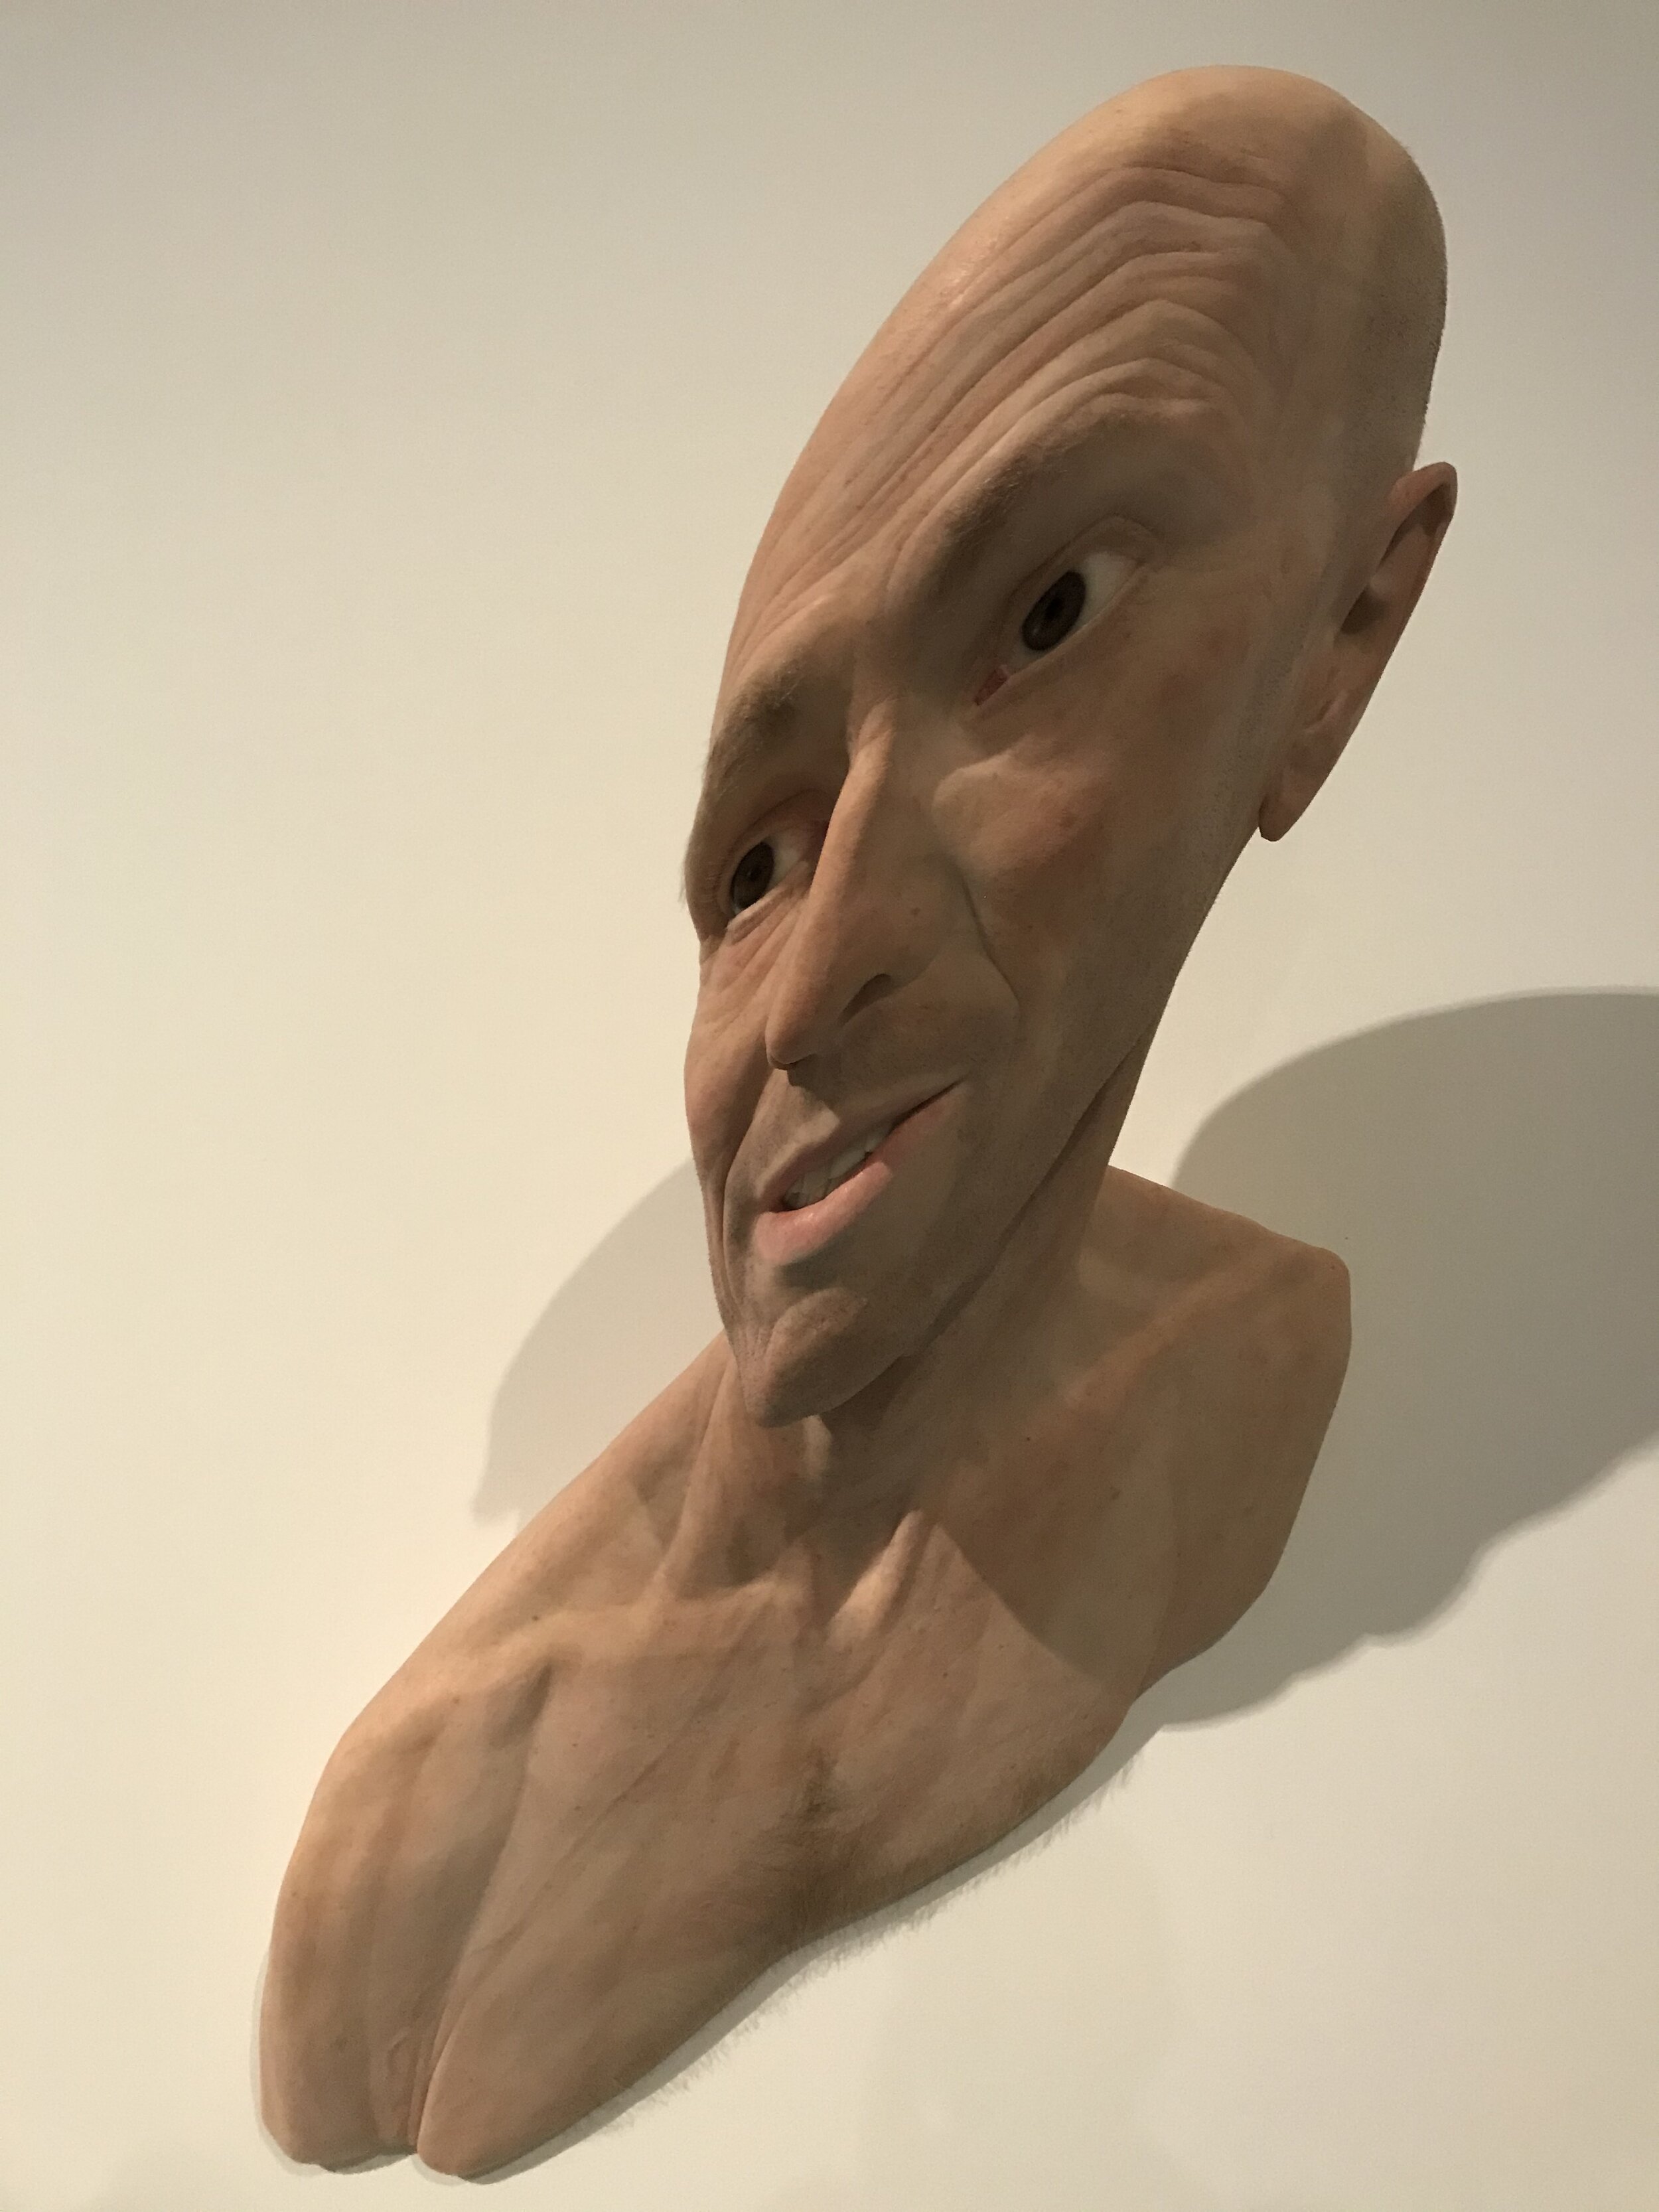
Evan Penny - “Self Stretch 2012”
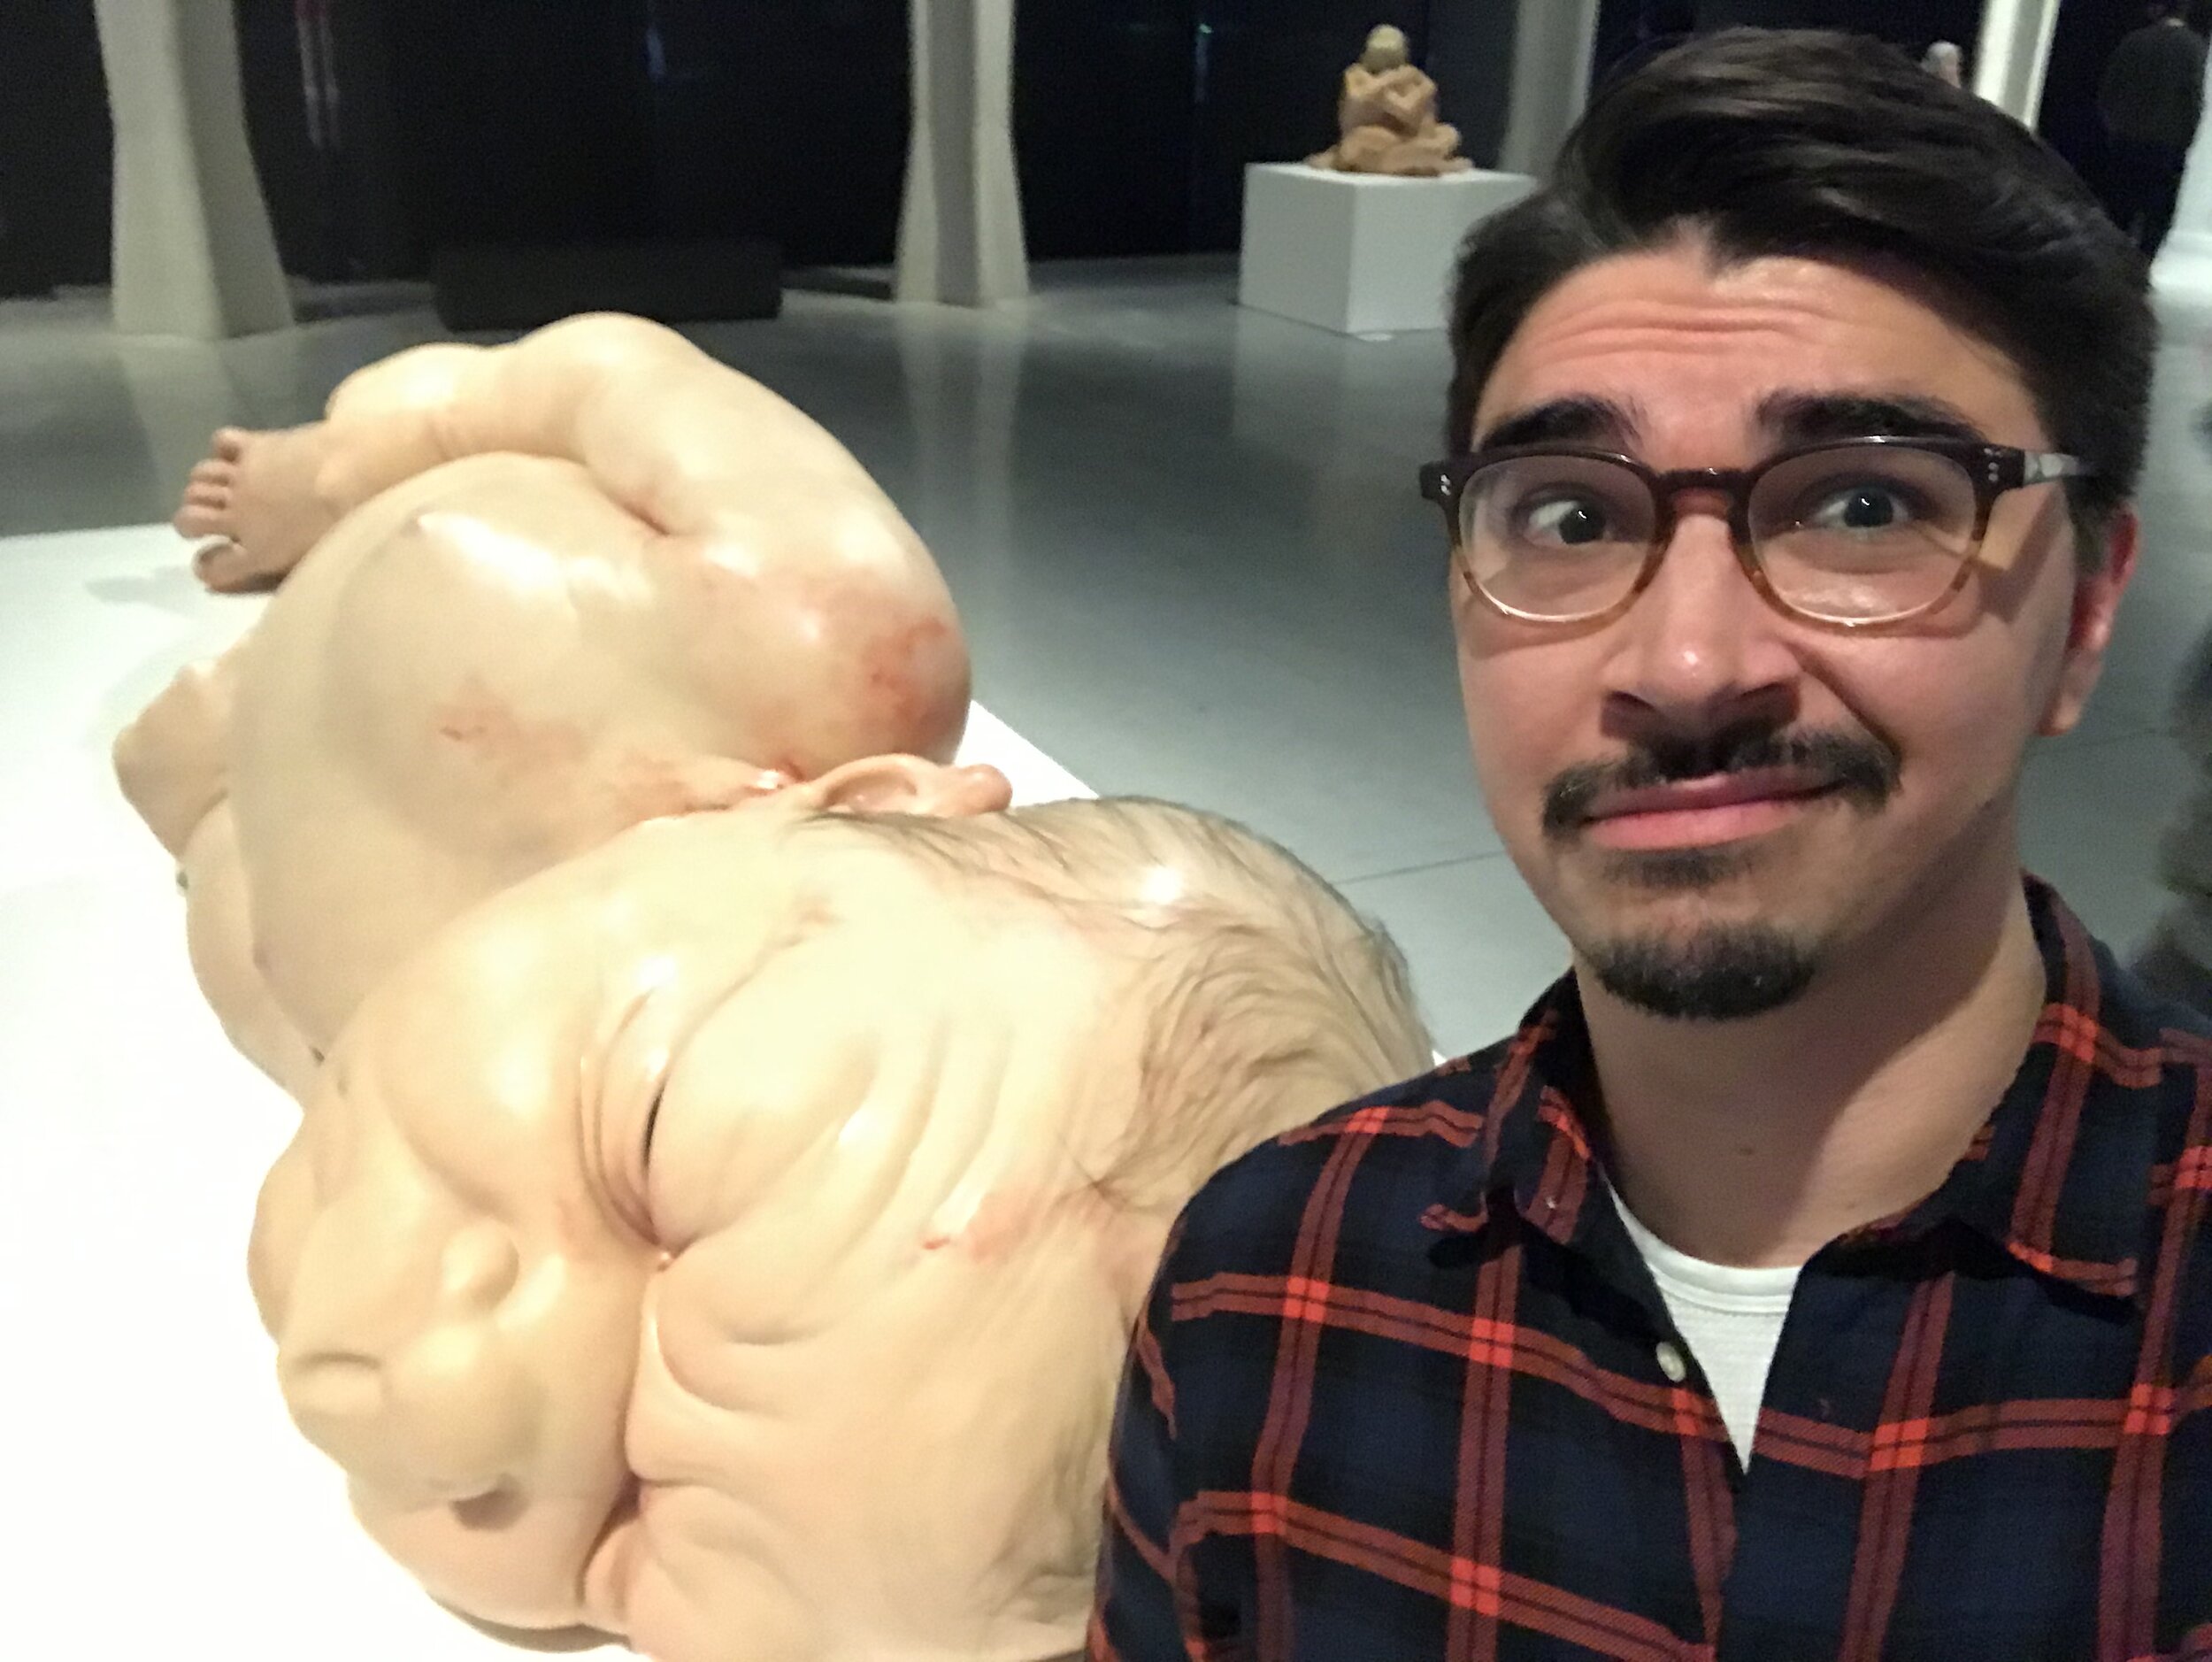
Another video playing in the gallery shows the incredible amount of work that was put into creating the internal structure and mold for Ron Mueck’s colossal sculpture of a newborn, “A Girl”. In the presentation given by Kazu Hiro at the 2019 International Anaplastology conference, he also explained how 3D printing and scanning aided in the upscaling process for his celebrity sculpture series (a brief write-up on I did on Kazu Hiro’s presentation and the 2019 IAA in Scottsdale, AZ can be found HERE) .
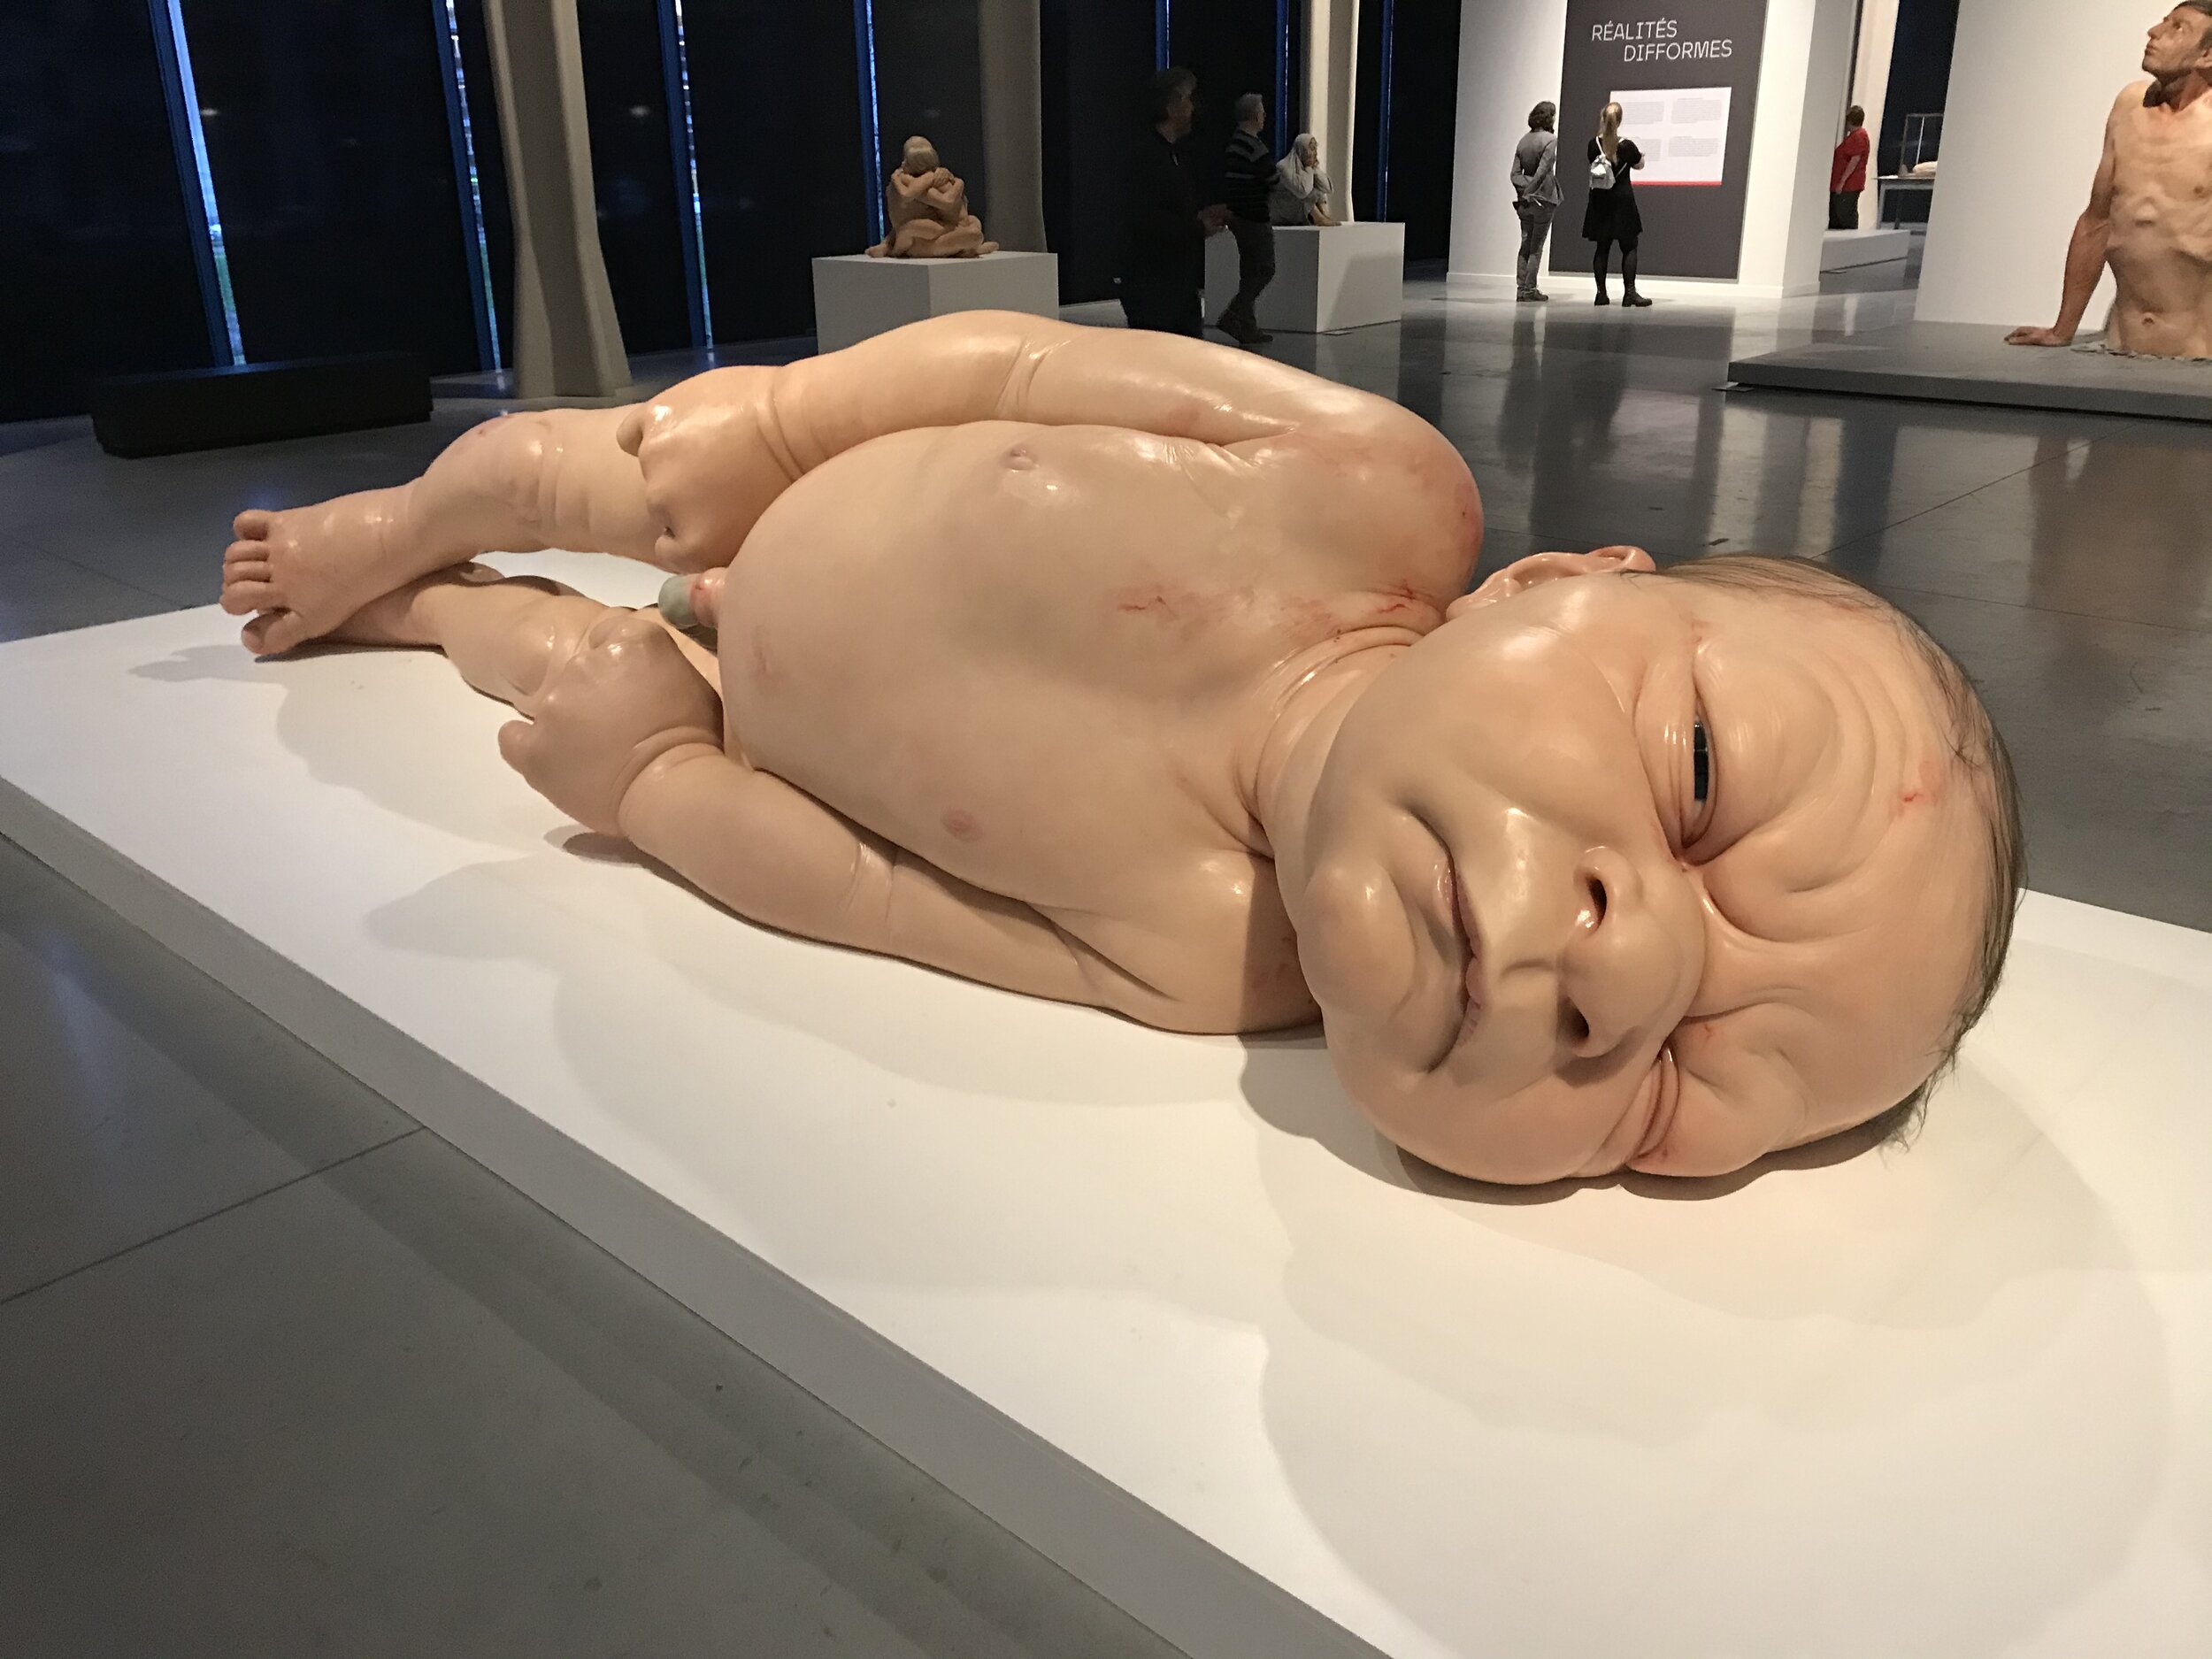
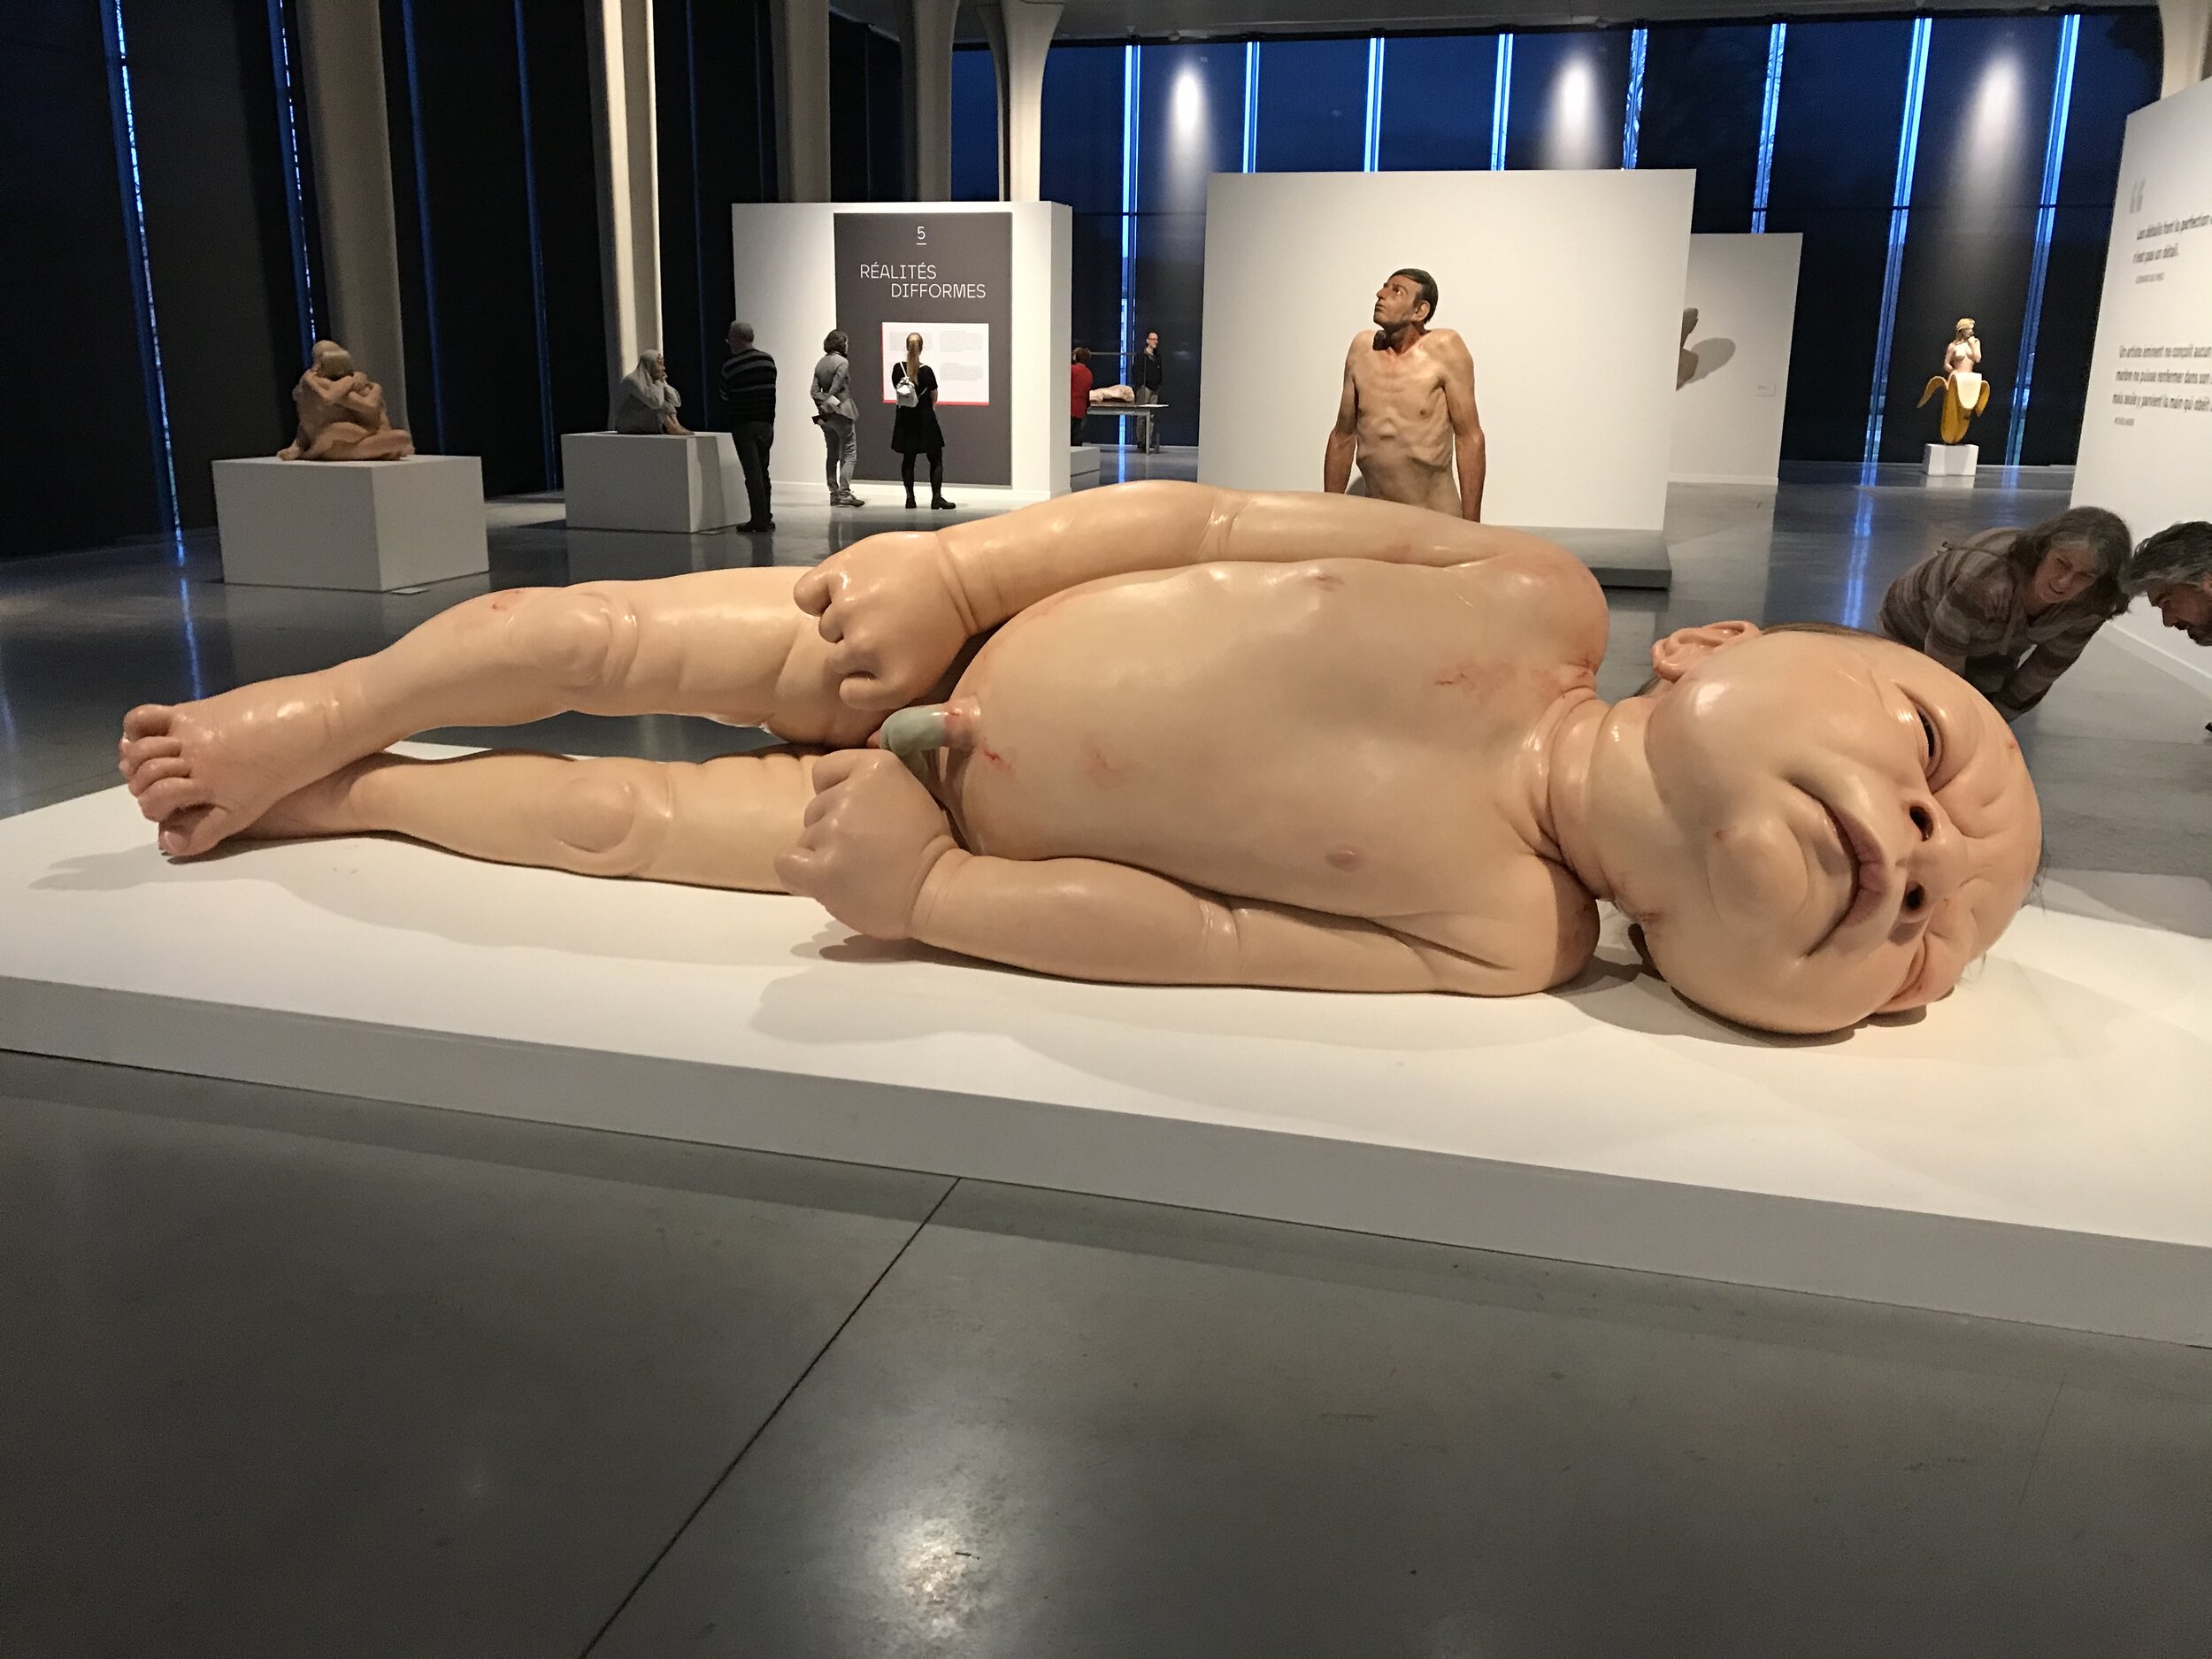
Ron Mueck - “A Girl”
These incredible artists have definitely pushed the boundaries far past what was previously thought possible, when it comes to realistically recreating the appearance of a lifelike human body. Being able to see the techniques used in these pioneering works of silicone sculpture shows just how much detail can be achieved through the proper combination of materials. If anyone has the chance to see this exhibition in the flesh (nyuk nyuk nyuk), I highly recommend it!
-Ali
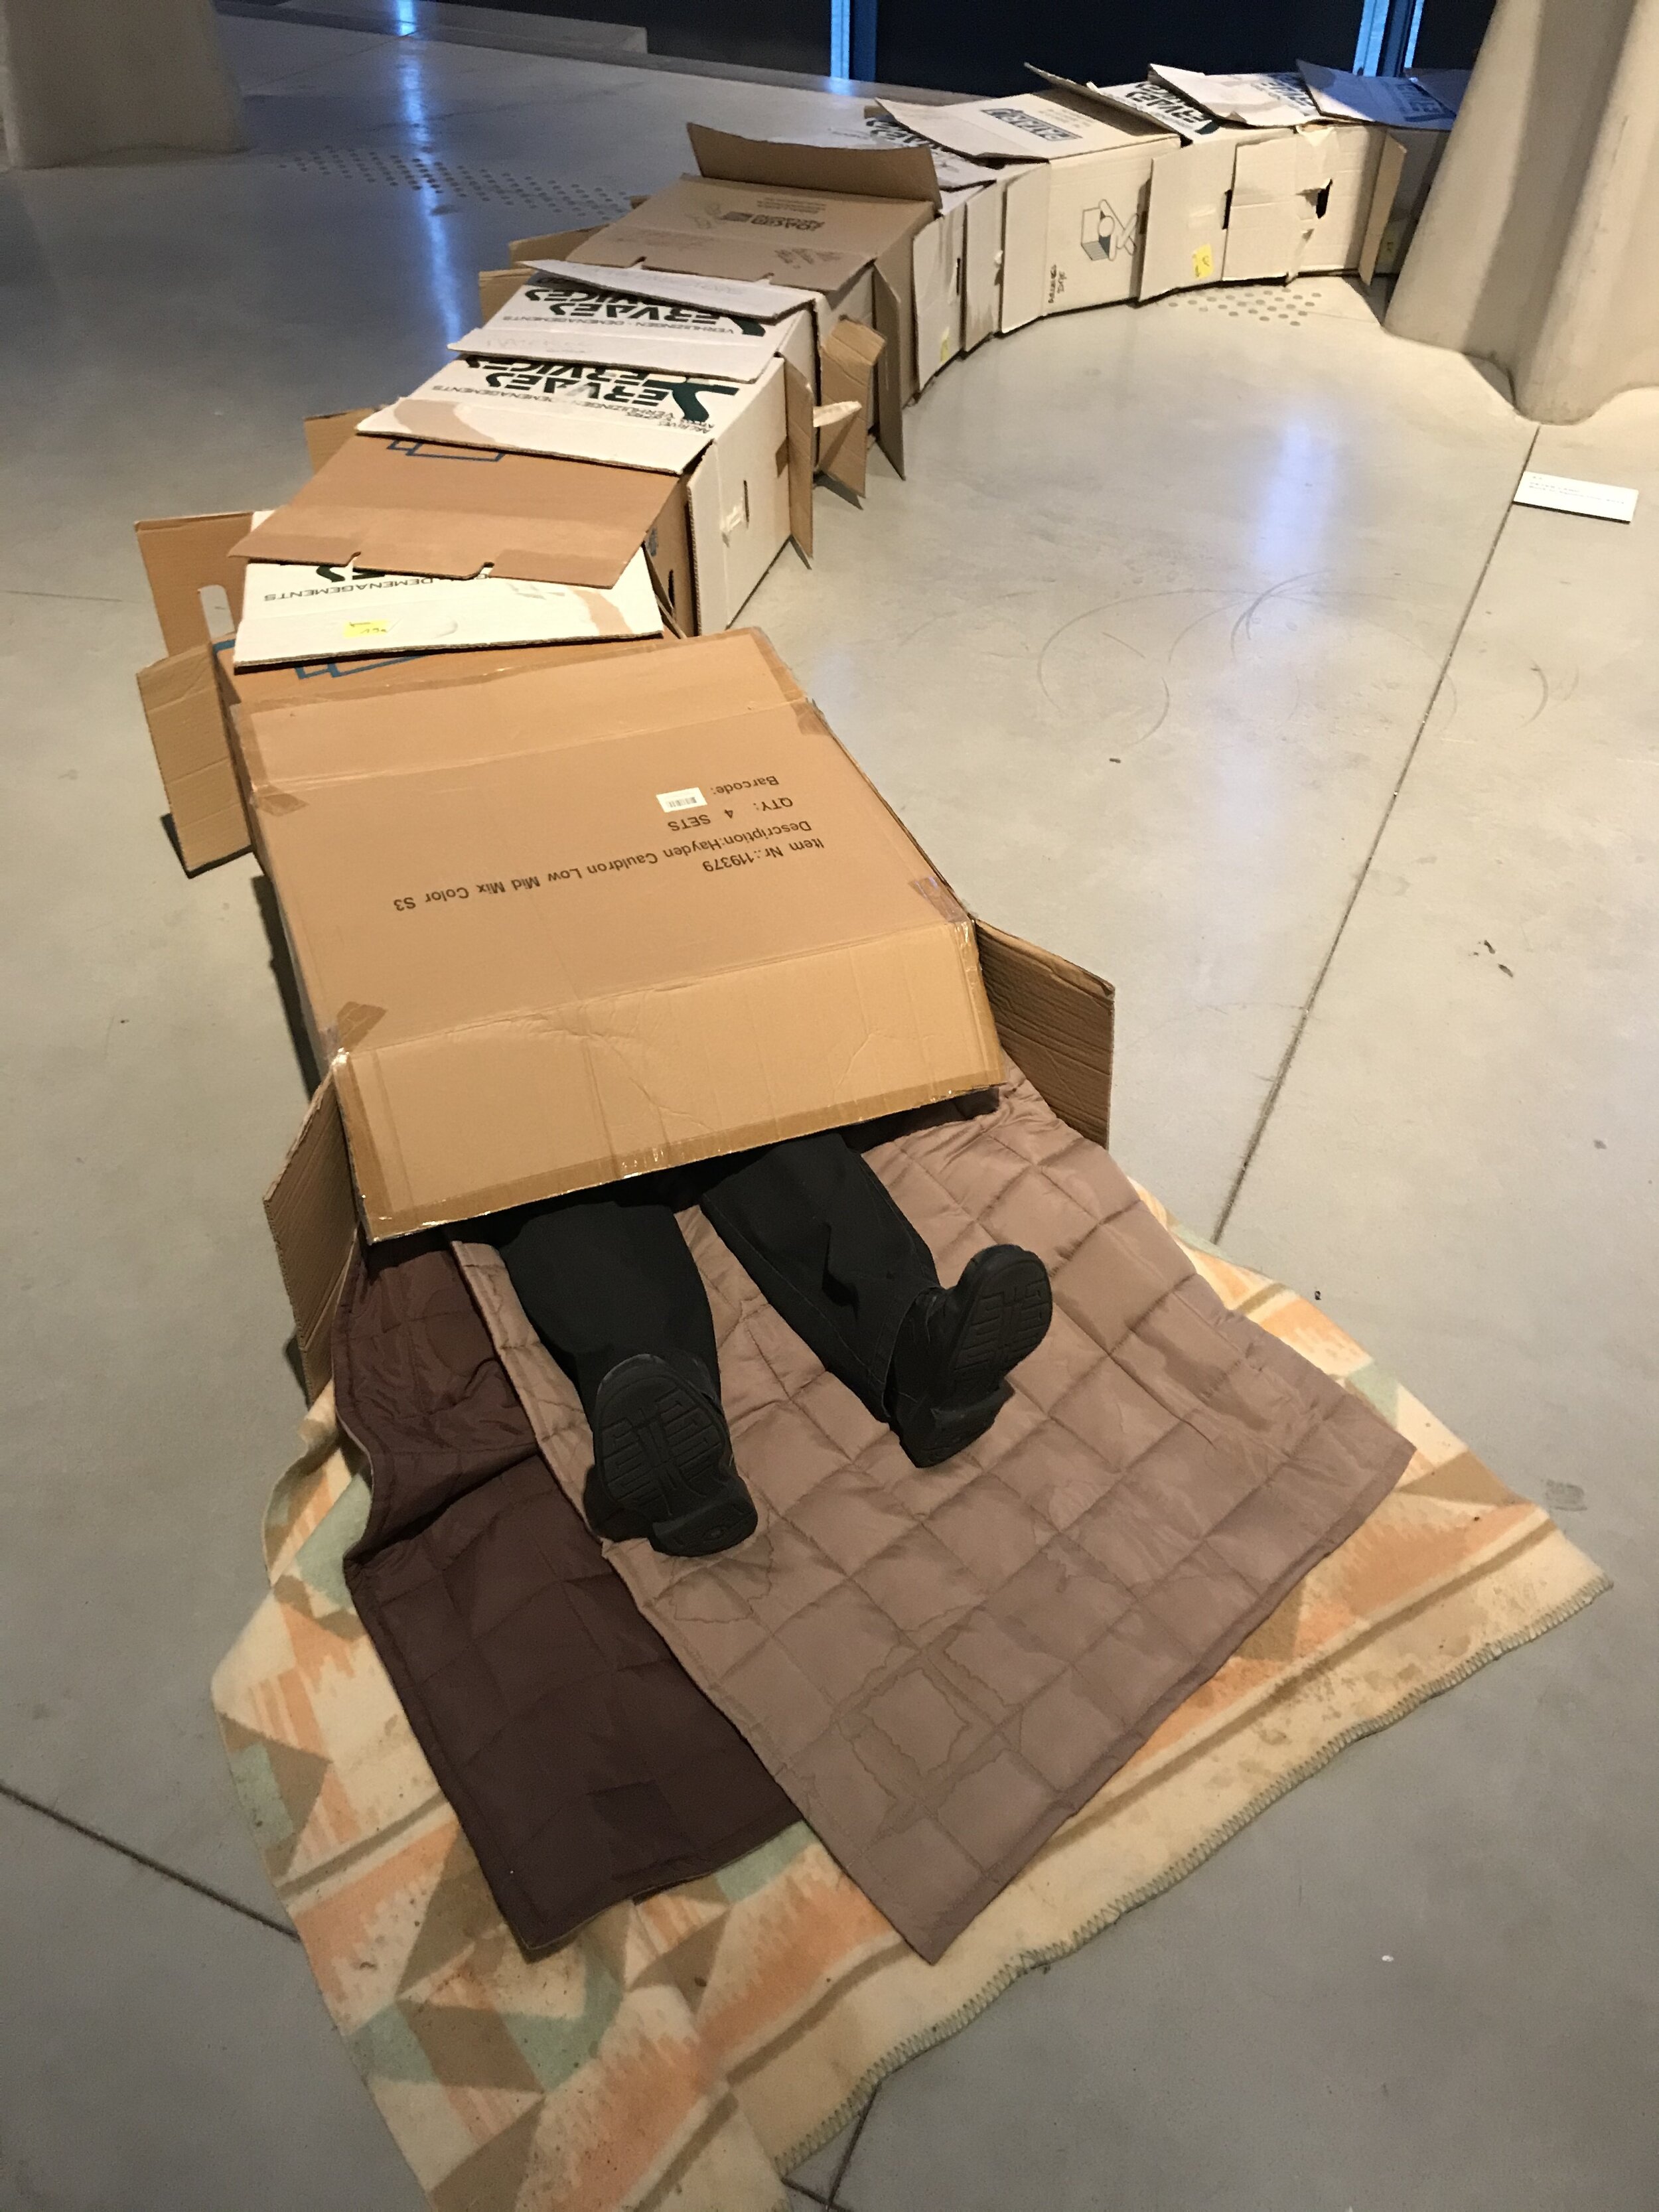
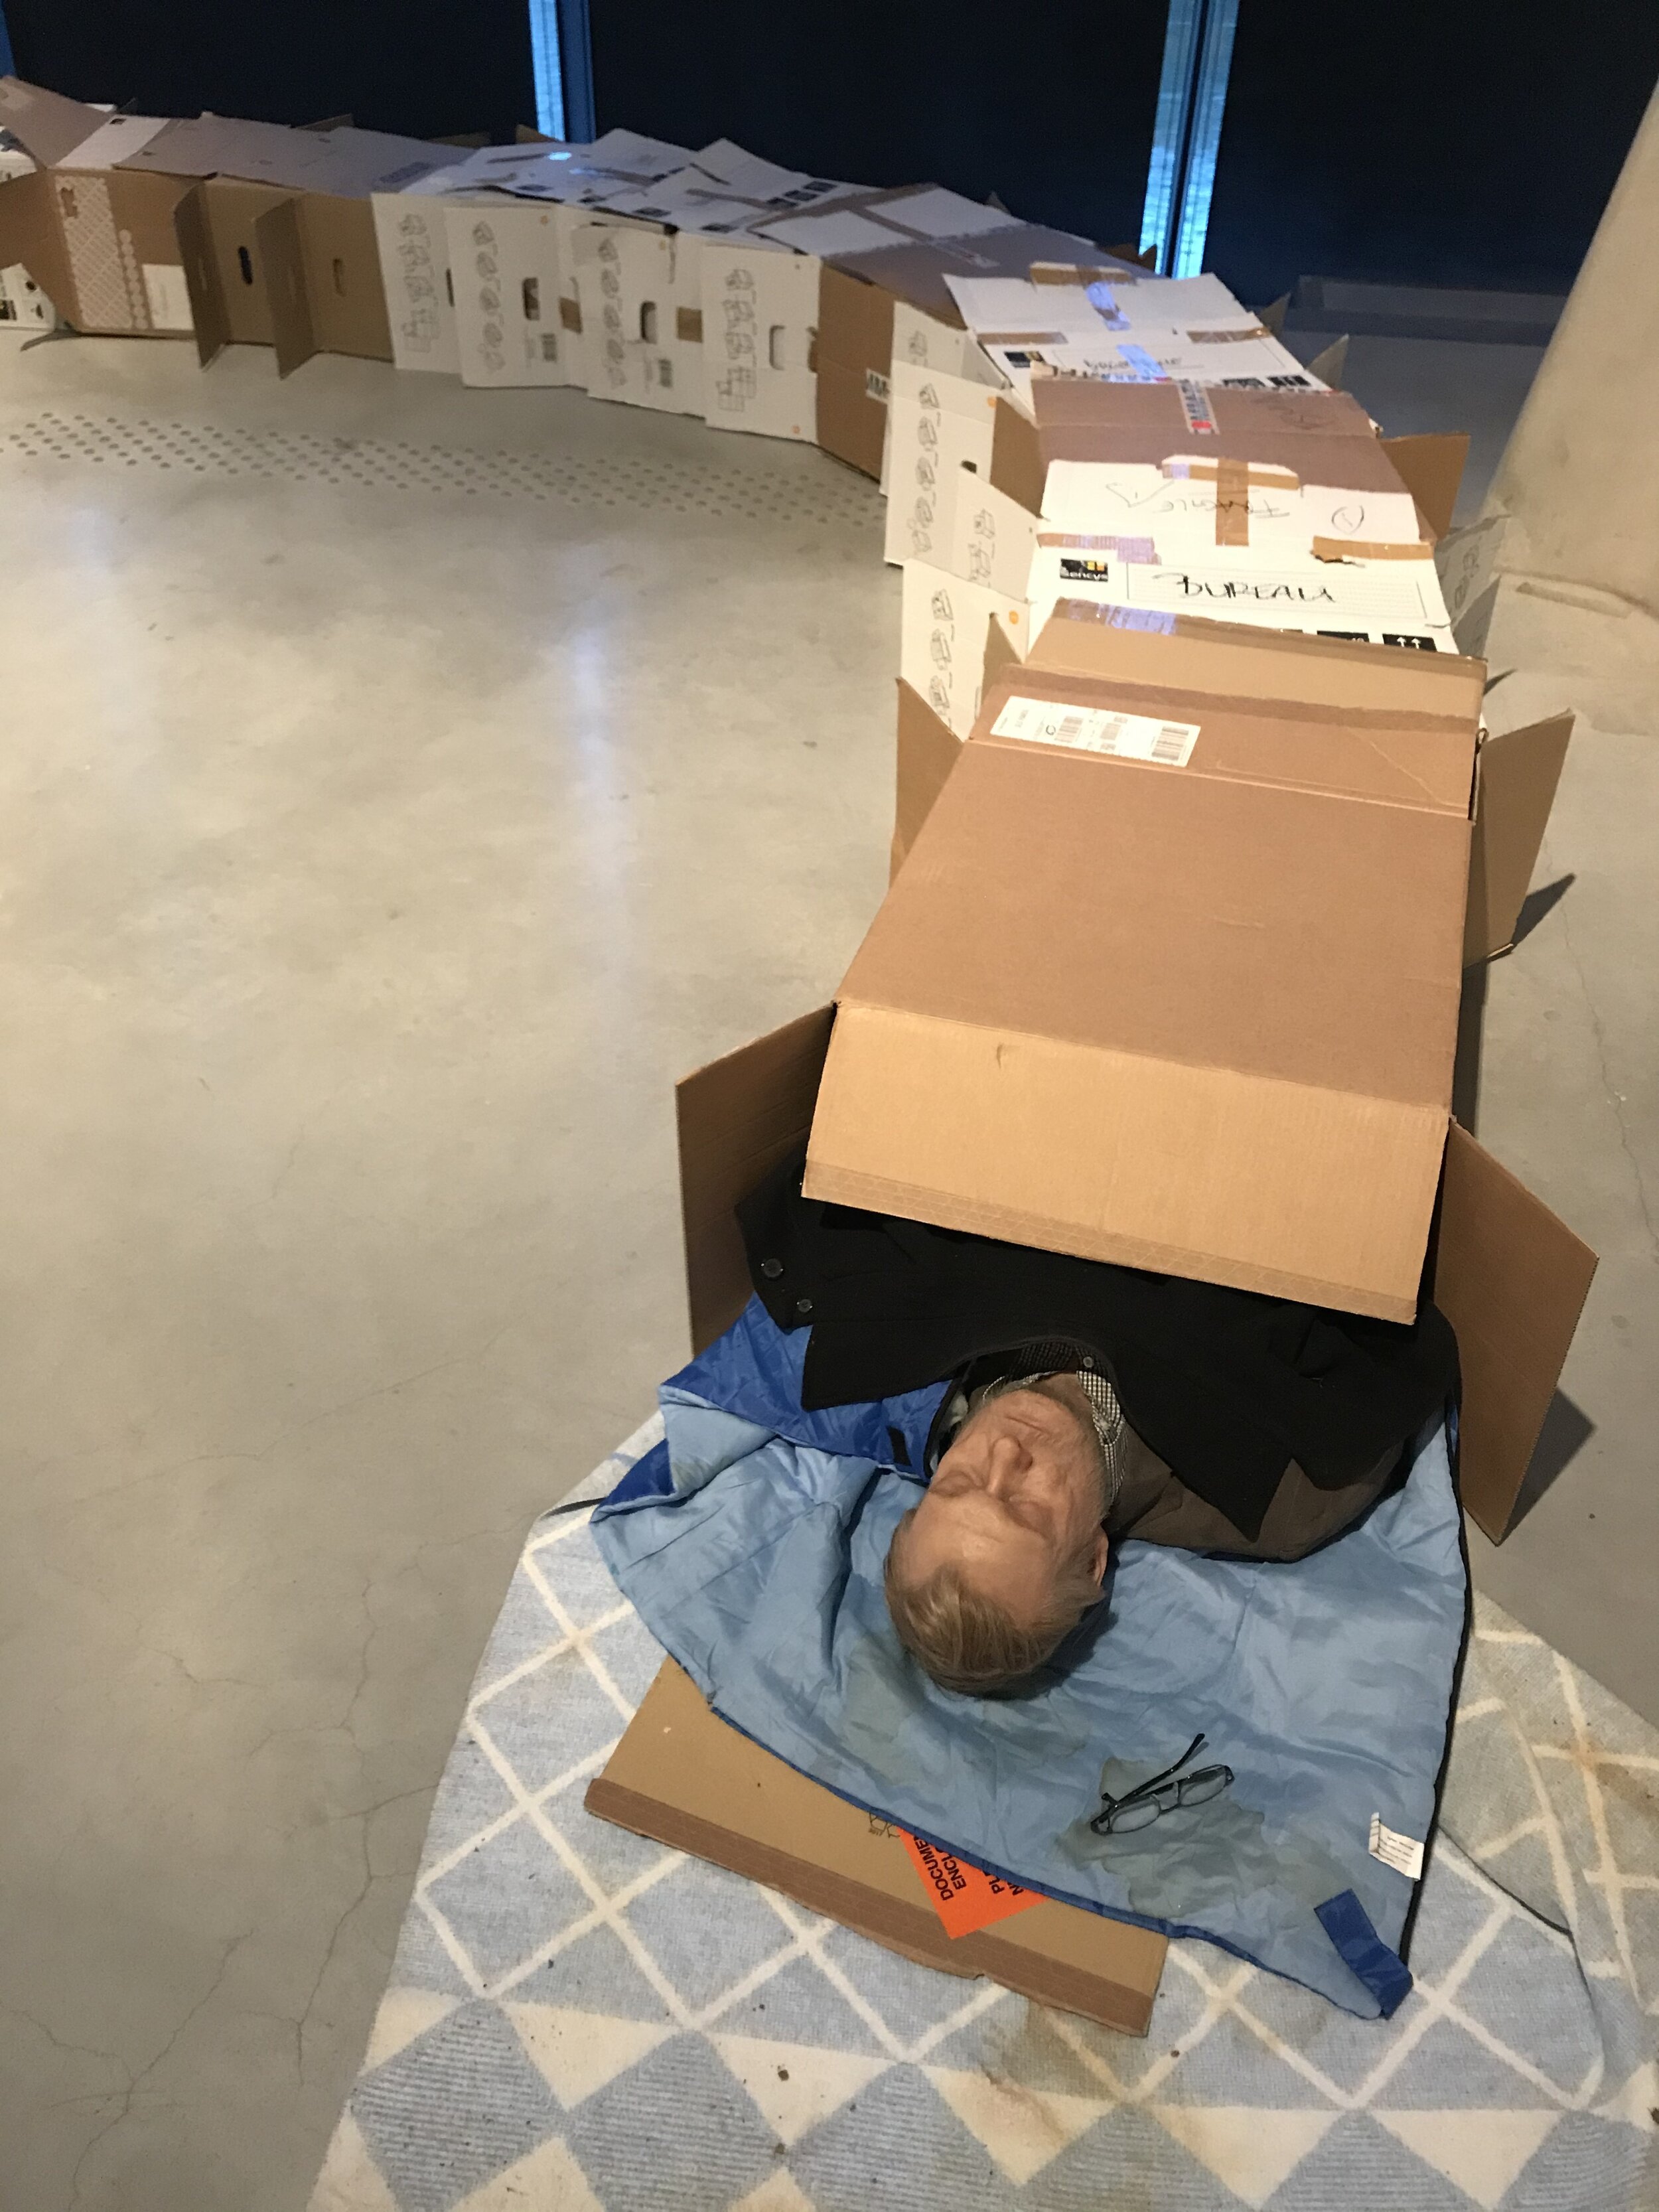
P.S. There were too many extraordinary pieces to include throughout this post, so here are some bonus photos for your enjoyment!